Creating the Clay Model of a Gray Wolf
This project will focus on a Gray Wolf. As with every project, I sculpt a clay model before I start carving the wood. I typically use Plasticine clay. Clay is much more forgiving than and it provides an opportunity to make adjustments. The most important part of building a clay model is that it help me to study the specimen. I don’t think anyone can learn about a bird or animal without sculpting it first.
Step one
Study photographs or the actual specimen and then draw a pattern that shows two different directions. In this case, I sketched a front and a side view. It’s critical to make sure that the two sketches are the same size. I draw the patterns side by side so that I’m certain that I have everything the right size.
Step two
Build an armature to hold the clay. I built this Gray wolf armature out of wood that was screwed togeather and then shaped with a rasp. When building an armature, leave yourself room to make the clay thick enough for details that will be added later. Clay doesn’t adhere well to wood, so it is advisable to either use wire or large staples to give the clay something to grab.
Step three
Apply the clay to the armature in quarter inch thick sheets. These thin sheets will simply be the base for all the additional clay you will add when putting in the details. I find that its easier to build up the clay by using small pieces at a time. Details for the eyes, nose, mouth and fur have not been added yet. Add clay in steps so that you can take a break and then come back and have a fresh perspective. You should always be your own worst critic.
Picture during the building up process
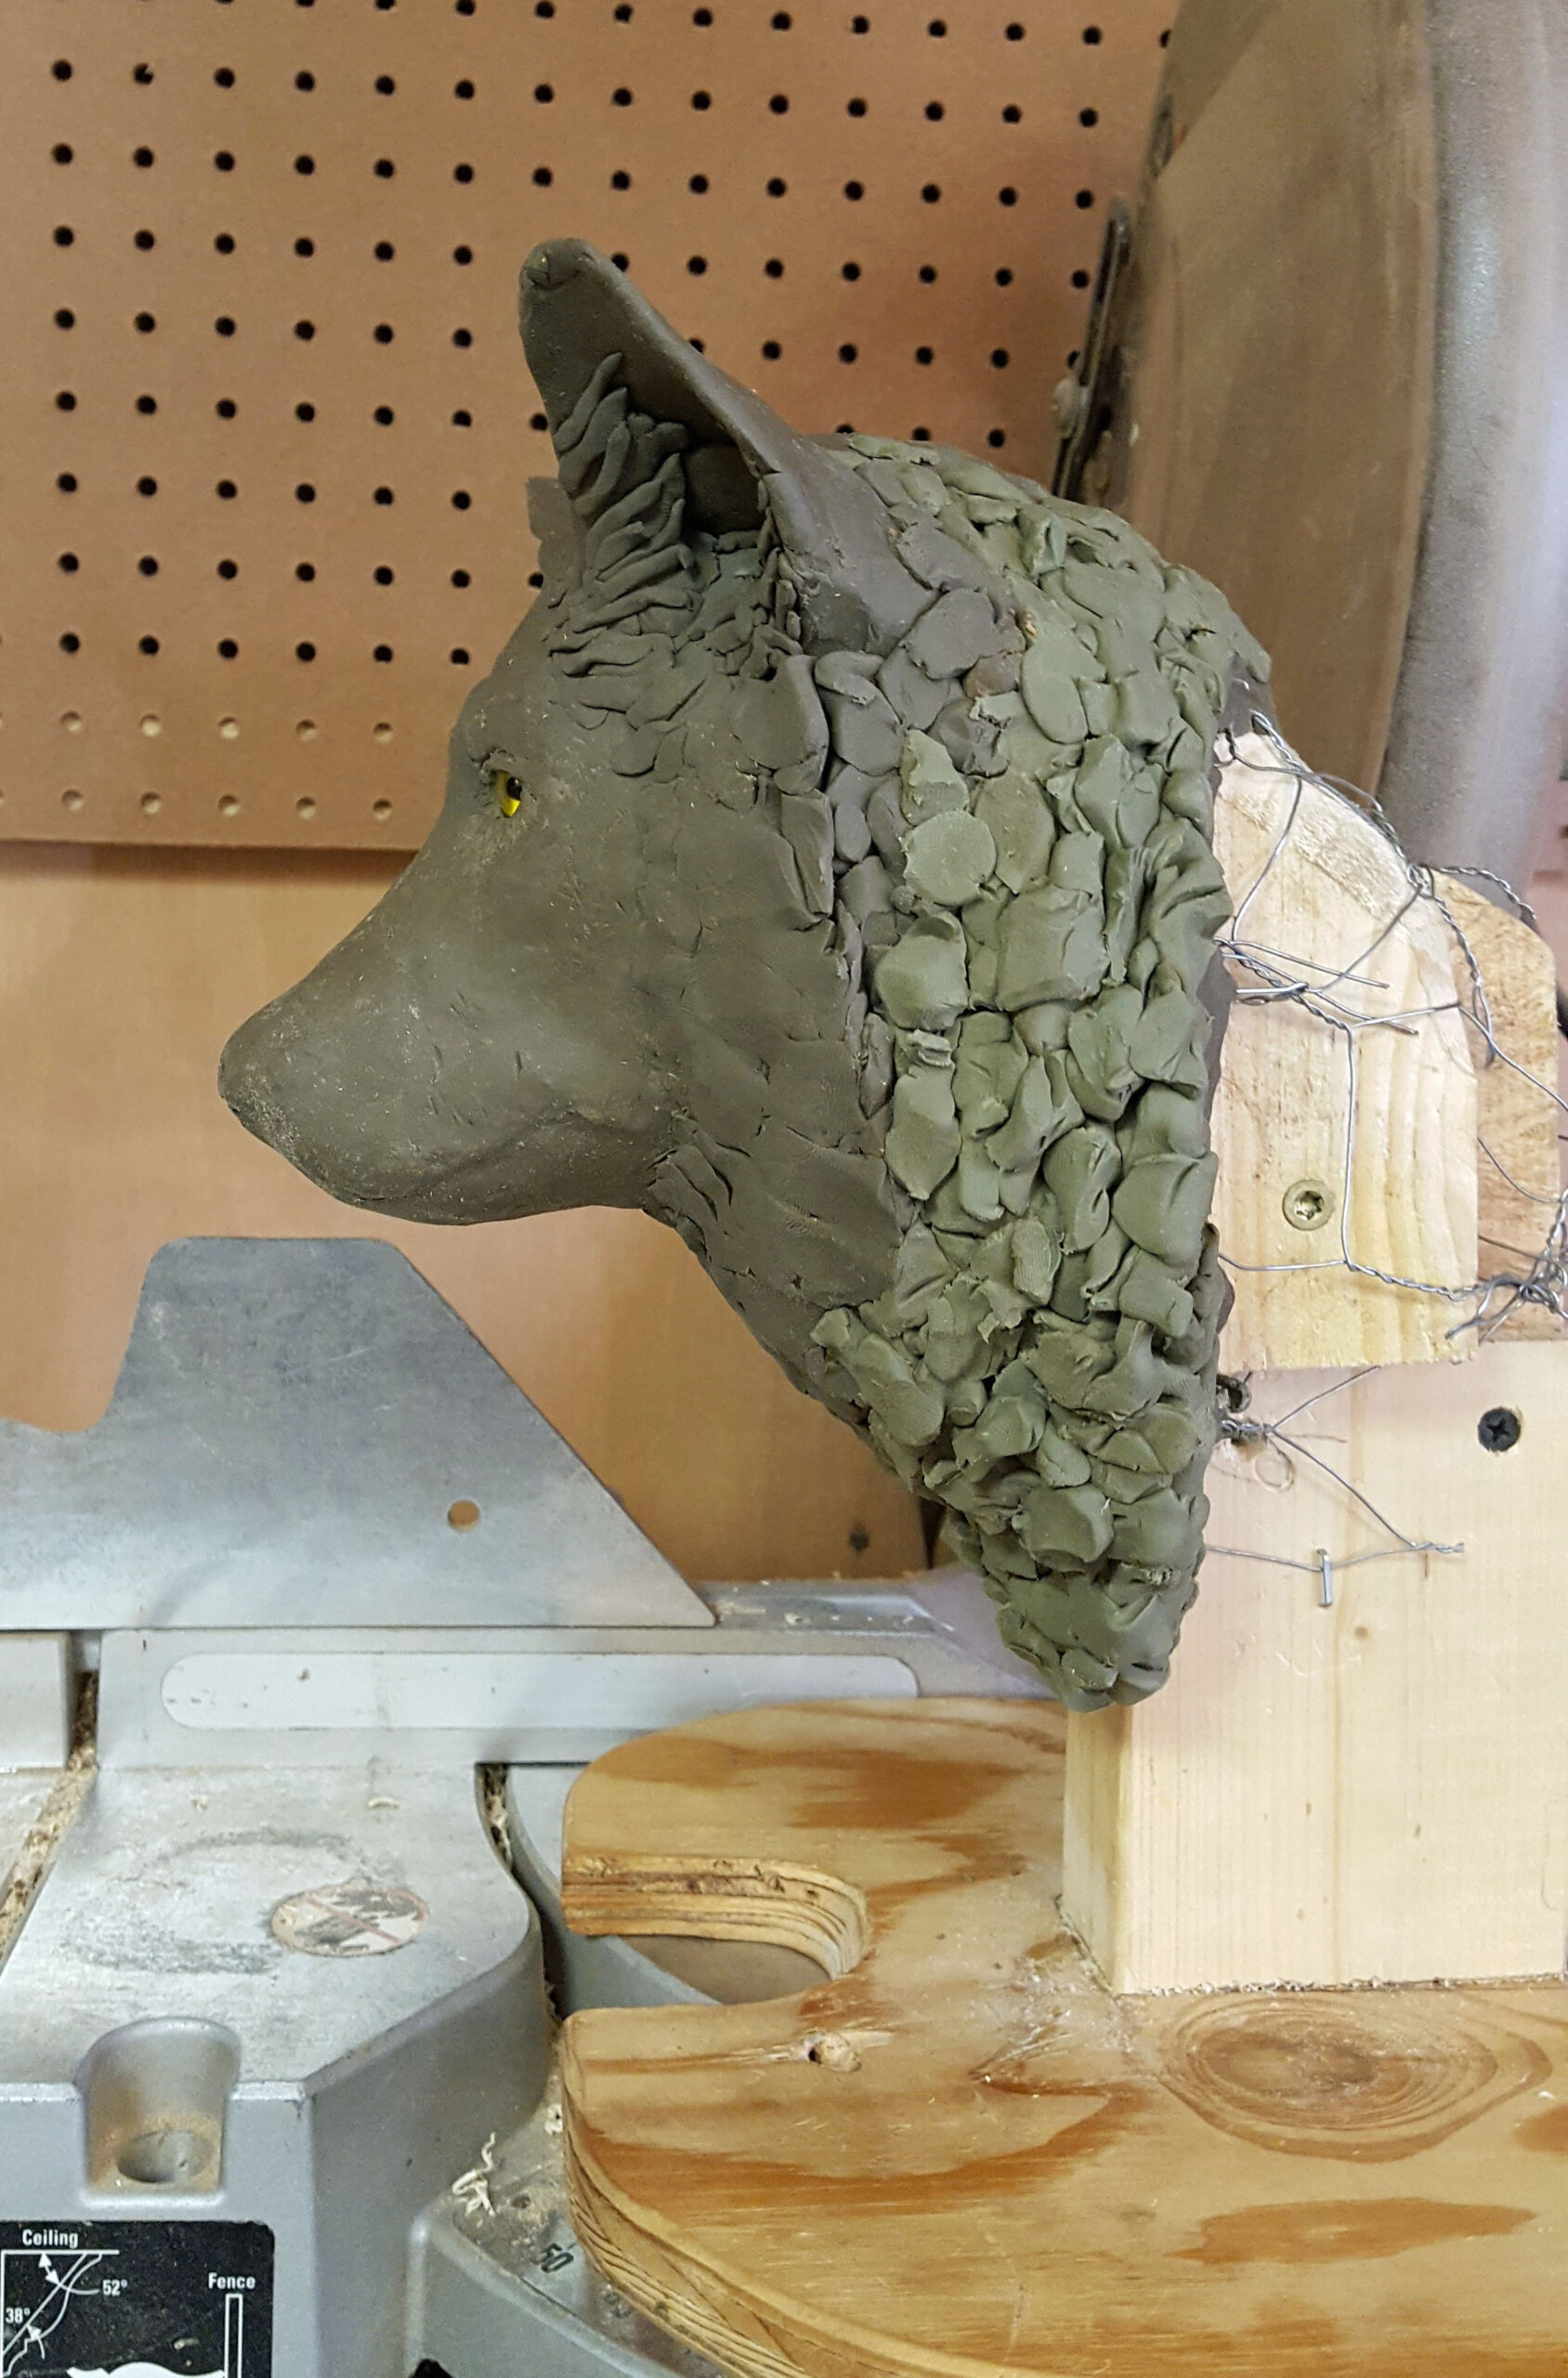
Adding clay to build the general shape of the sculpture.

Right quartering view of the sculpture.

Front view of the rough clay sculpture during the initial clay application.
Left facing view if the rough clay model.
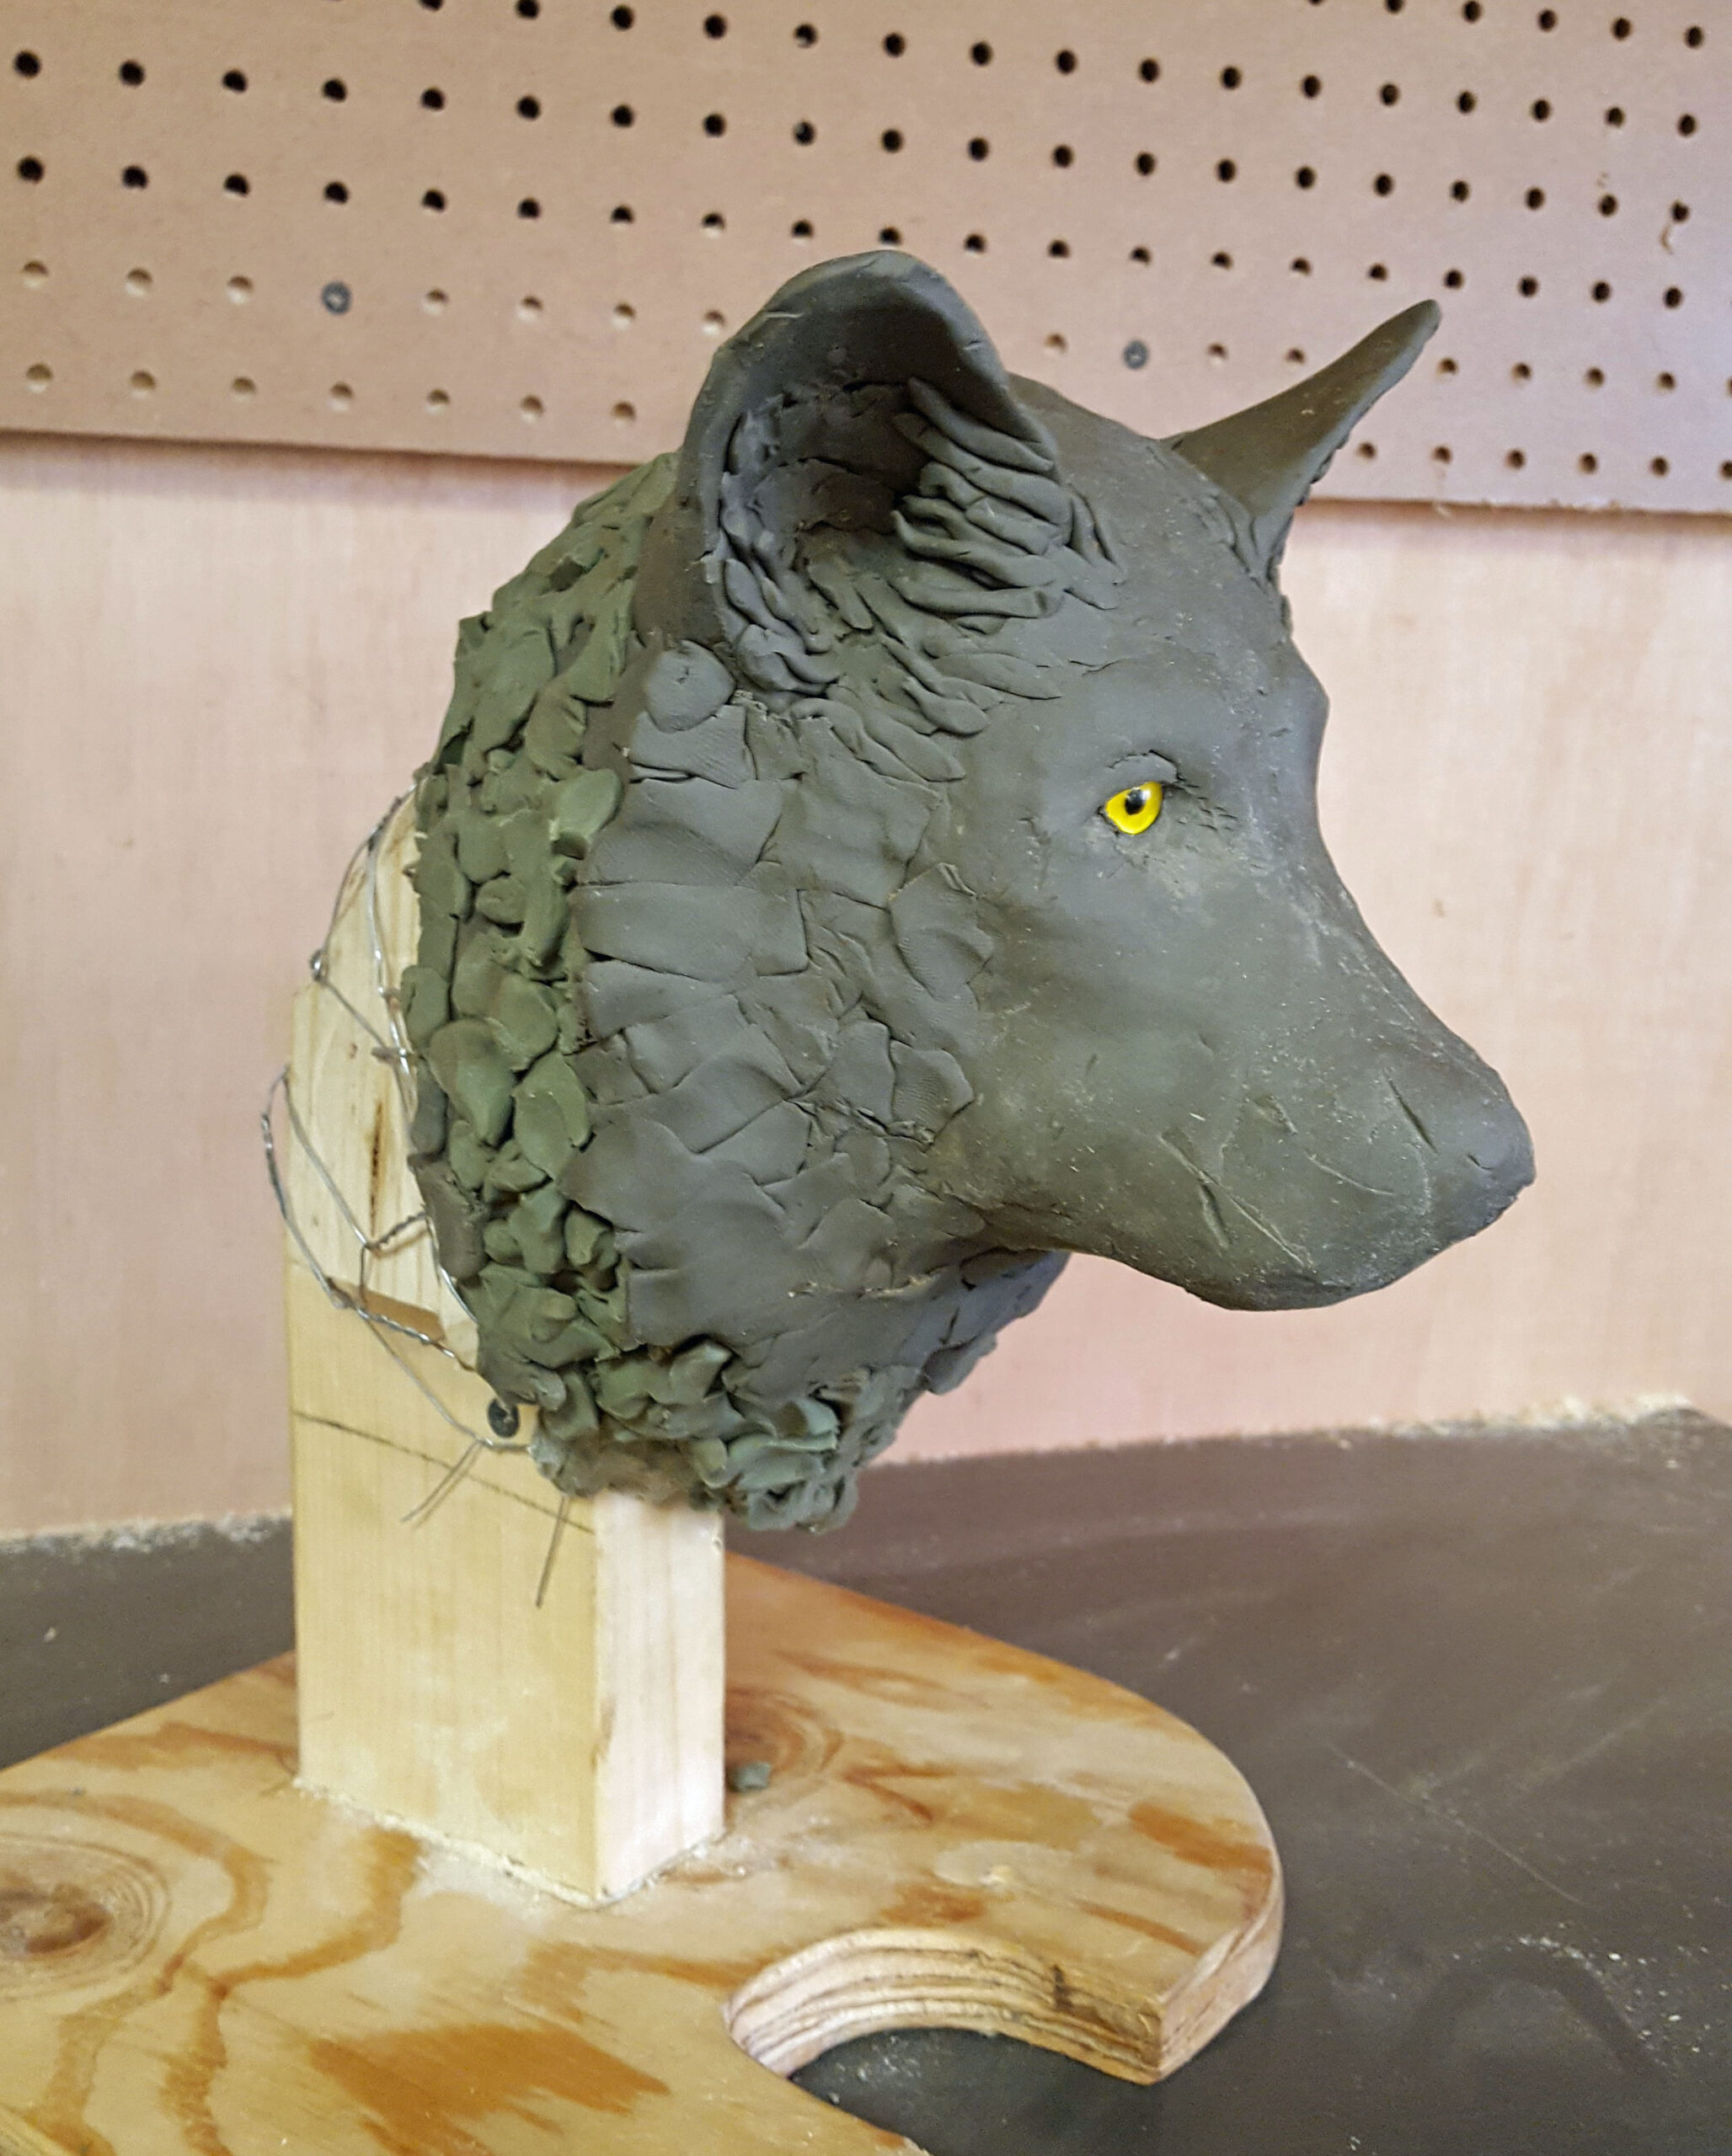
The second day of Clay work
When sculpting either clay, wax or wood, I like to say that shadows are your friend. For instance, if you hold this wolf head up in front of you, with the nose pointing toward you, you could angle the sculpture in a way that caused shadows on the face. The shadows help you keep things symmetrical. If one side is different from the other the shadows will make it easy to see.
The second day of work focused on refining the face, ears, and fur.
Finally working on the wood
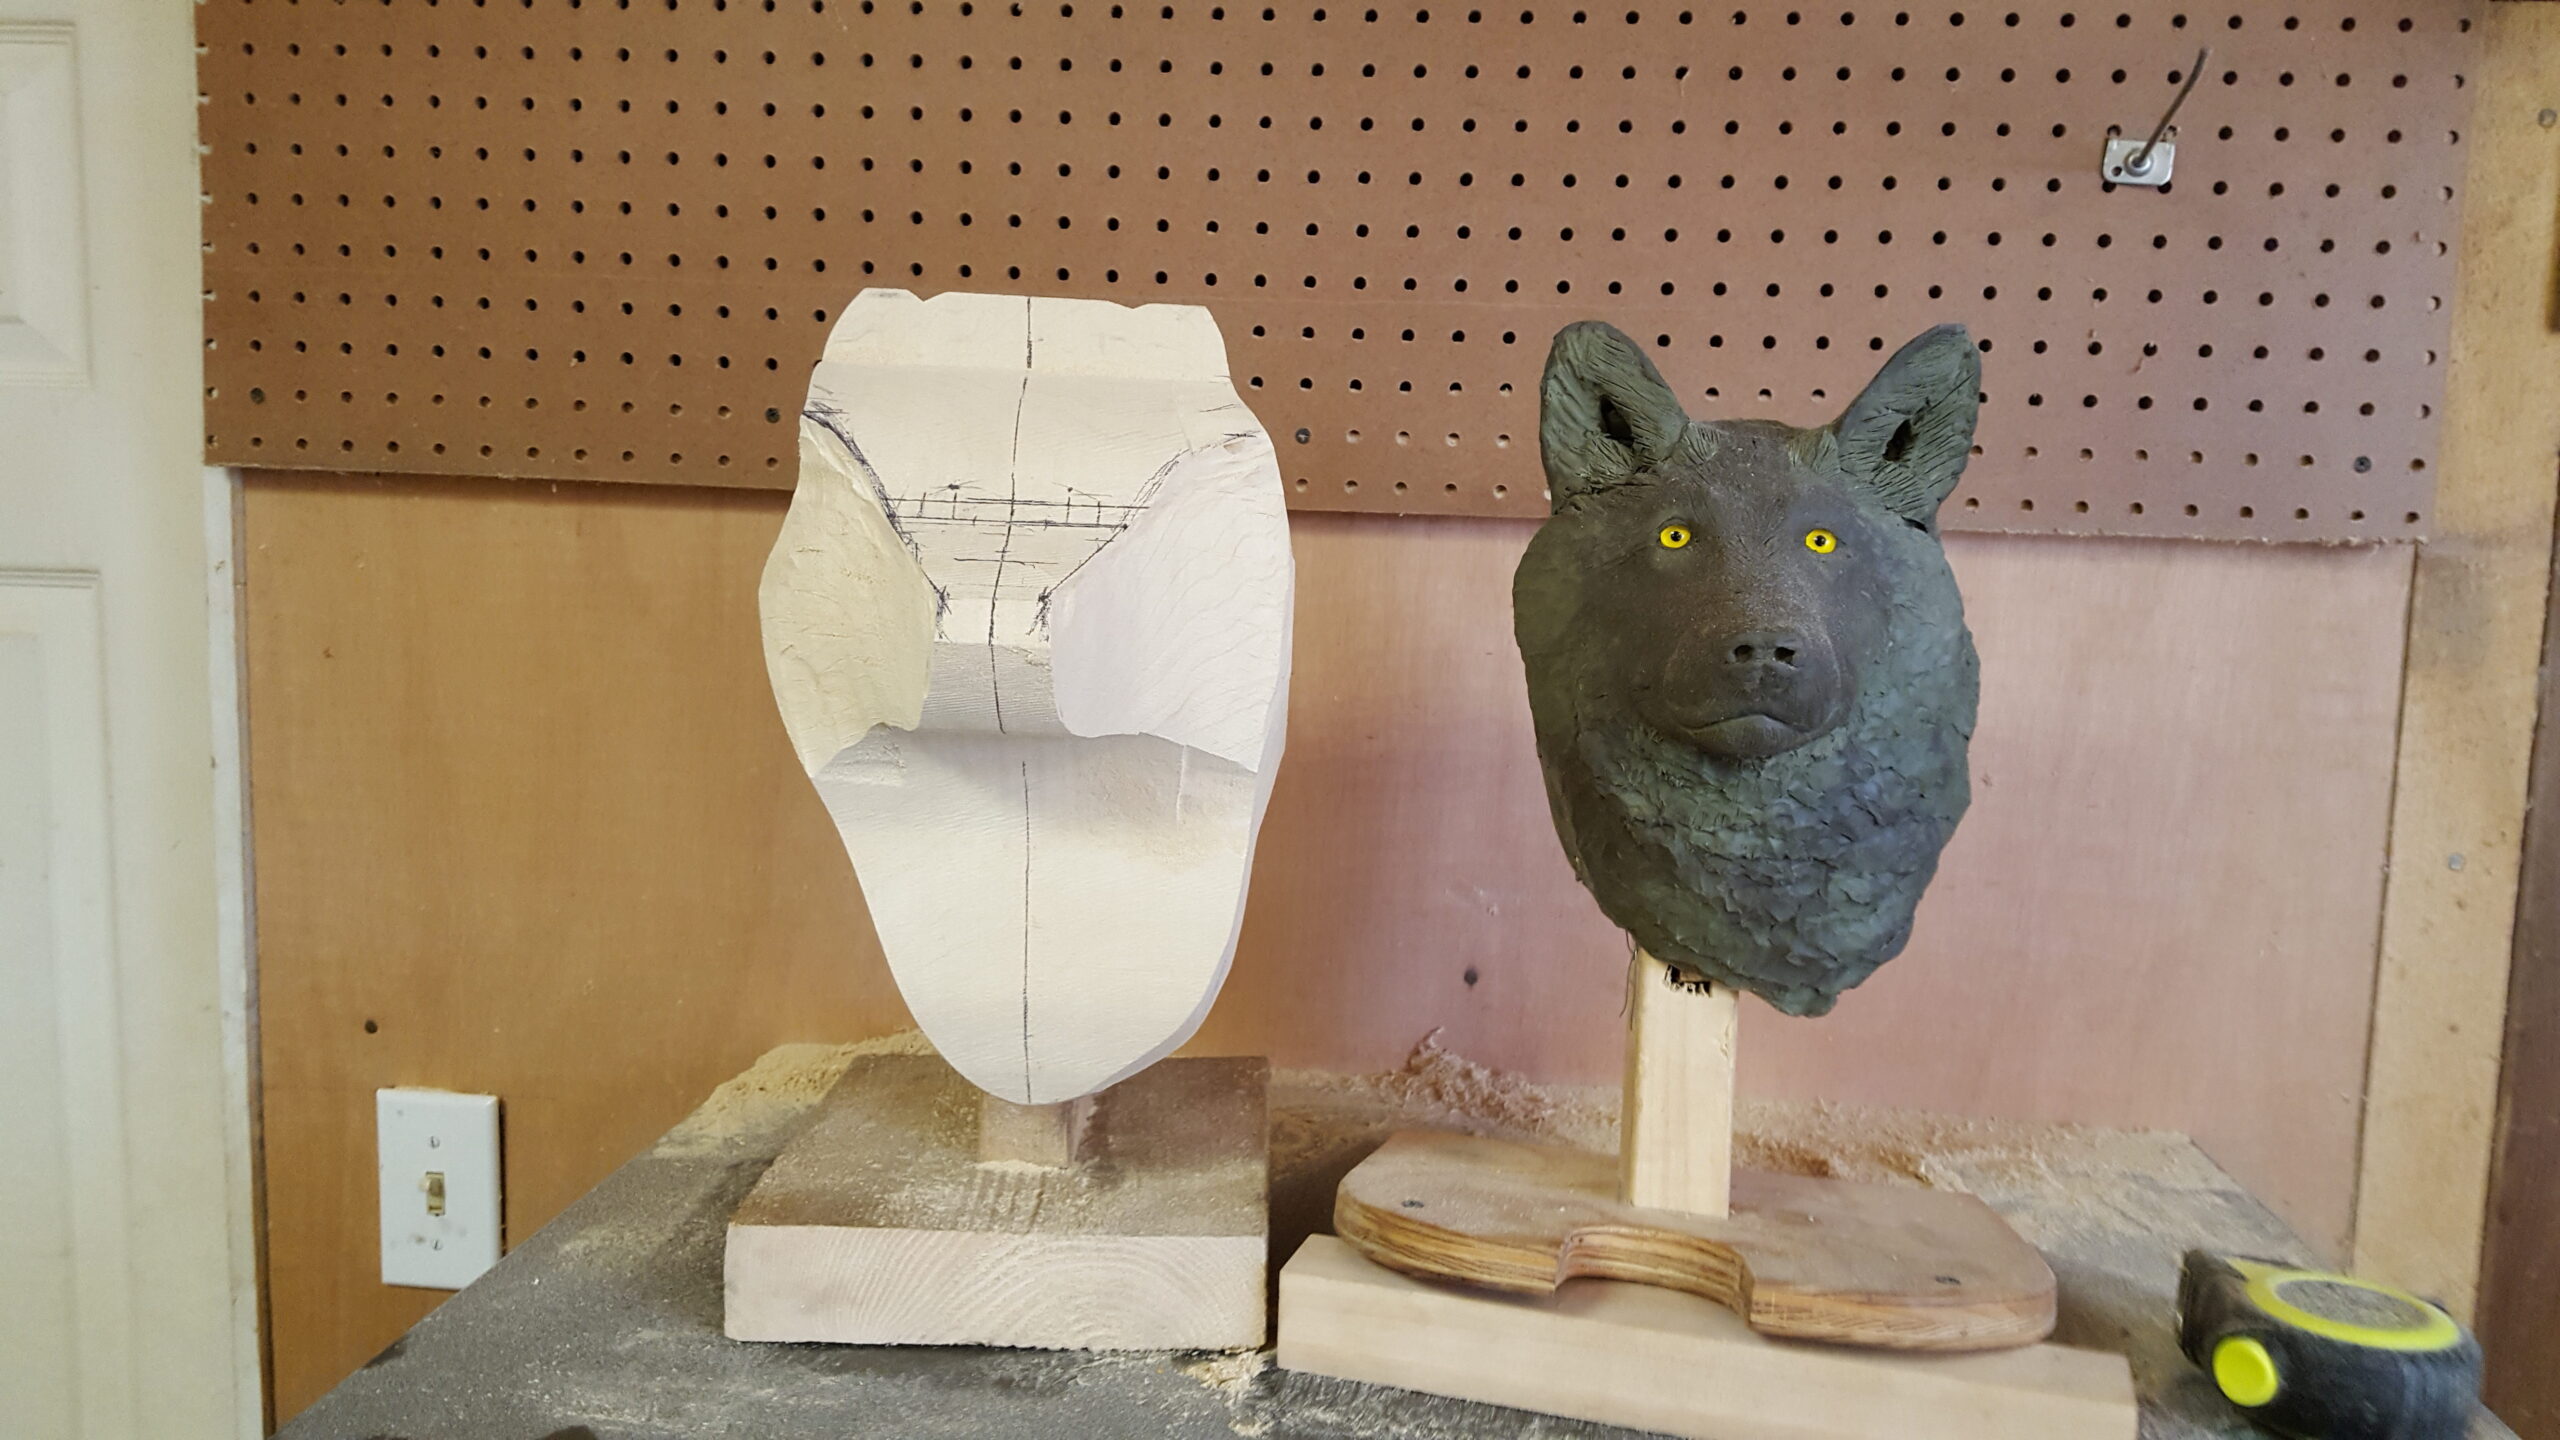
The front and side patterns were used to cut the block of wood.

After many reference marks and studying the clay model, the sculpture is starting to show the basic features of a wolf.
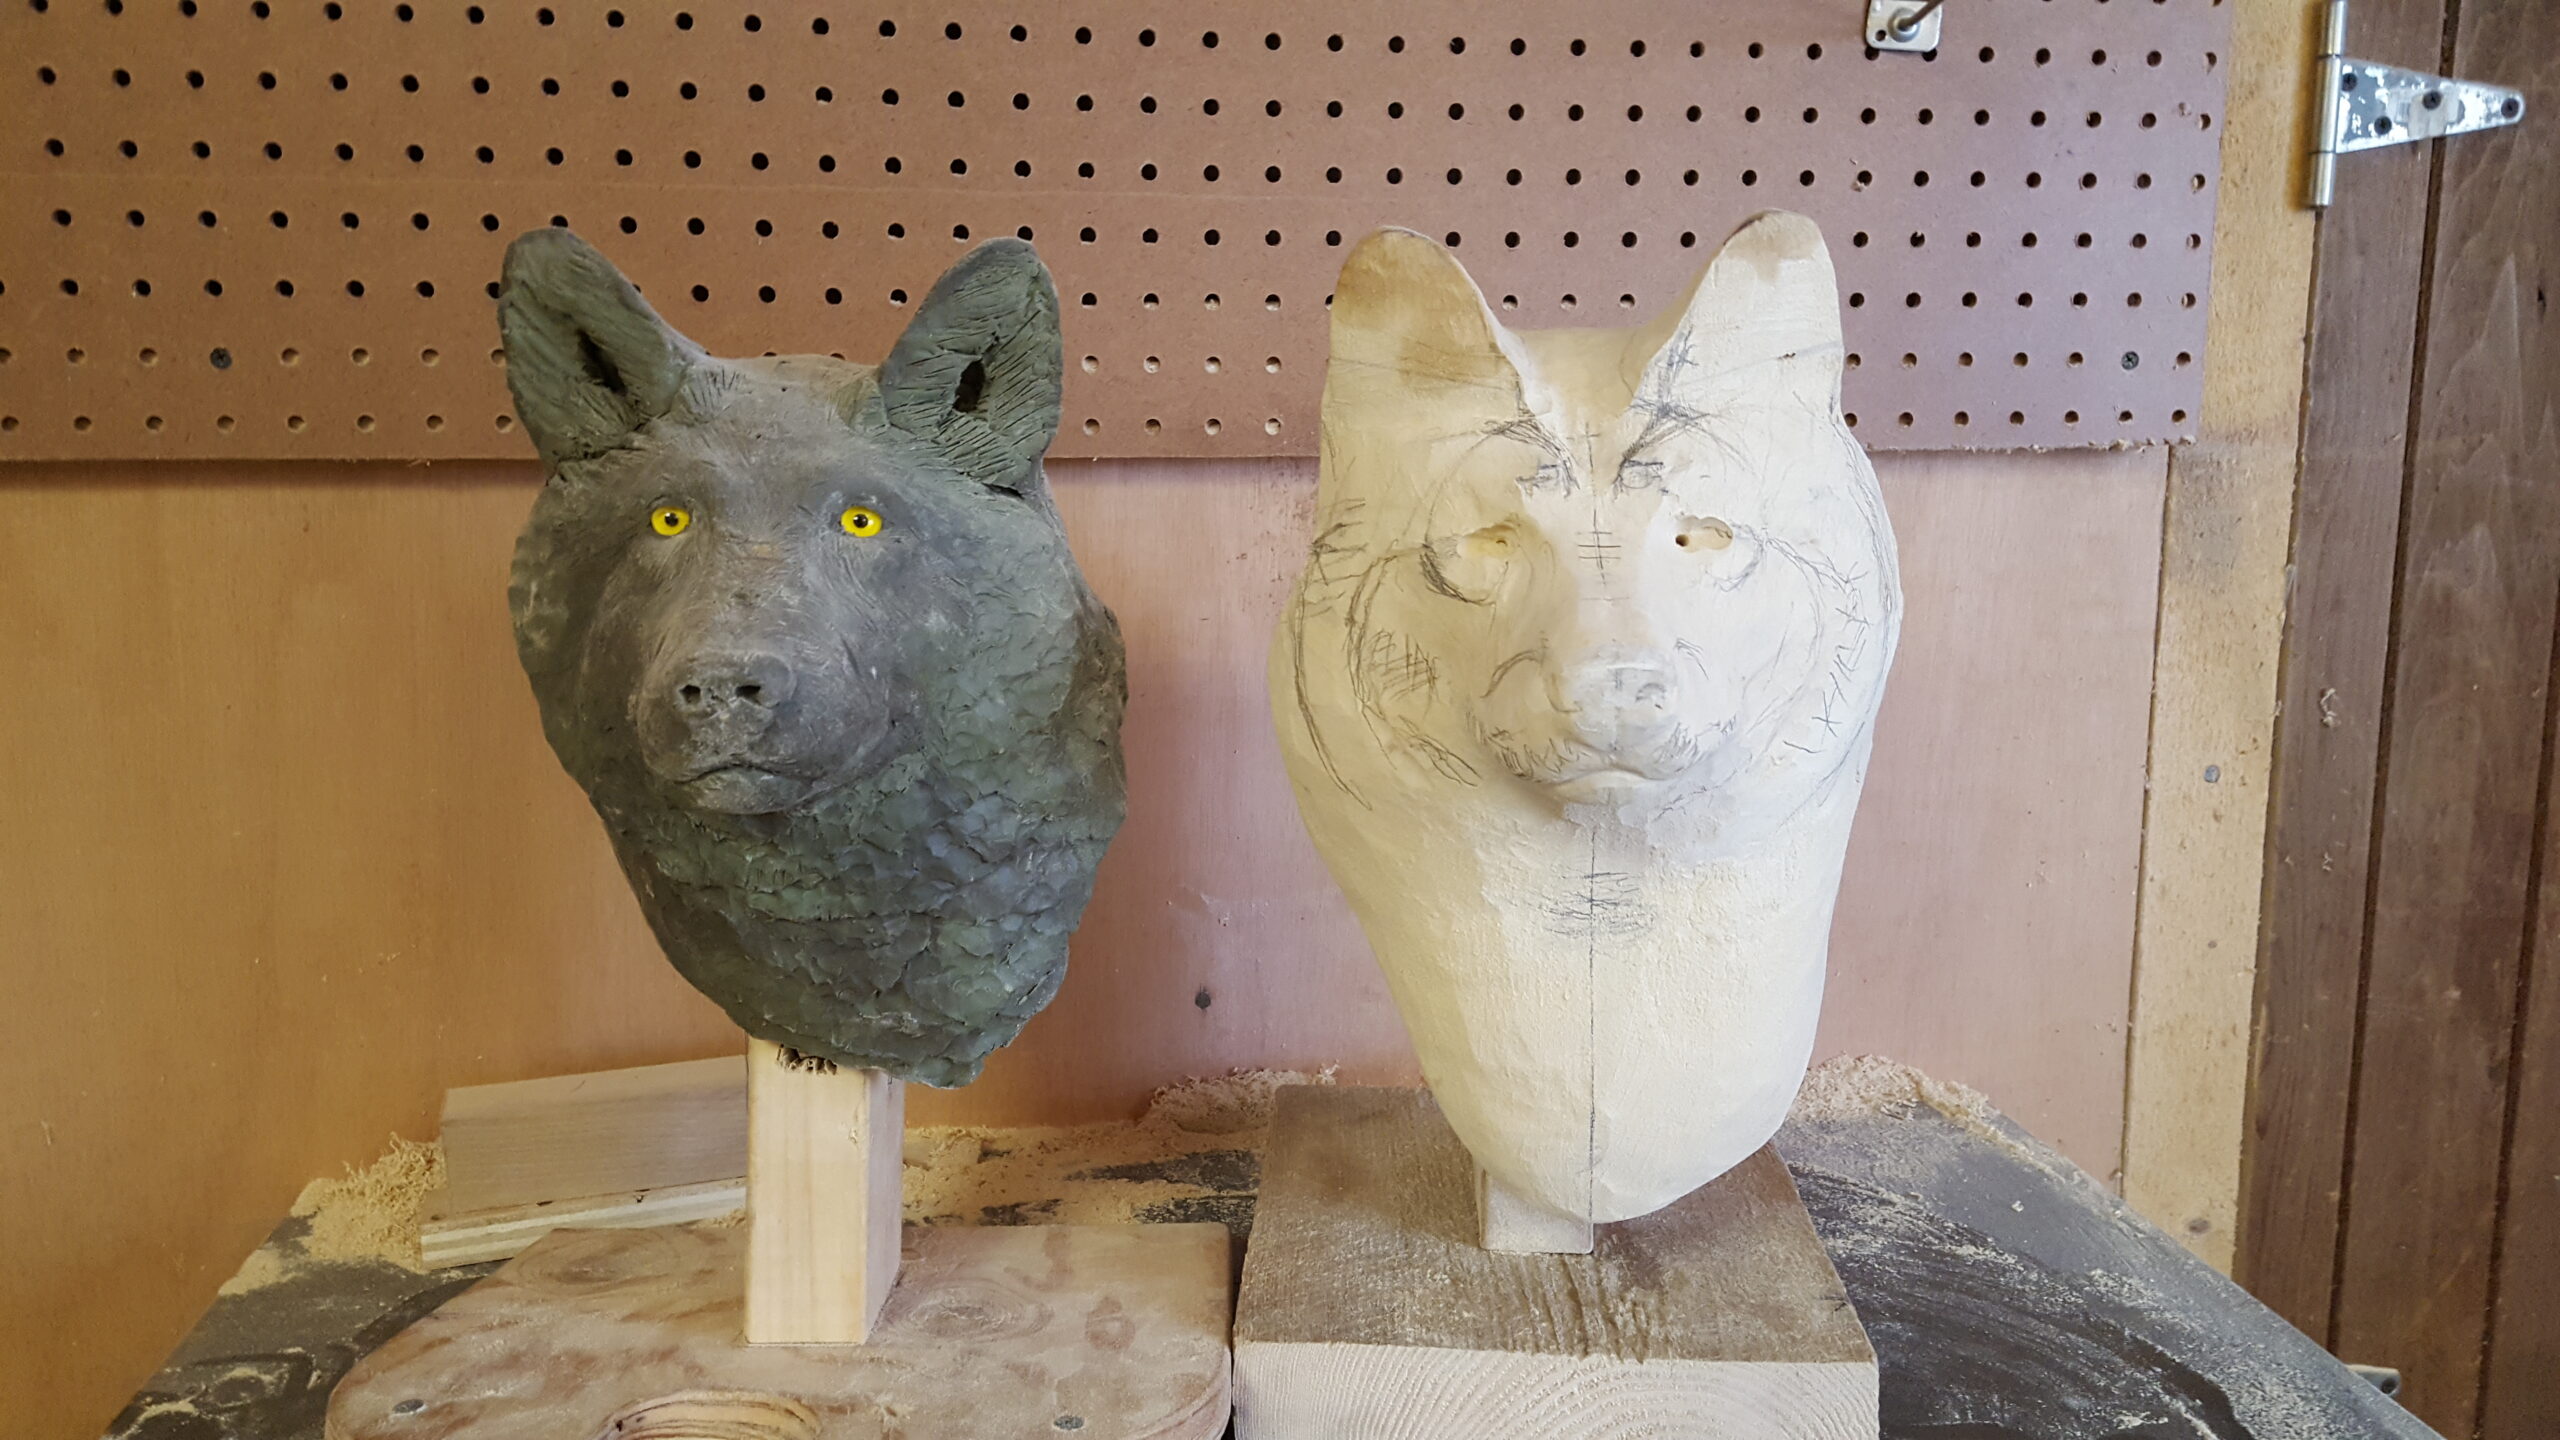
I use a pencil to mark measurements and to test facial features before removing any wood. After every step I redraw the lines to refine the details.

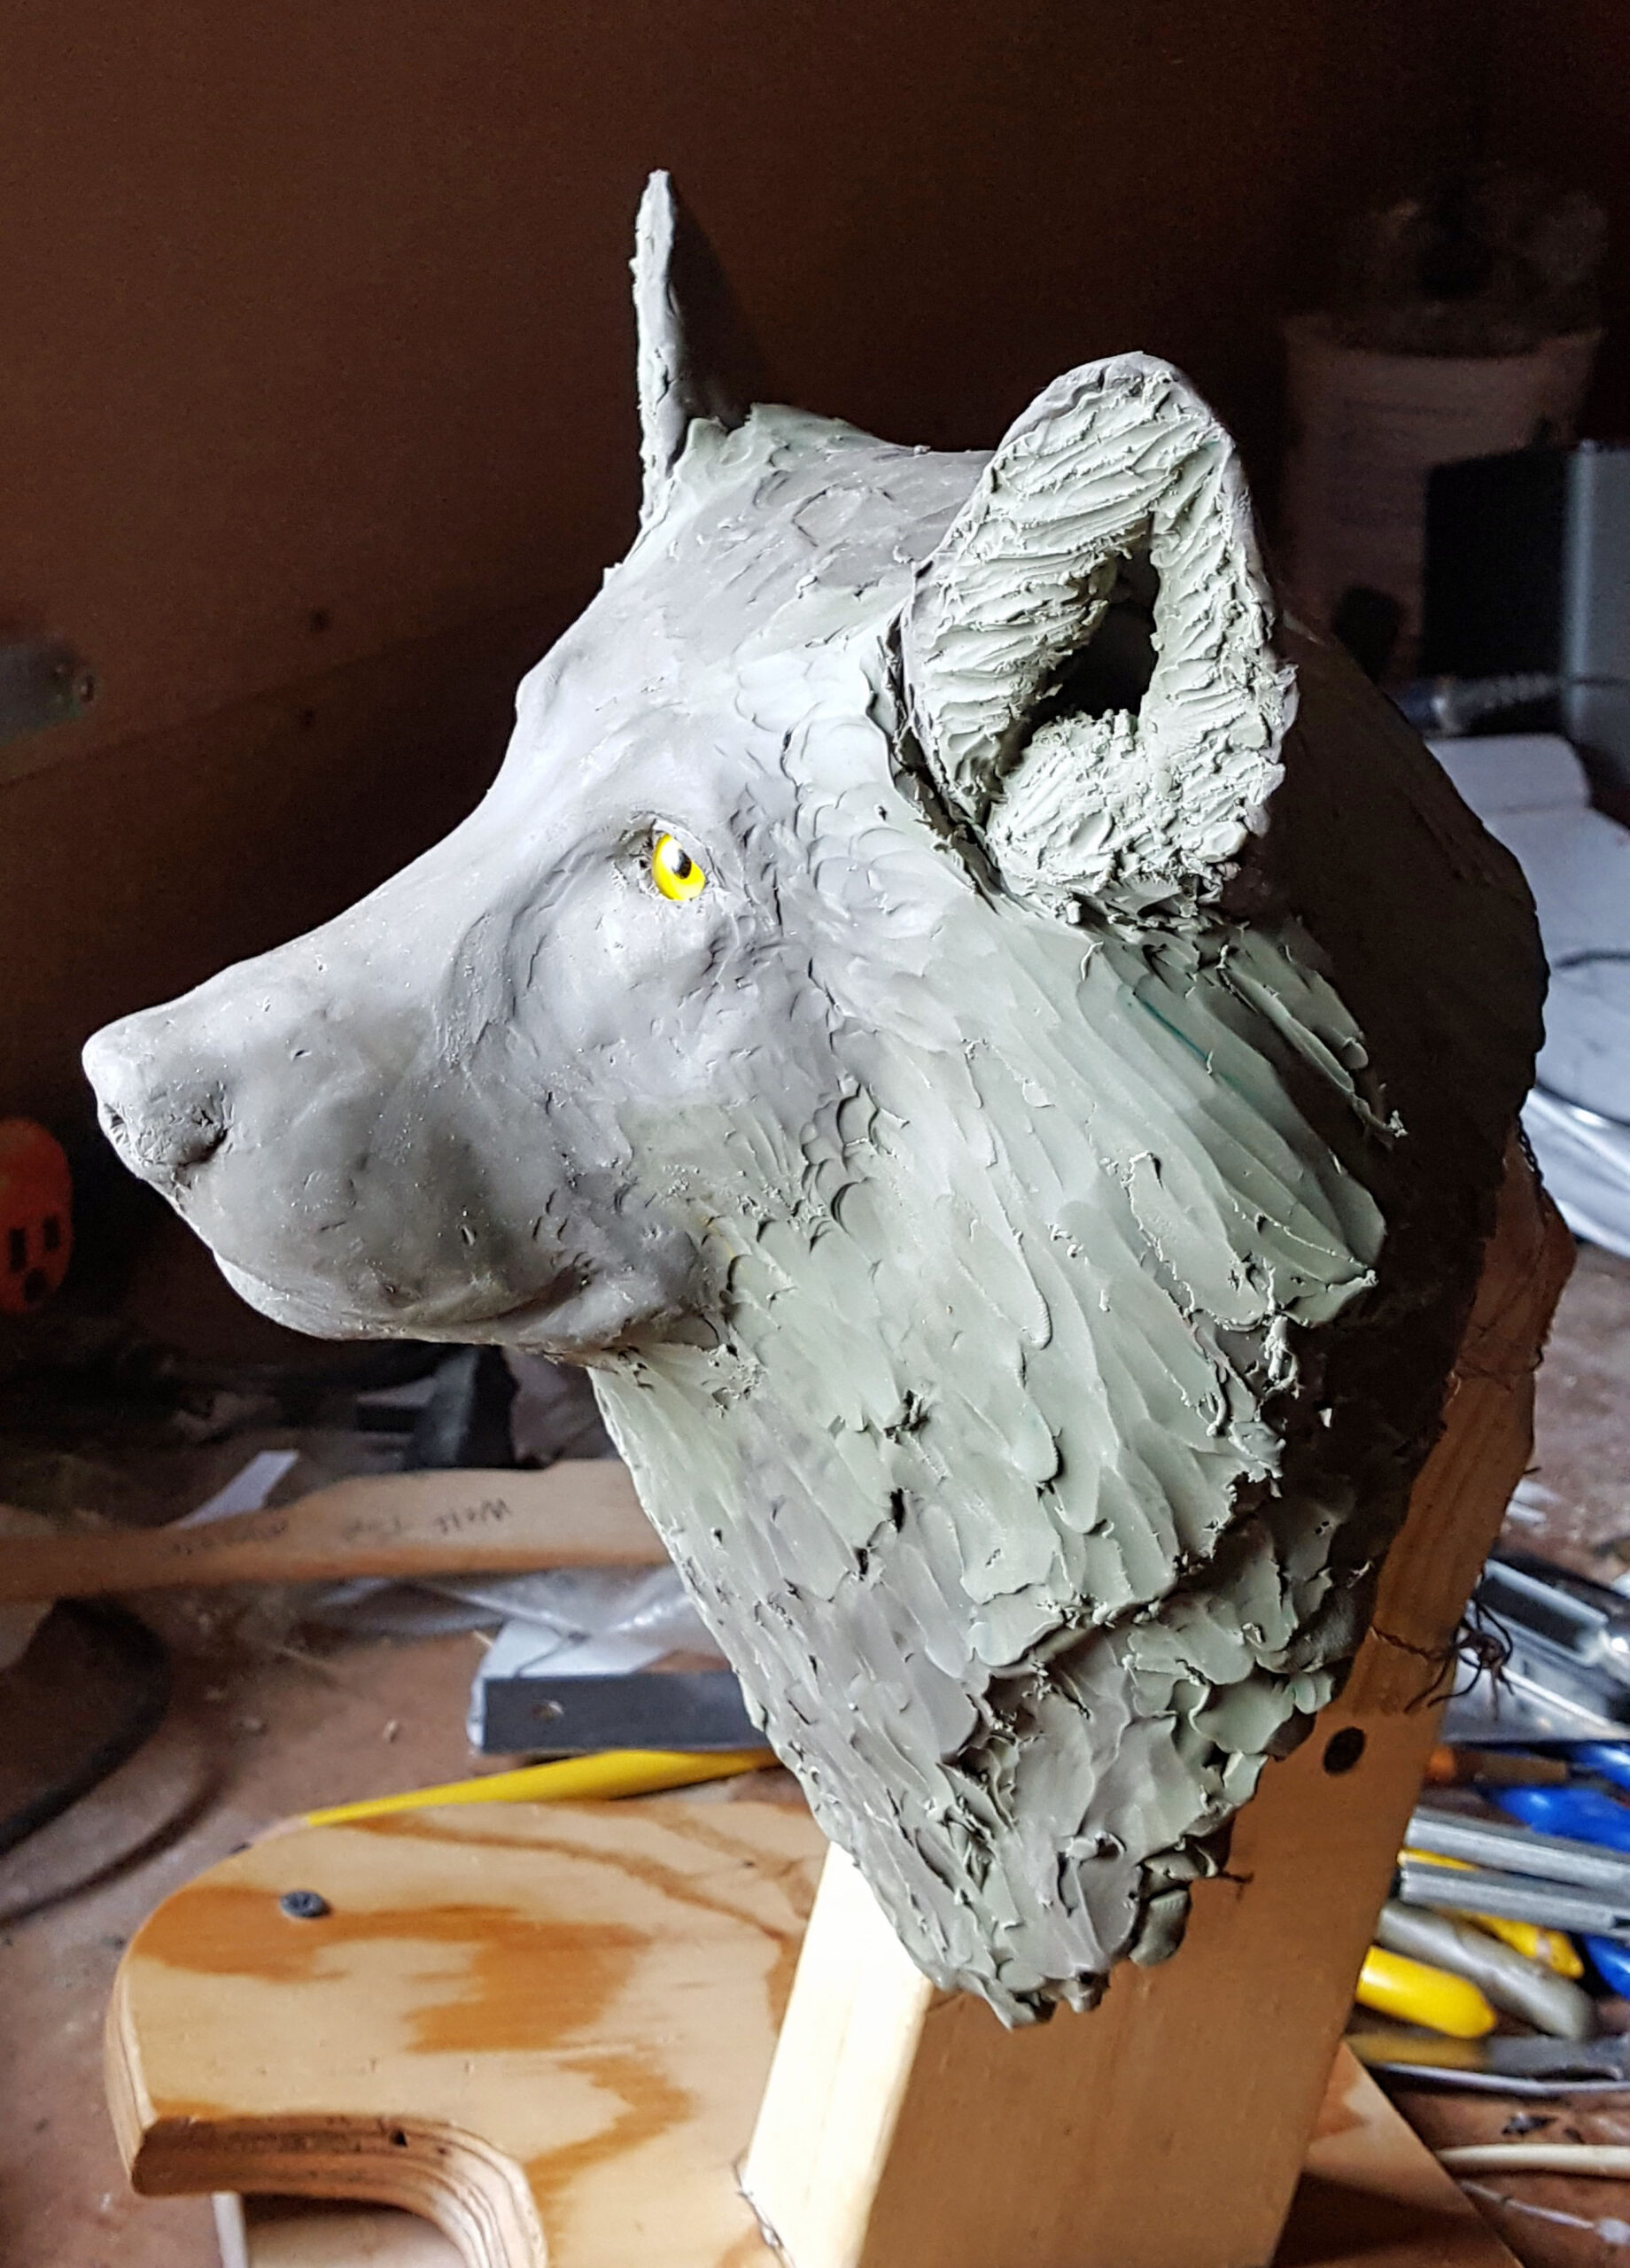
Spare eyes were used to give the carving some spirit while the wolf eyes are being custom made. Without the final eye lid detail, the sculpture looks a little afraid.
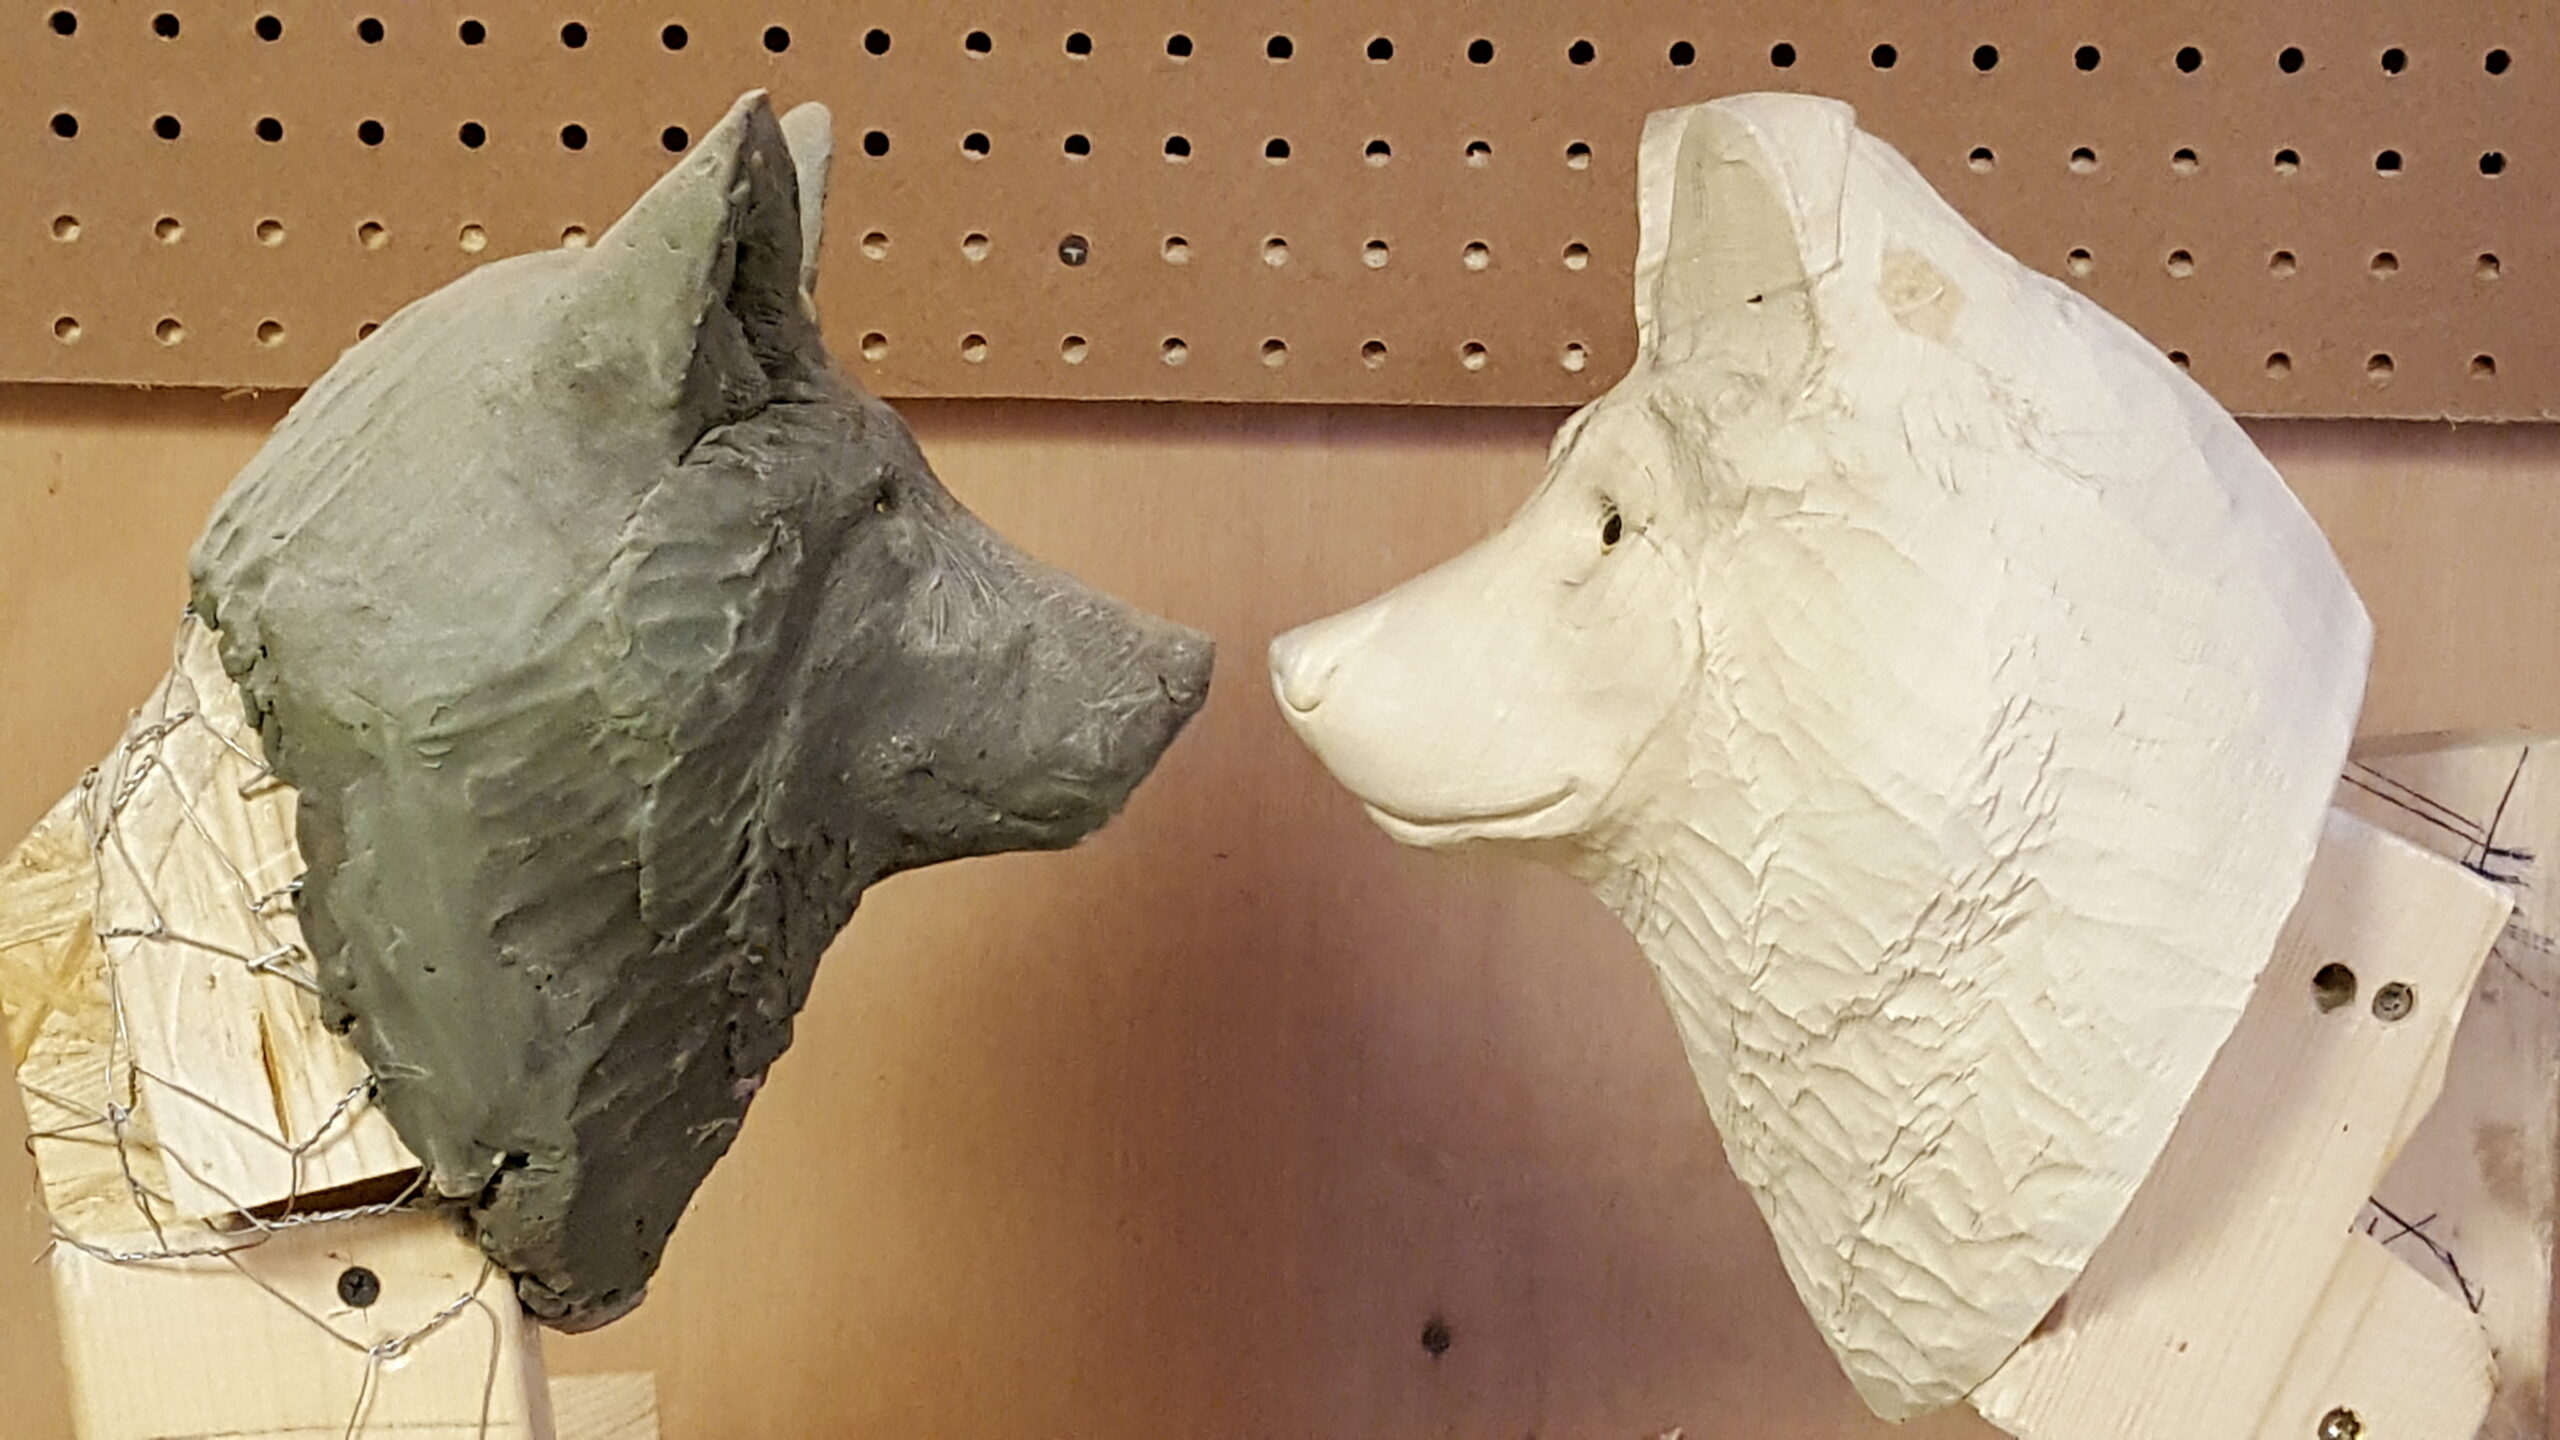
The beauty of having a clay reference is that you can put them side by side and check your angles.
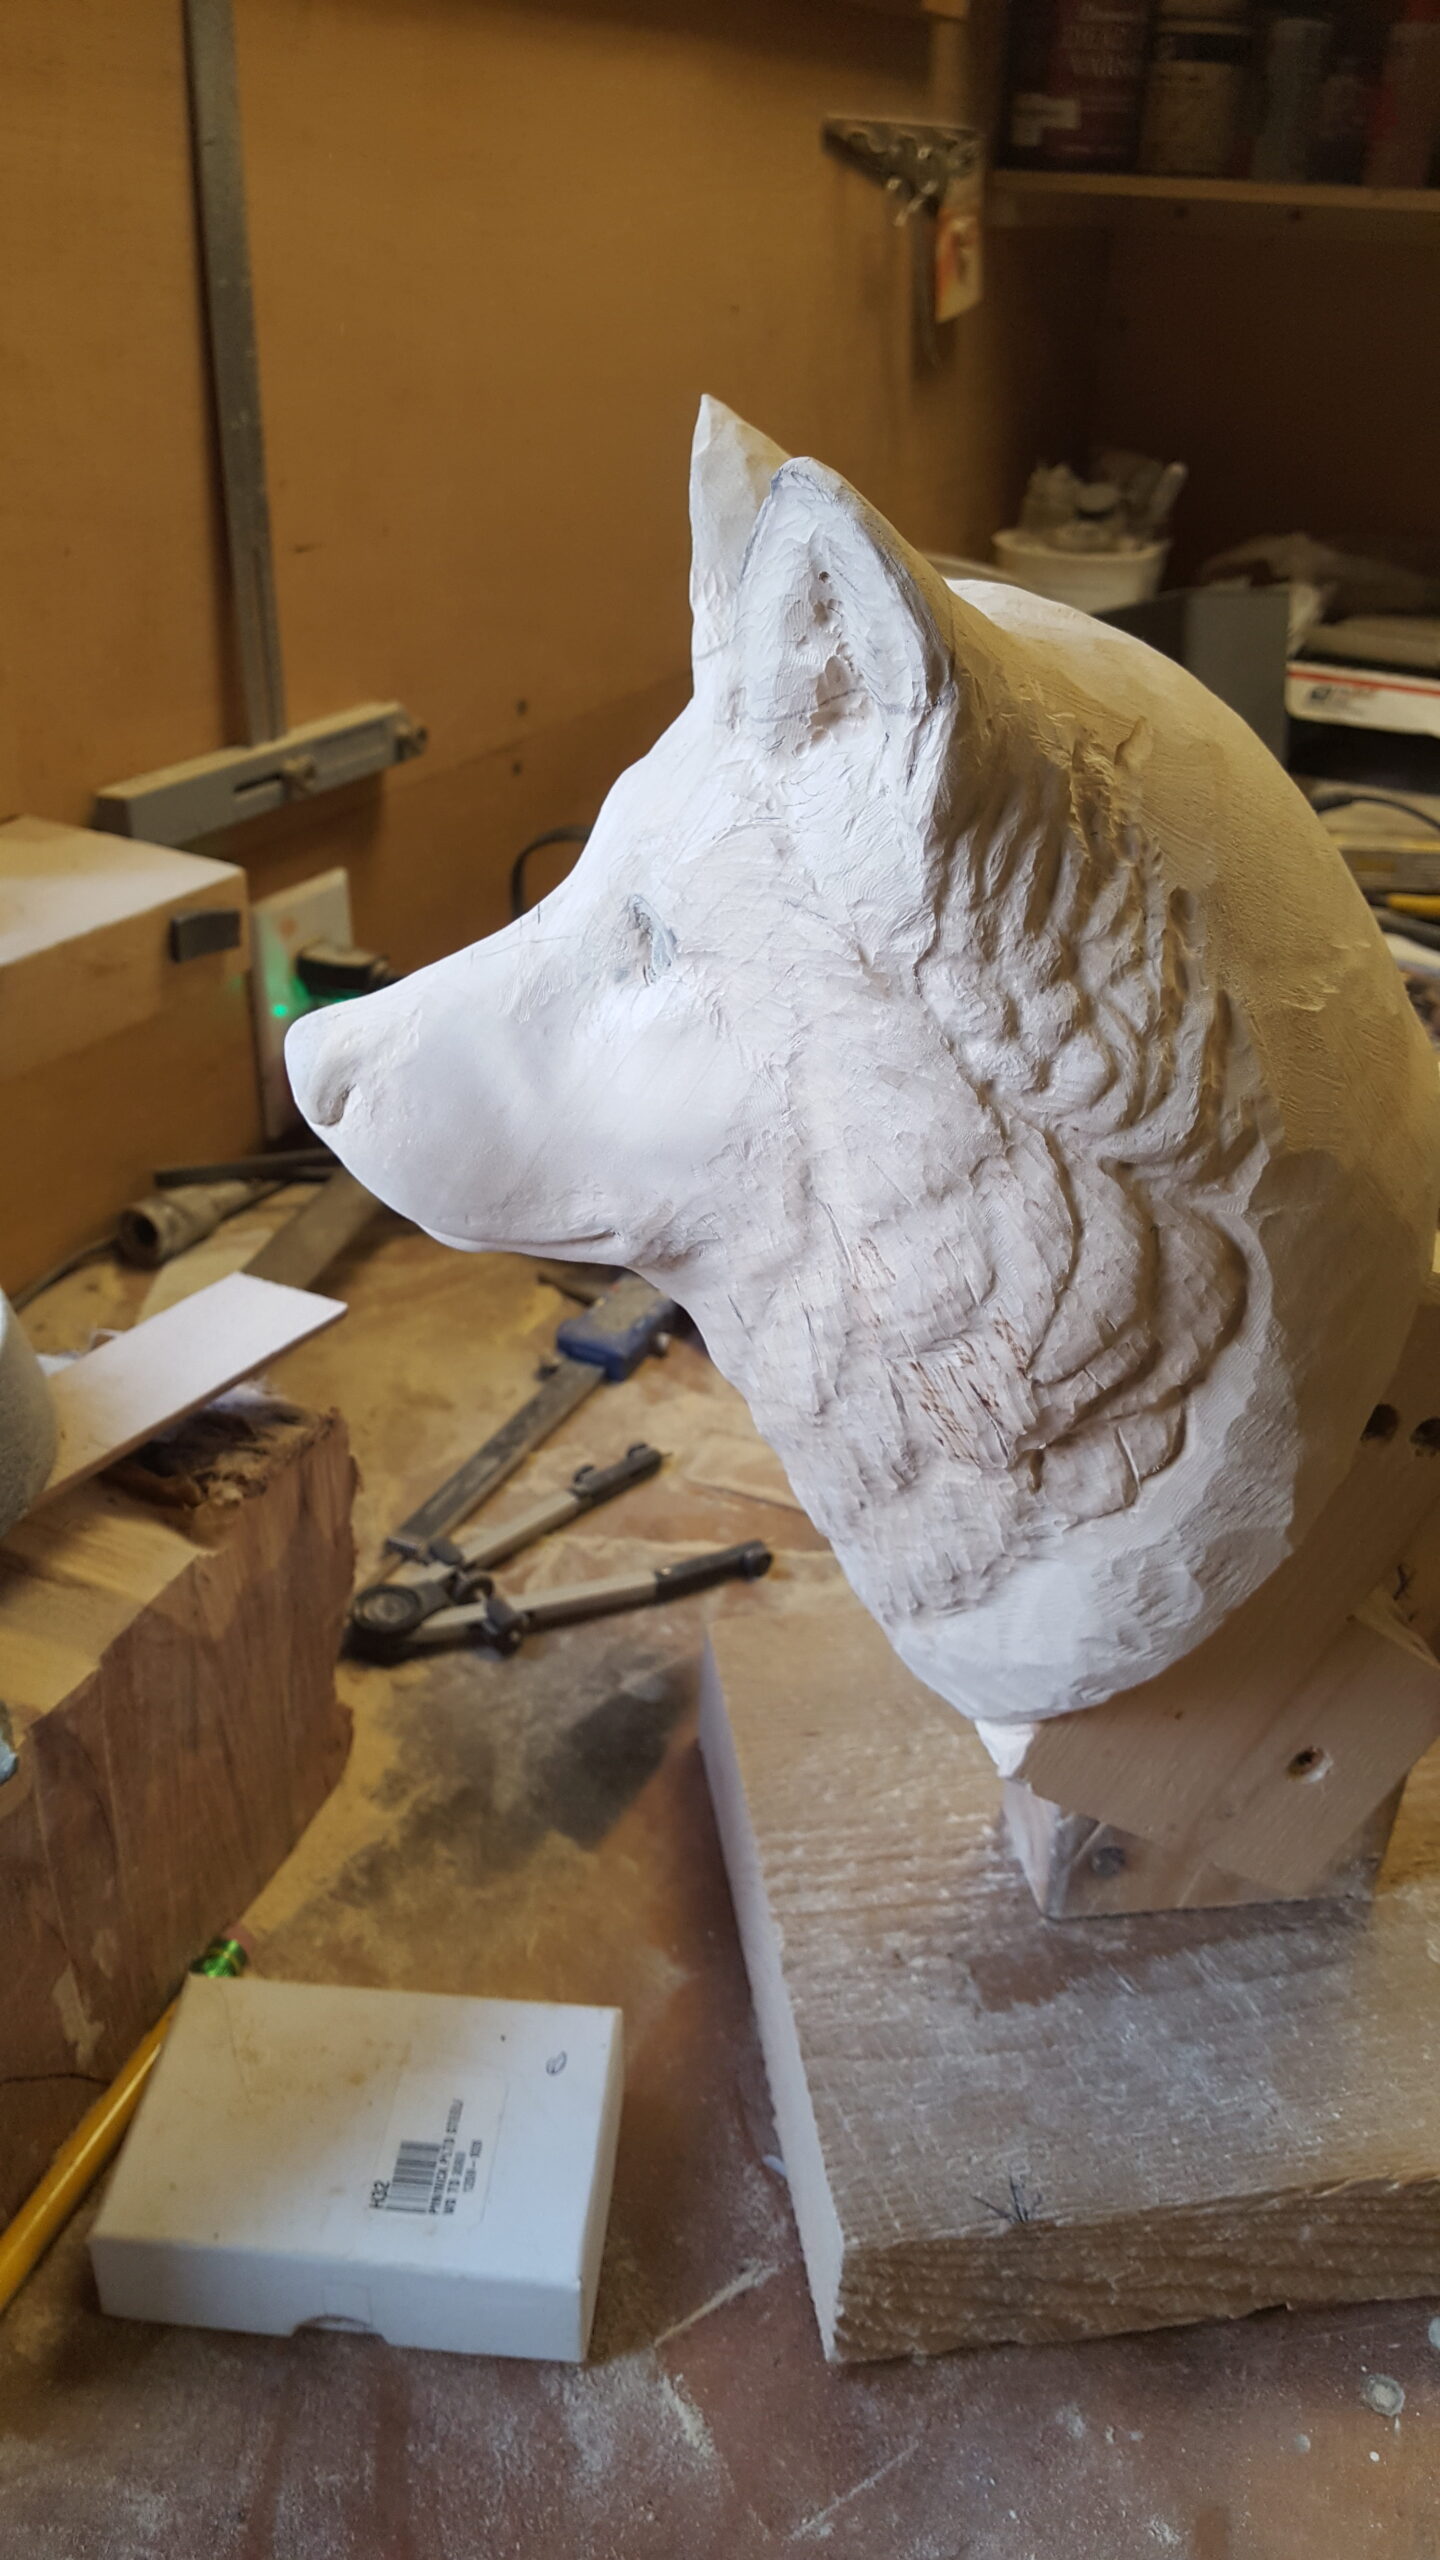
Carving fur can be tricky. I use shadows to help accentuate how everything is tied together.
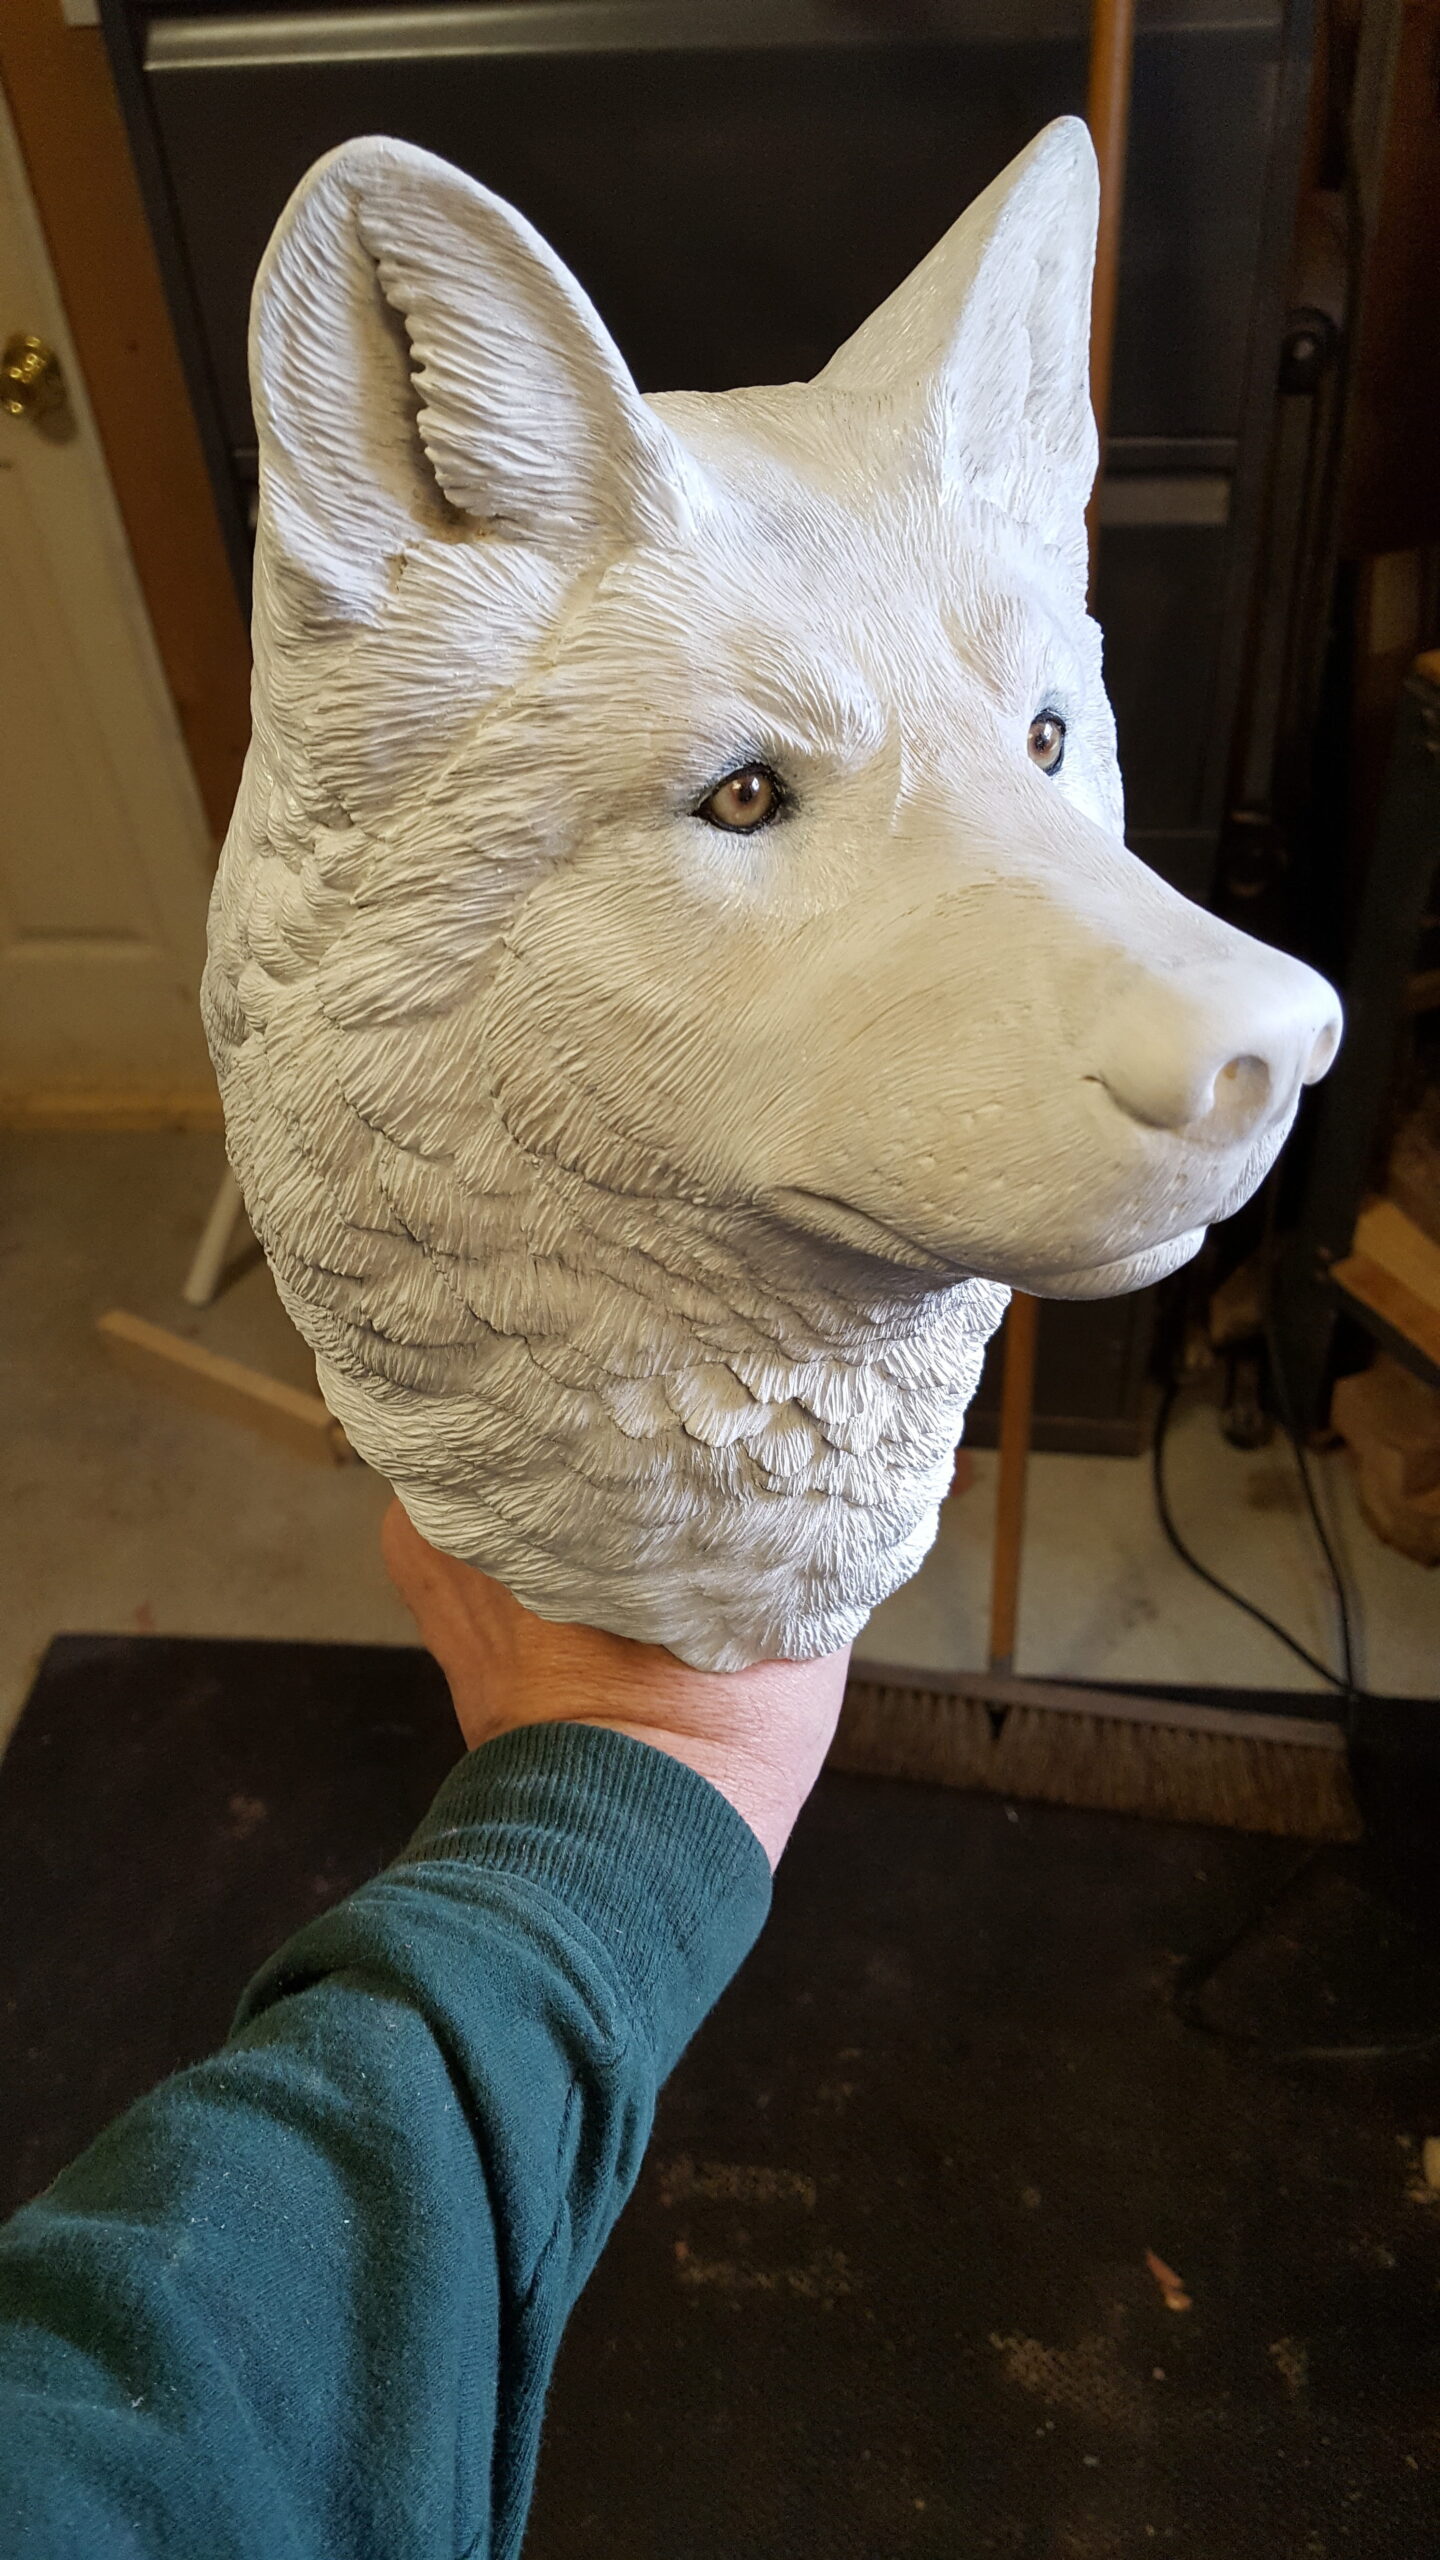
At this point I’m waiting on the custom made eye to arrive. They are half size of a real wolf yet they will look exactly like a real animal. The eye placement and look is extremely critical if you want your carving to look lifelike. Once set at the right depth and angles, I’ll use A+B epoxy to form the eye lids. I’m so anxious to start painting this sculpture.
The wolf sculpture is primed and ready to paint.
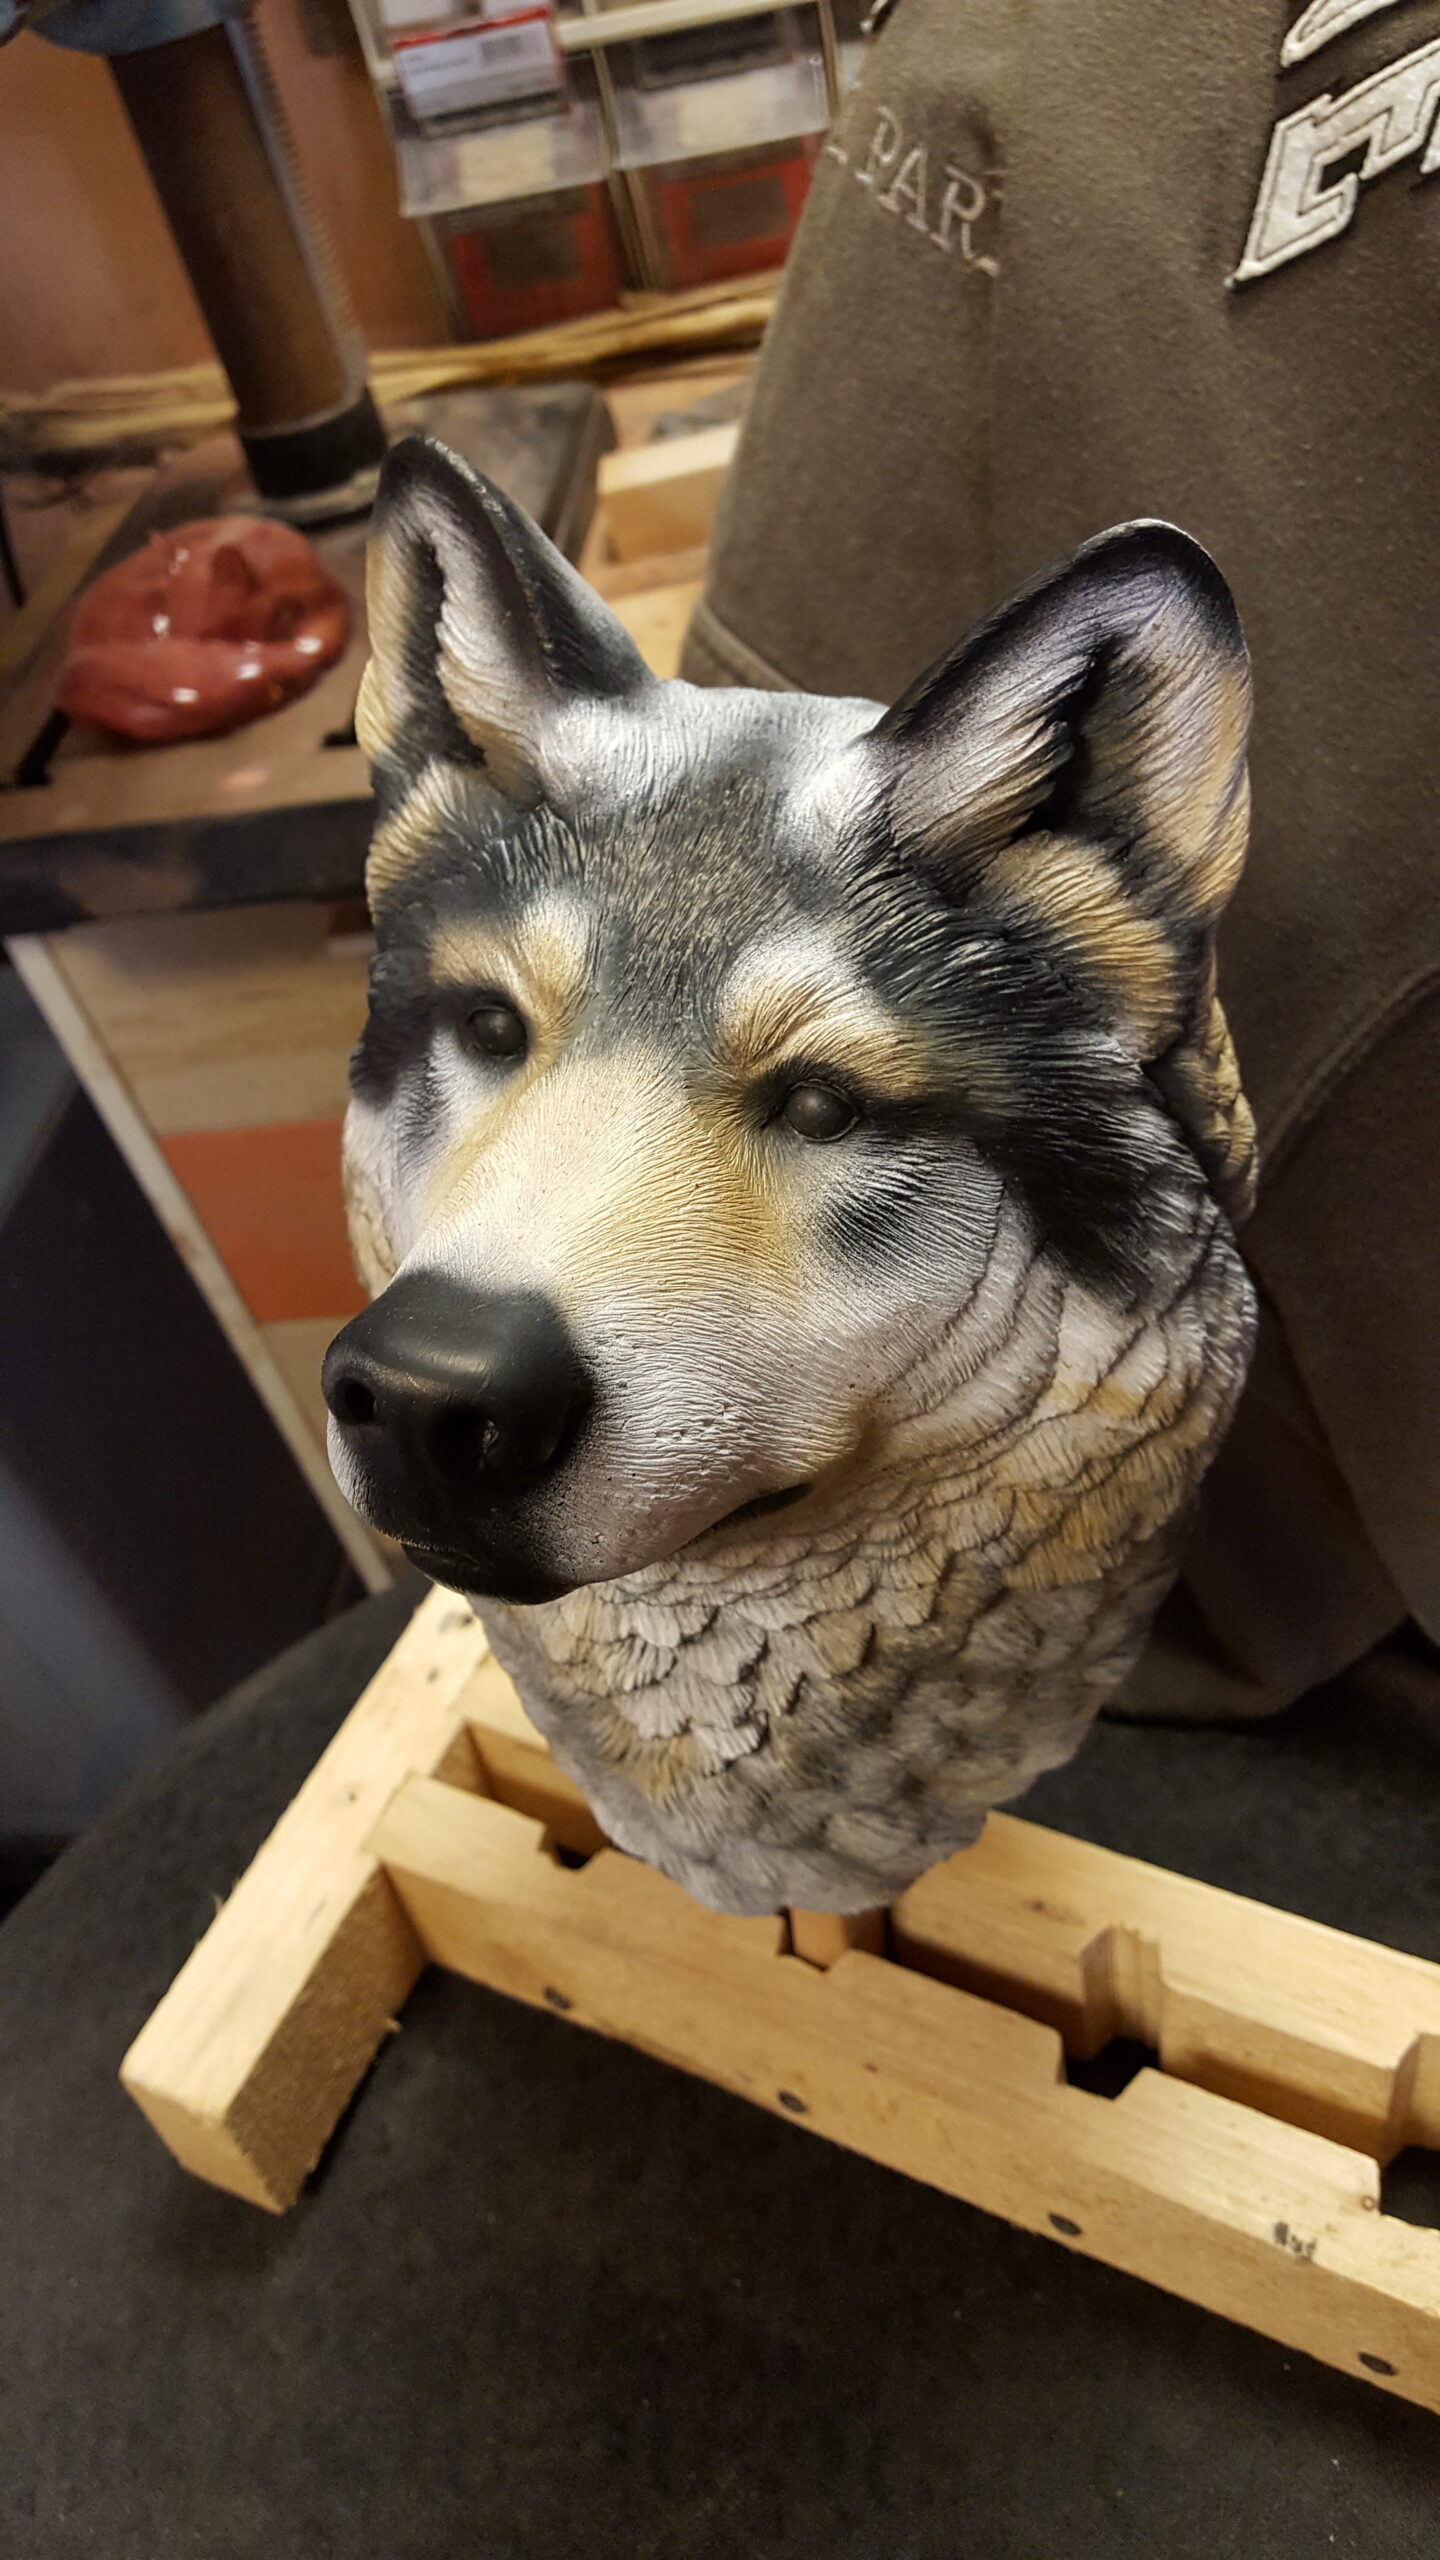
The background colors add shading that have more details added layer by layer.
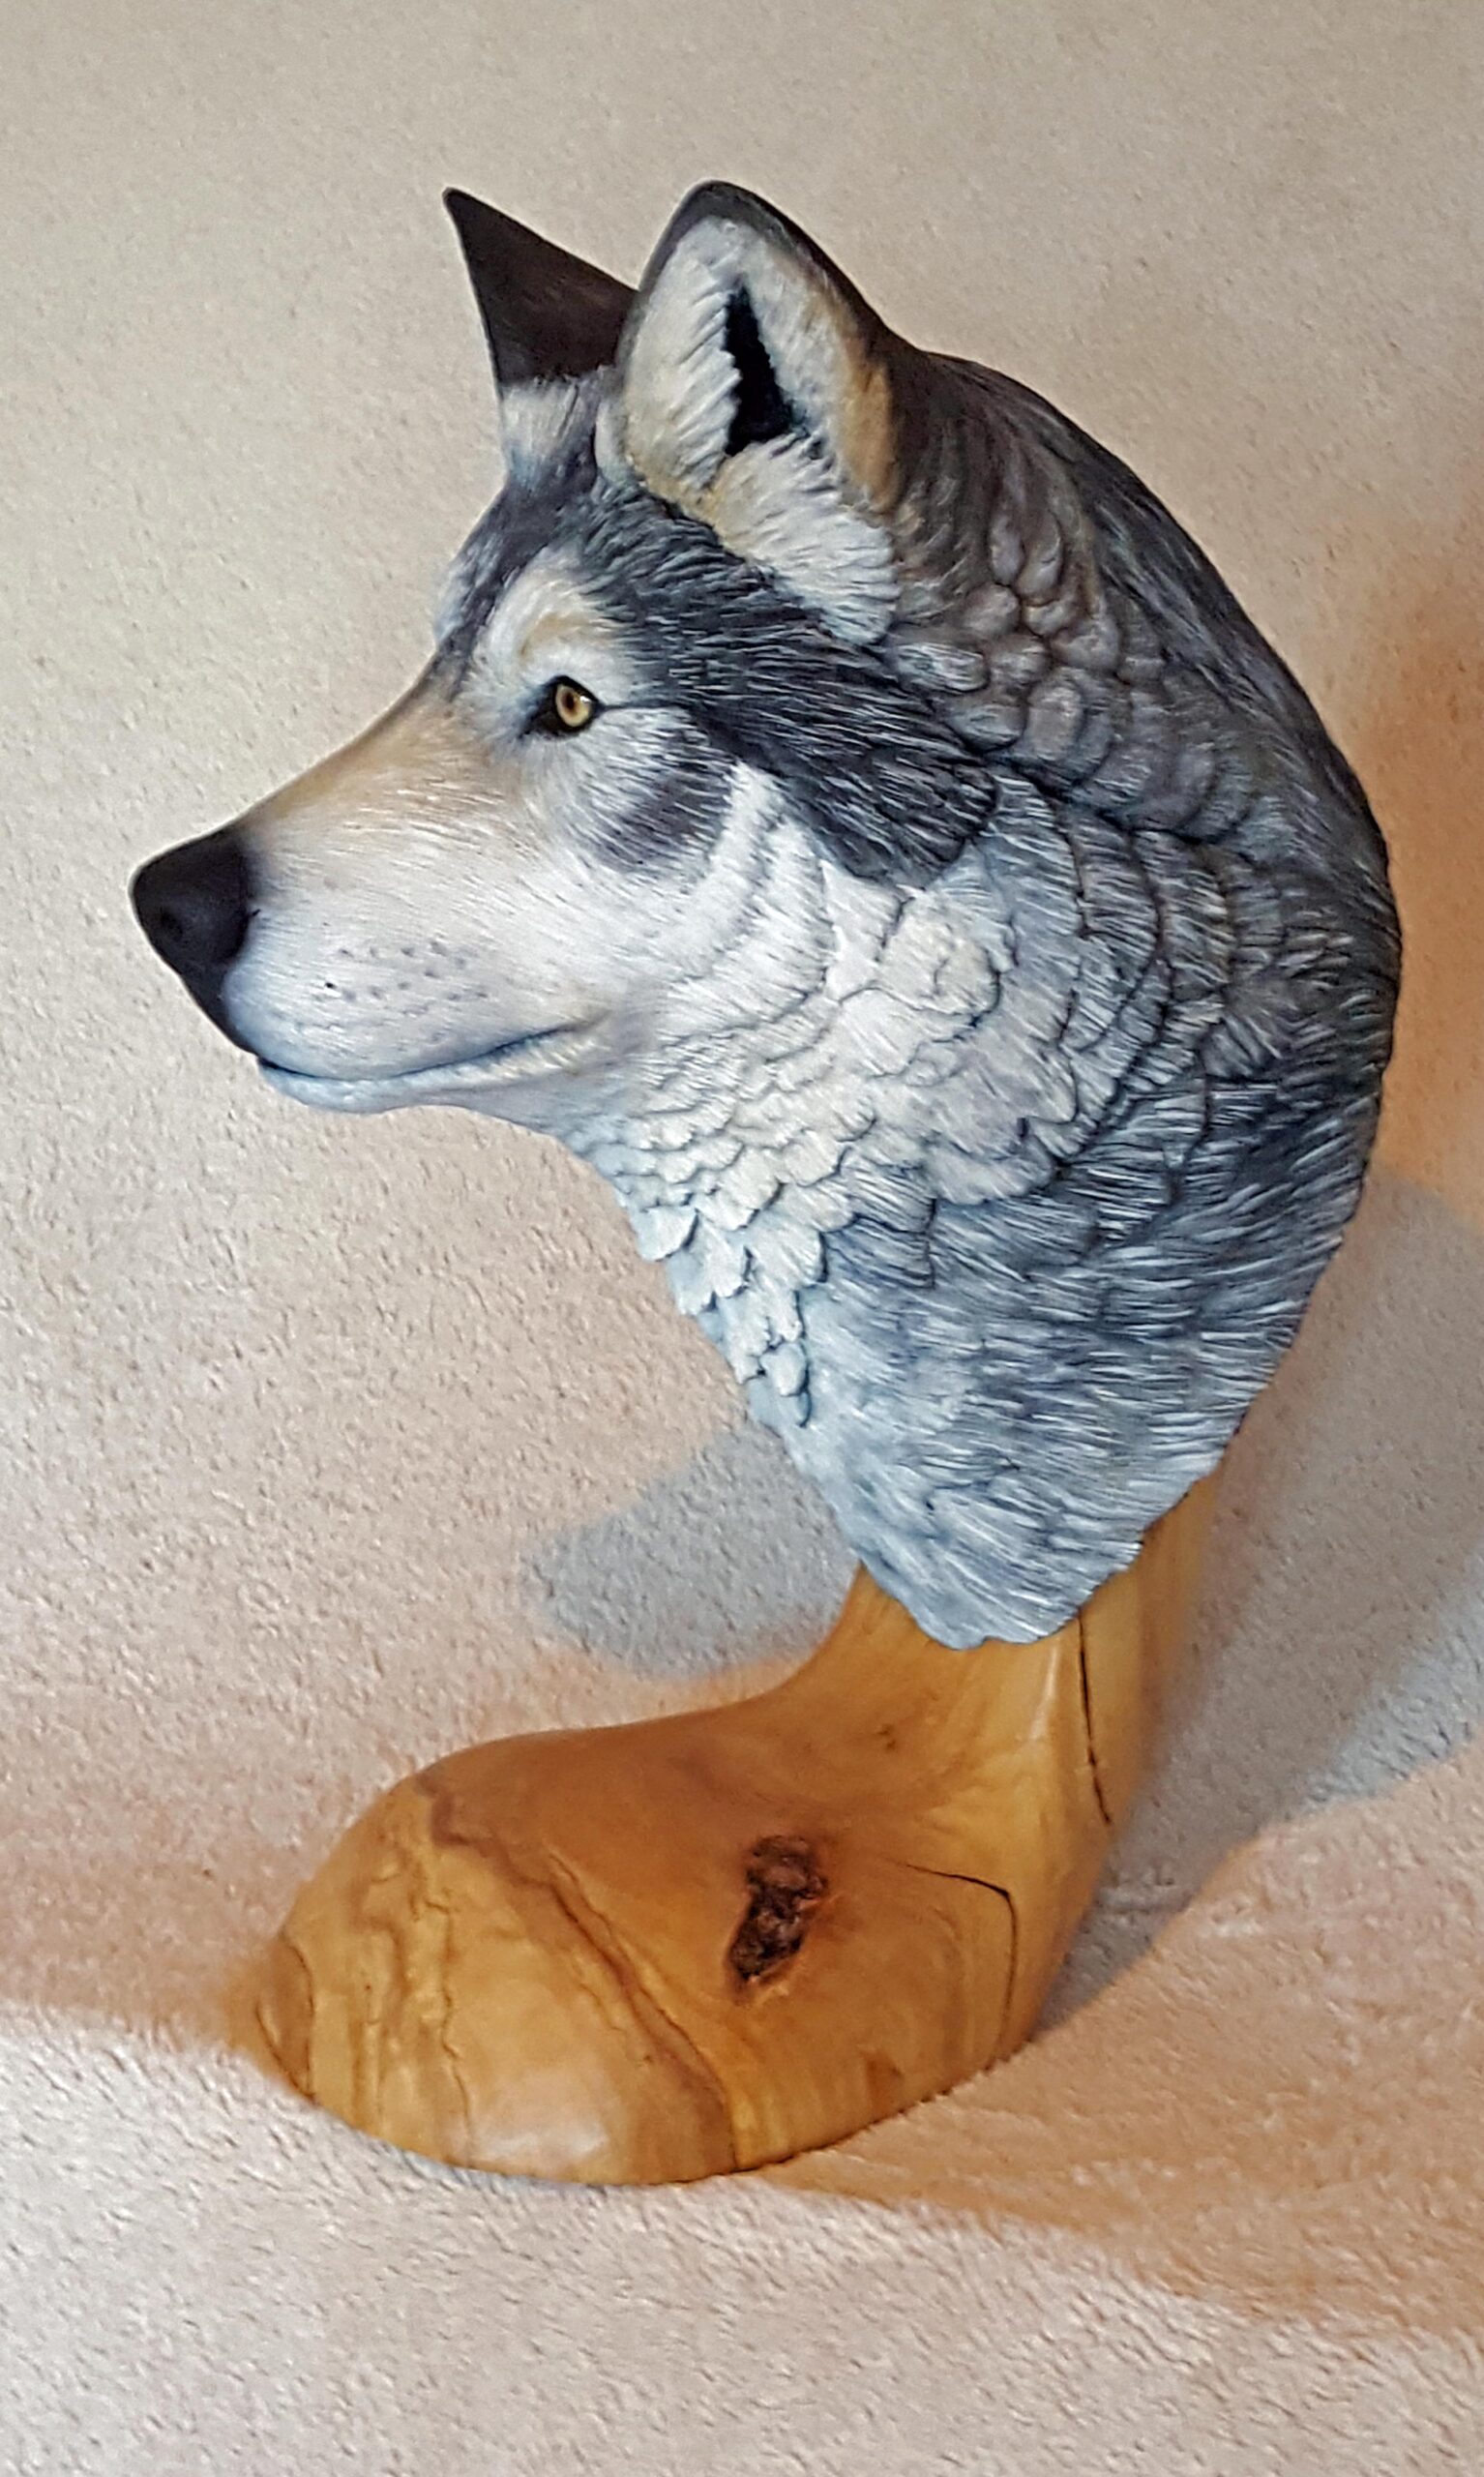
This is the first wolf sculpture I’ve done. I enjoyed the challenge and the education it provided.
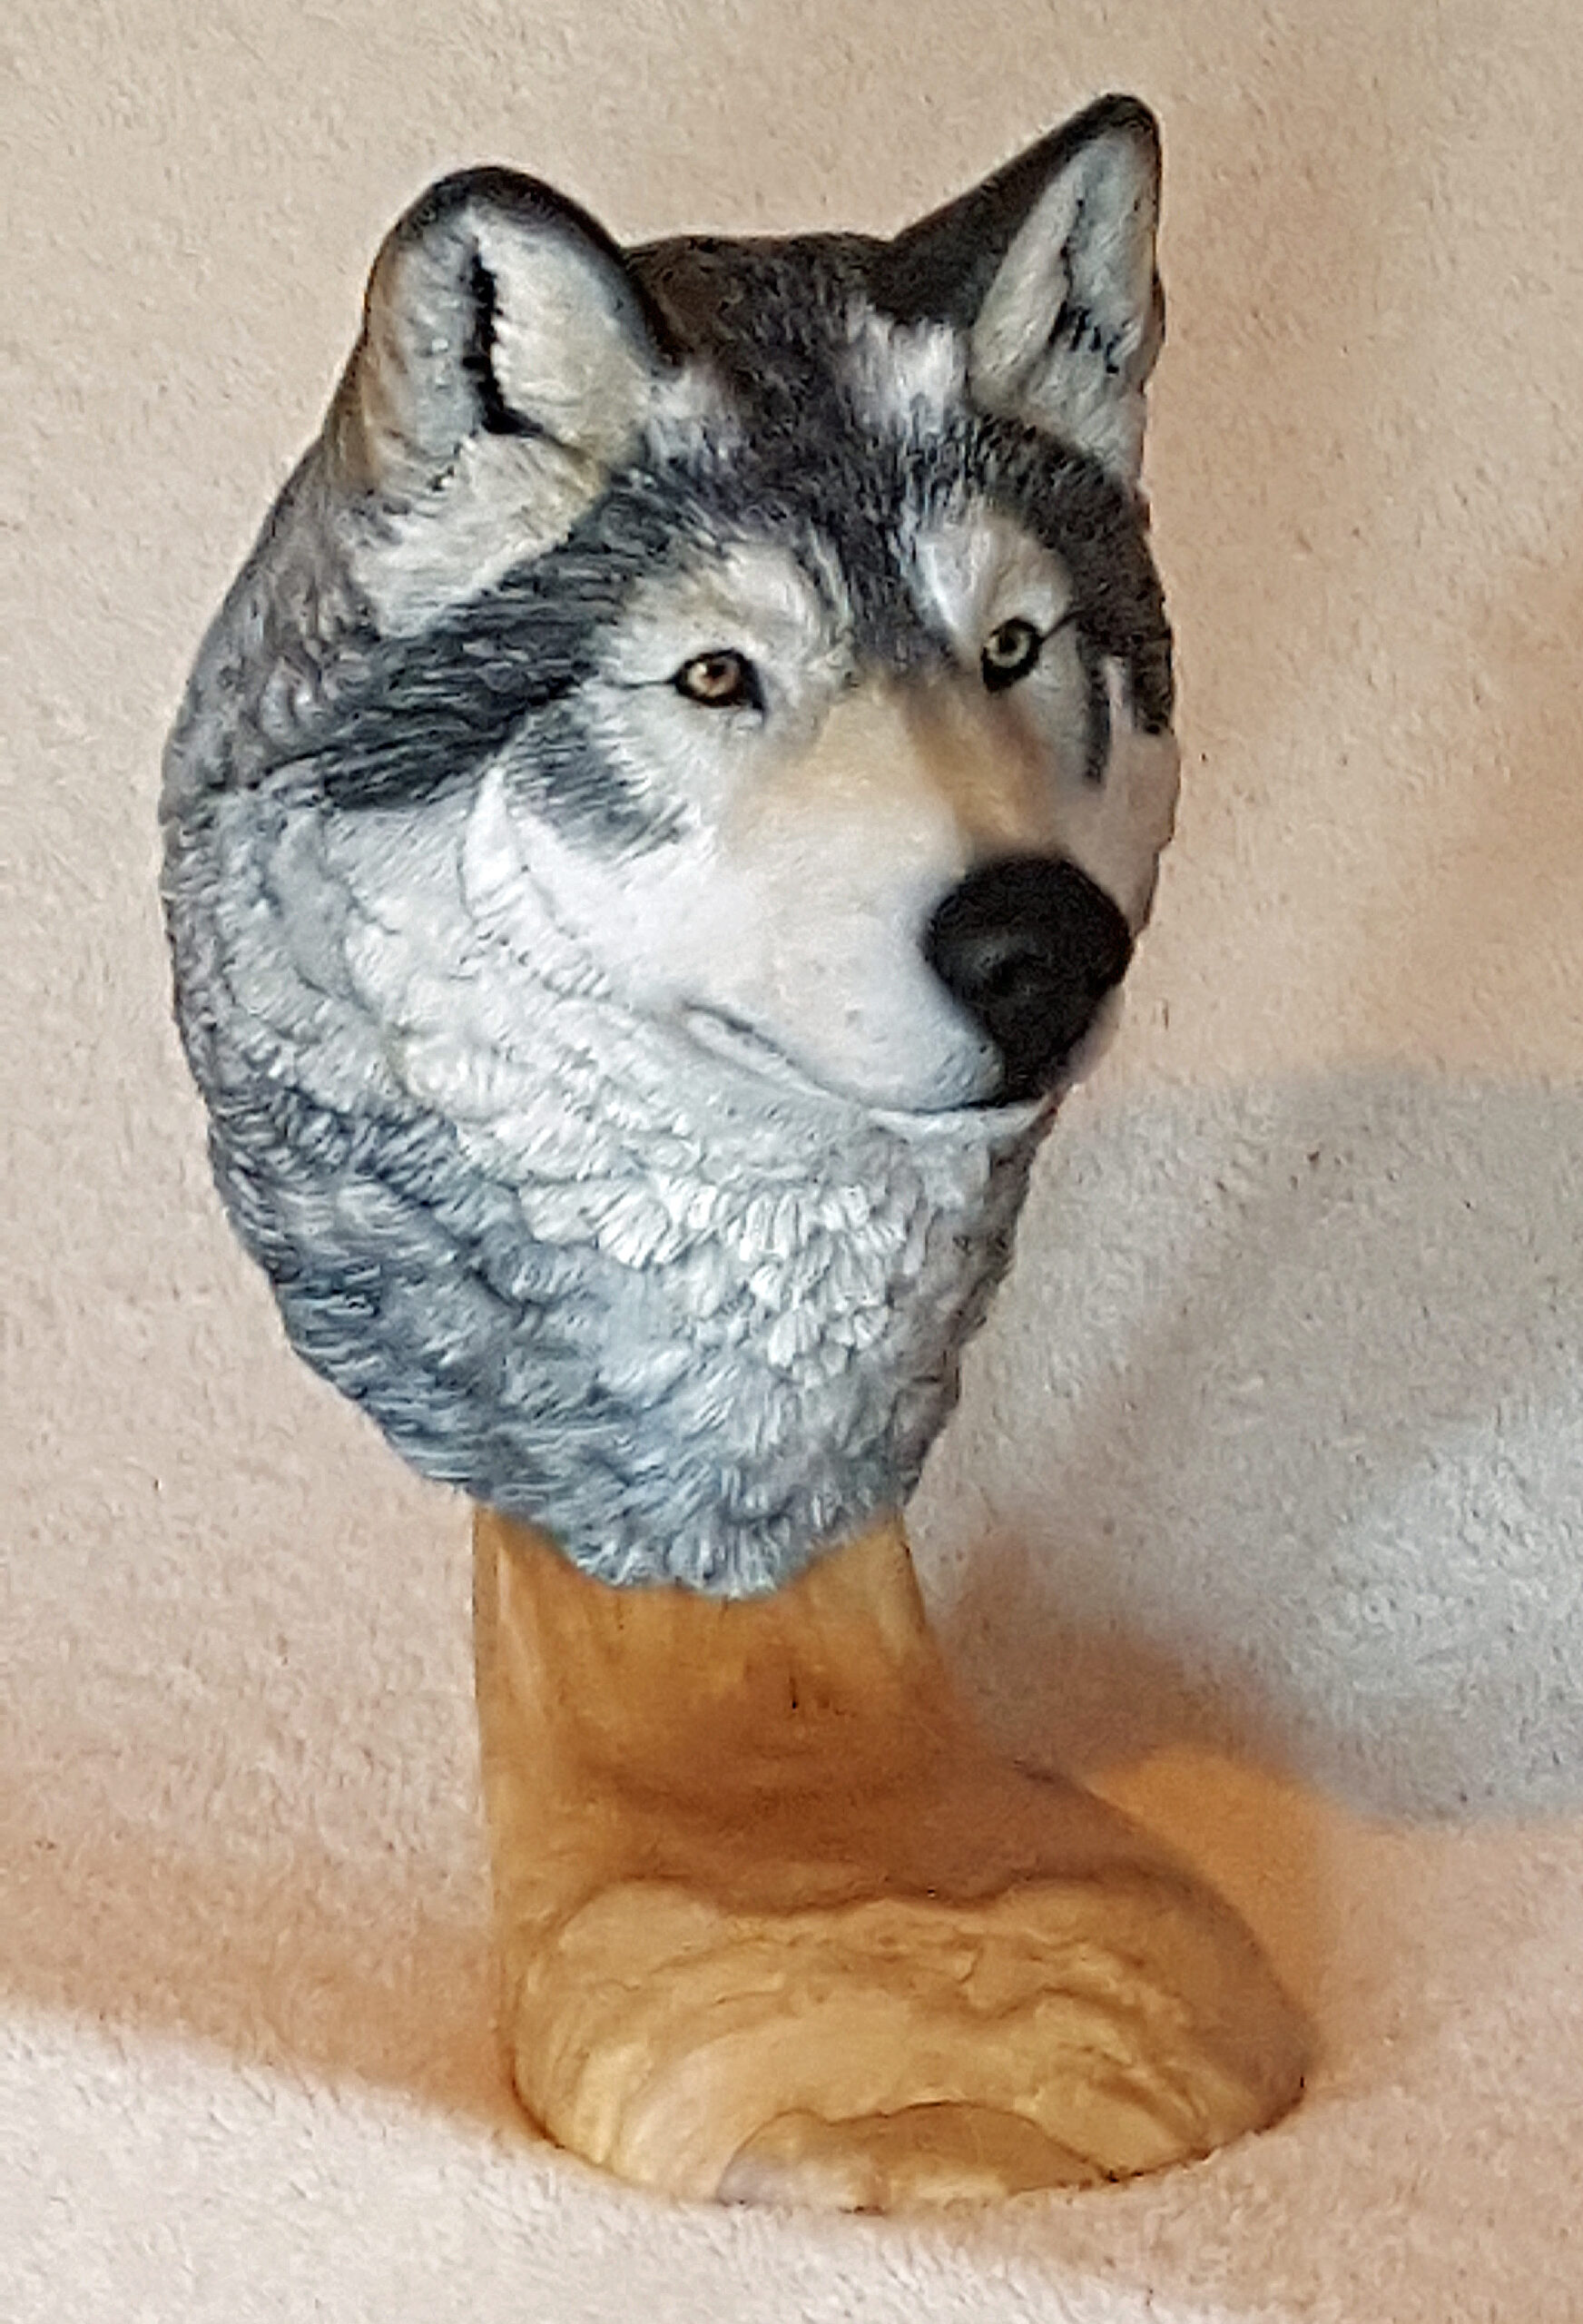
A successful sculpture of an animal must have eyes that connect with the viewer.
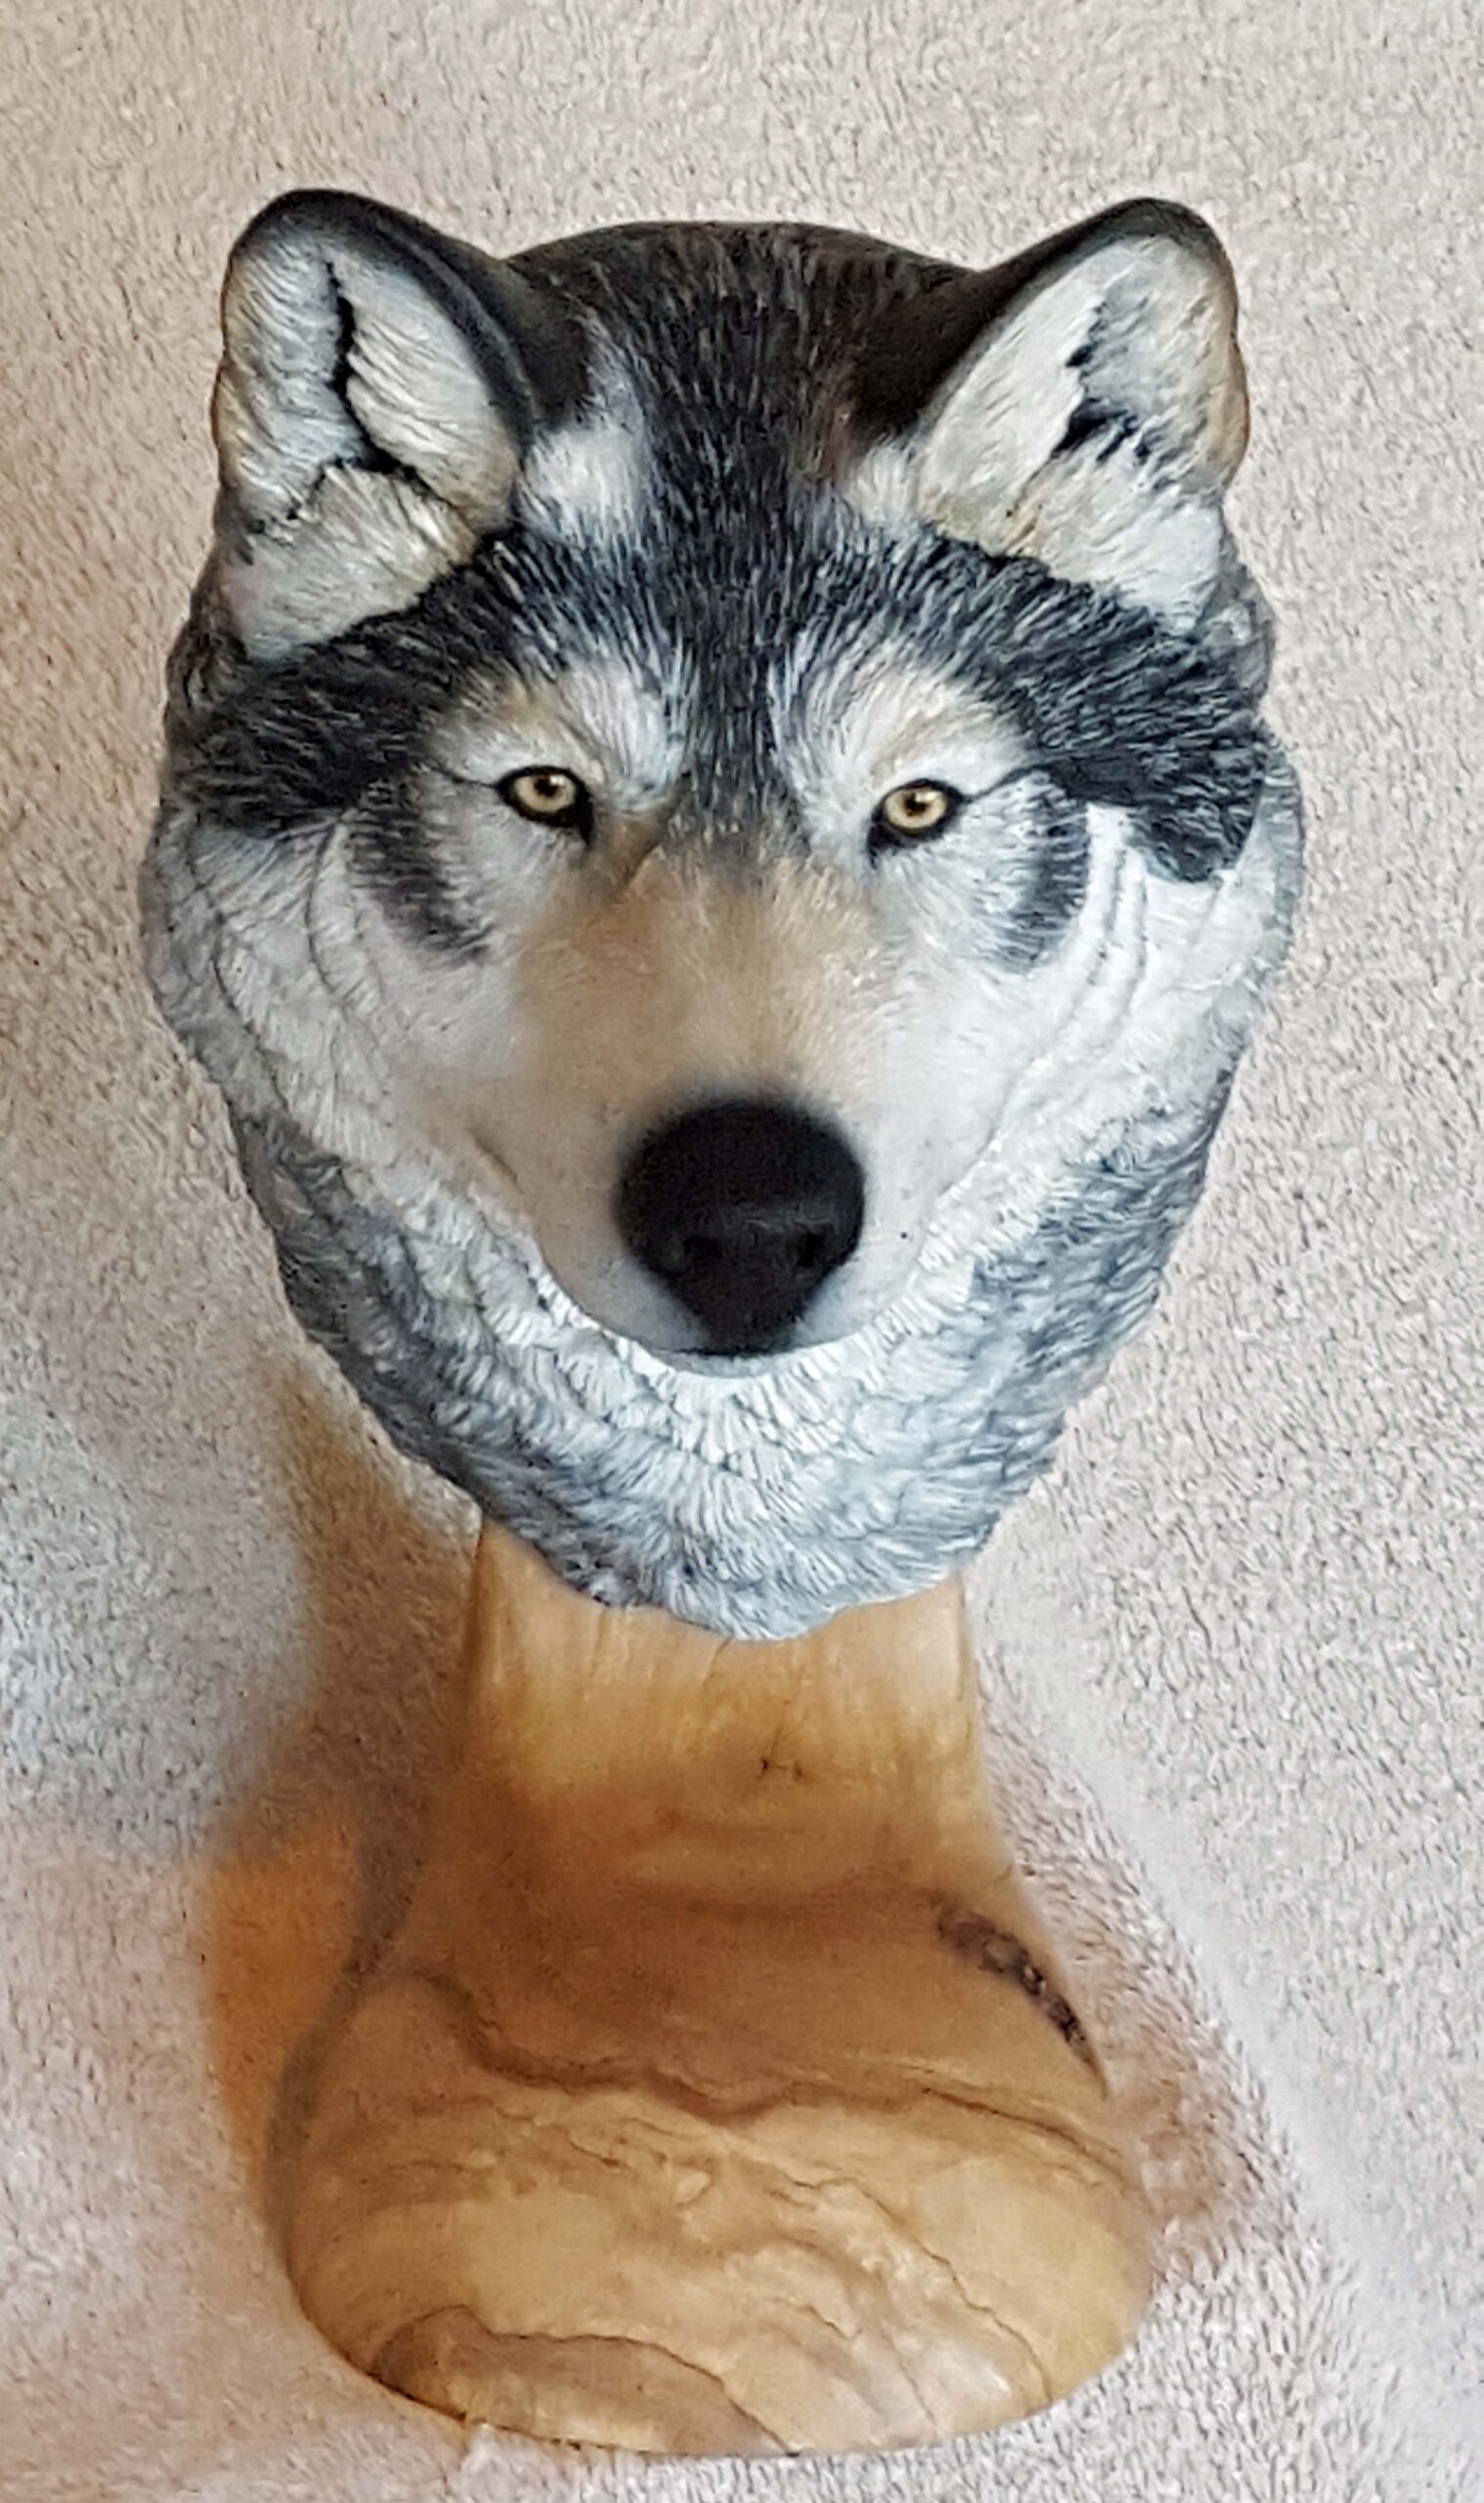
That custom glass eyes really bring life to this carving.