Starting to sculpt a Red Fox
I decided to carve a life-size red fox. I learned quite a bit carving the wolf head and will now have a chance to apply some new techniques. This project will be take a little more time to complete because I’m including four other carvers in the process and because we only meet once a week for a couple hours.
The first step is to draw the front and side view of the fox head. This is an important yet tricky task because you must have both drawings match in size. These drawings serve as the template for both the clay sculpture and cutting the wood. Knowing that a medium sized red fox has a 16 mm eye diameter, I find google images that will serve as my reference. Adjust the image size so that the eye diameter matches the 16 mm. You will then have a life size image to work from. You will have to also decide what personality you want your sculpture to have. Alert or relaxed. Happy or angry. Ears back, relaxed to the side or forward. It’s okay to have your sculpture evolve as you work on it.
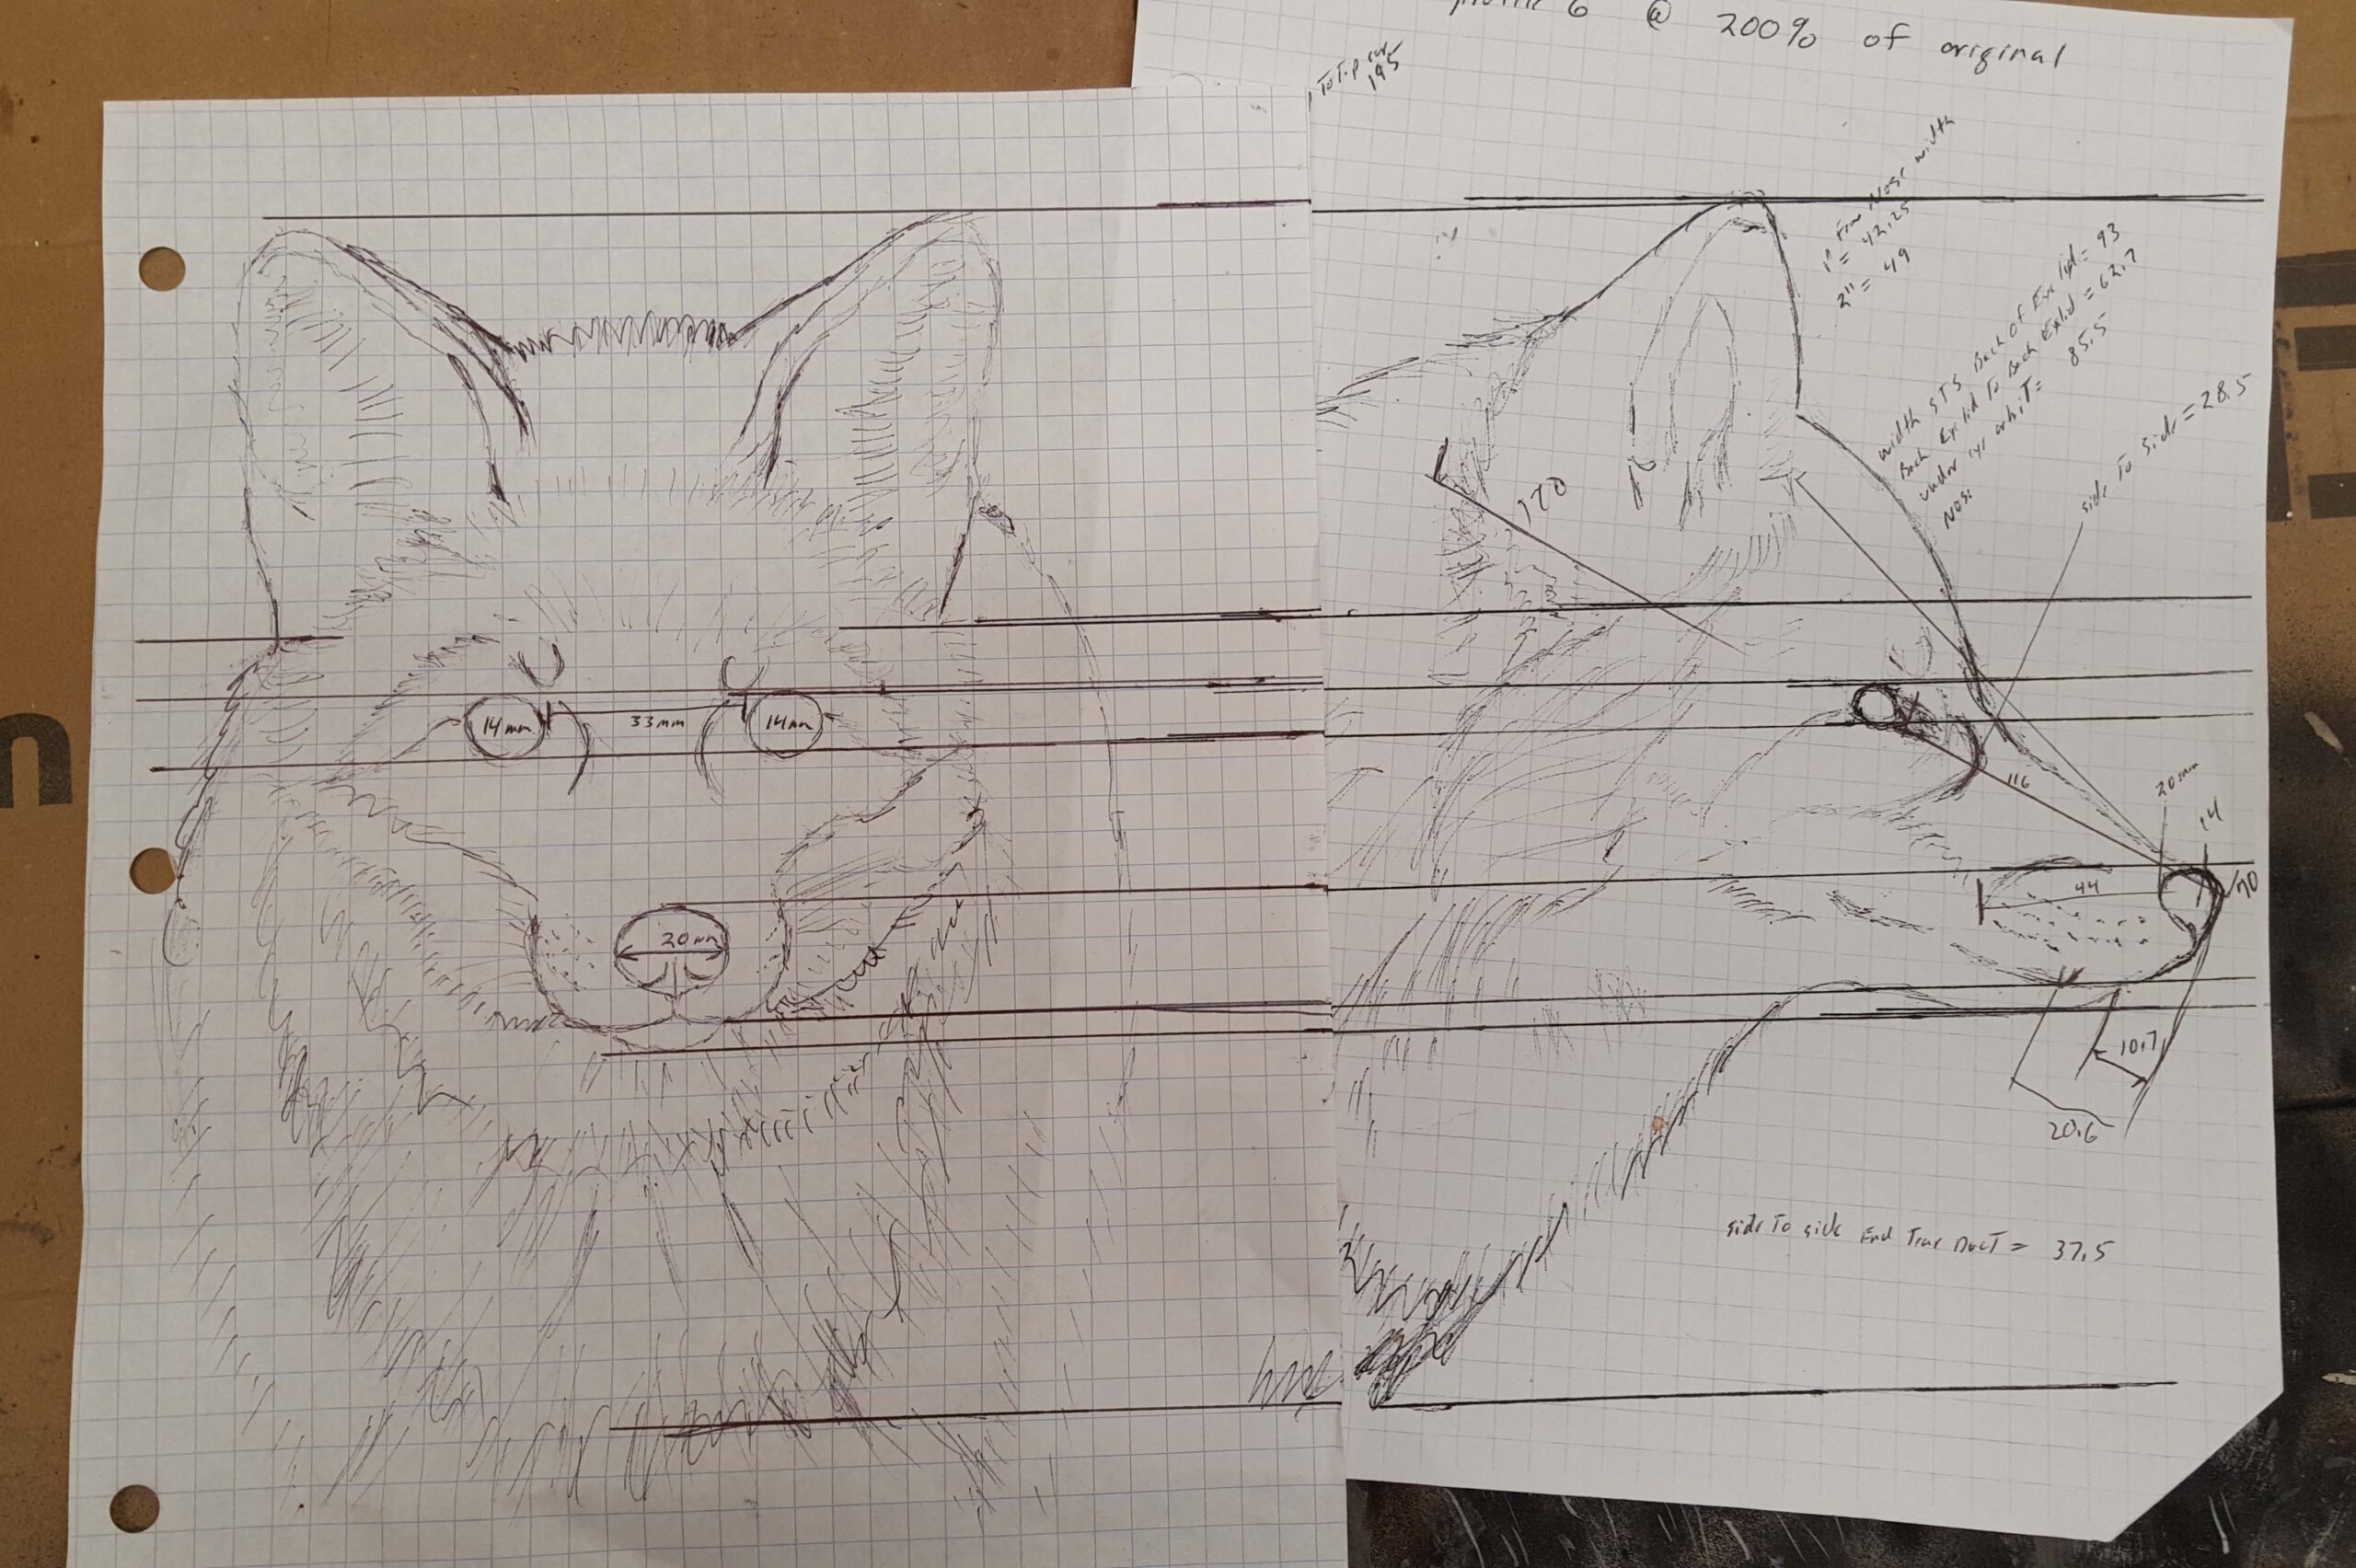
The initial front and side drawings of the Red Fox head.
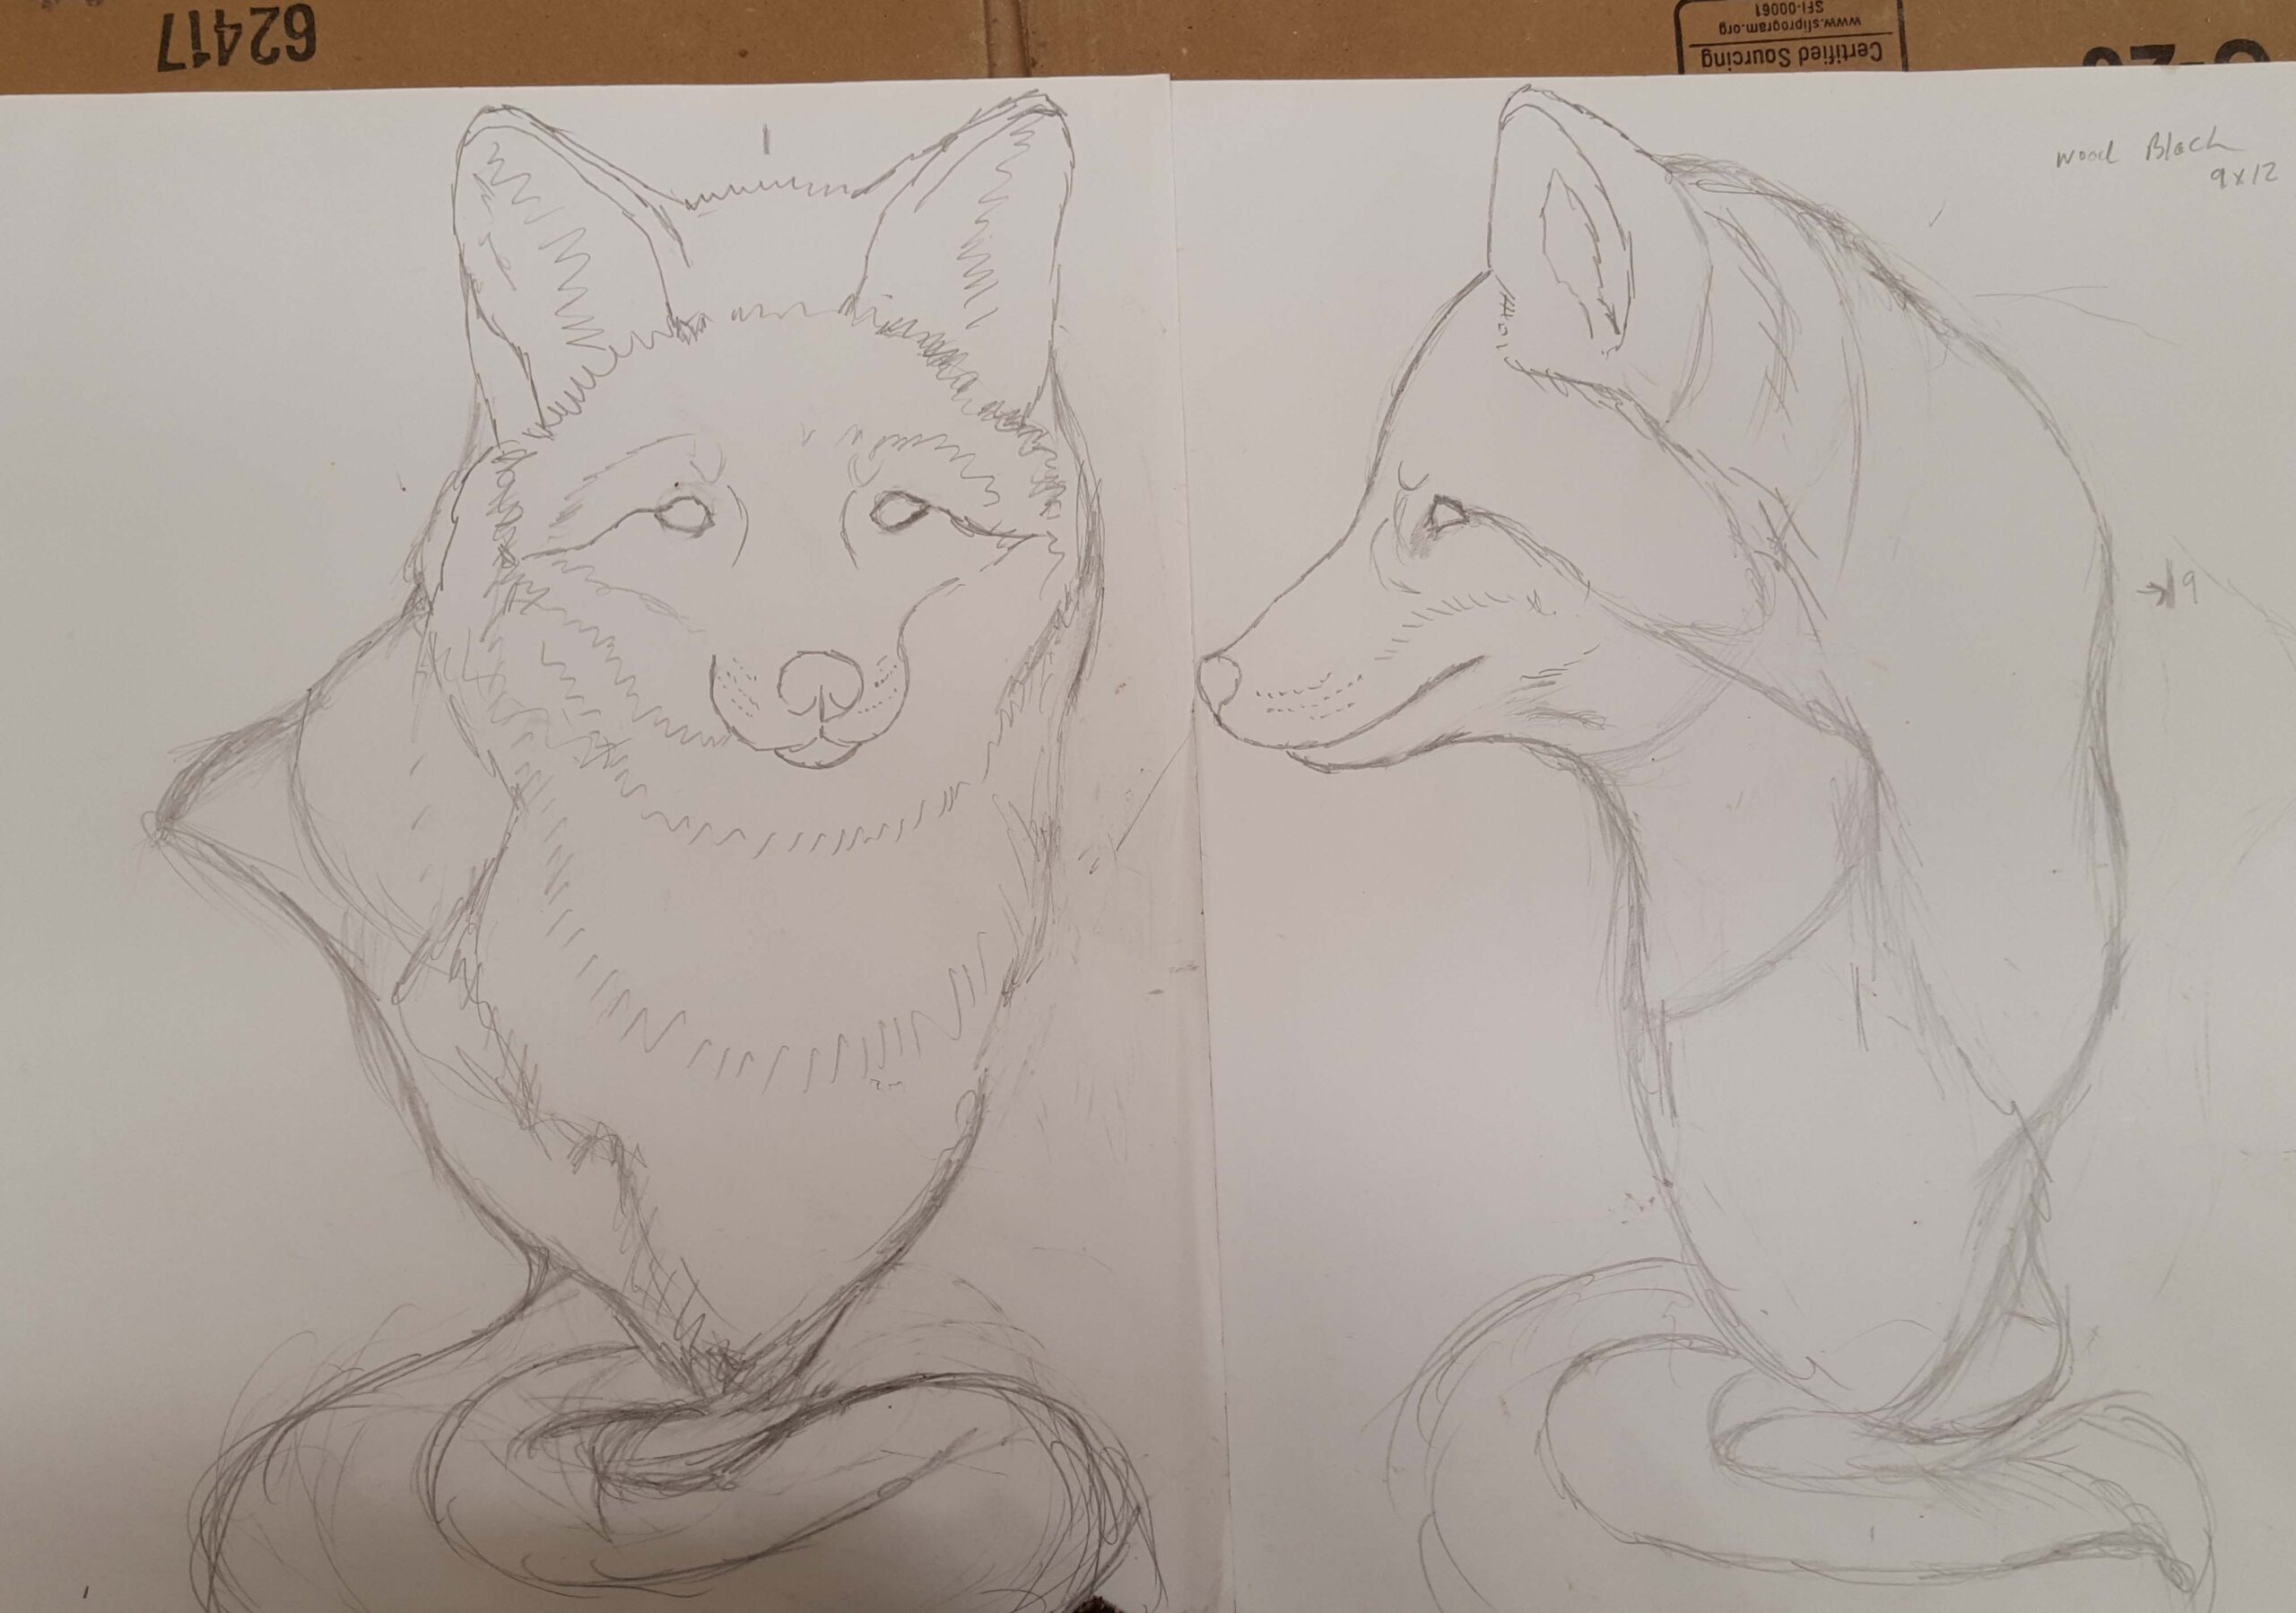
Rough sketches of the front and side view of the entire fox sculpture.
Because I wanted to carve the fox with a turned head, I needed to show part of the shoulder. At the same time I wanted to experiment with how the carving might be displayed. While the drawing does not show the base very well, my intent is that curve of the fox front chest will match the curve of the base.
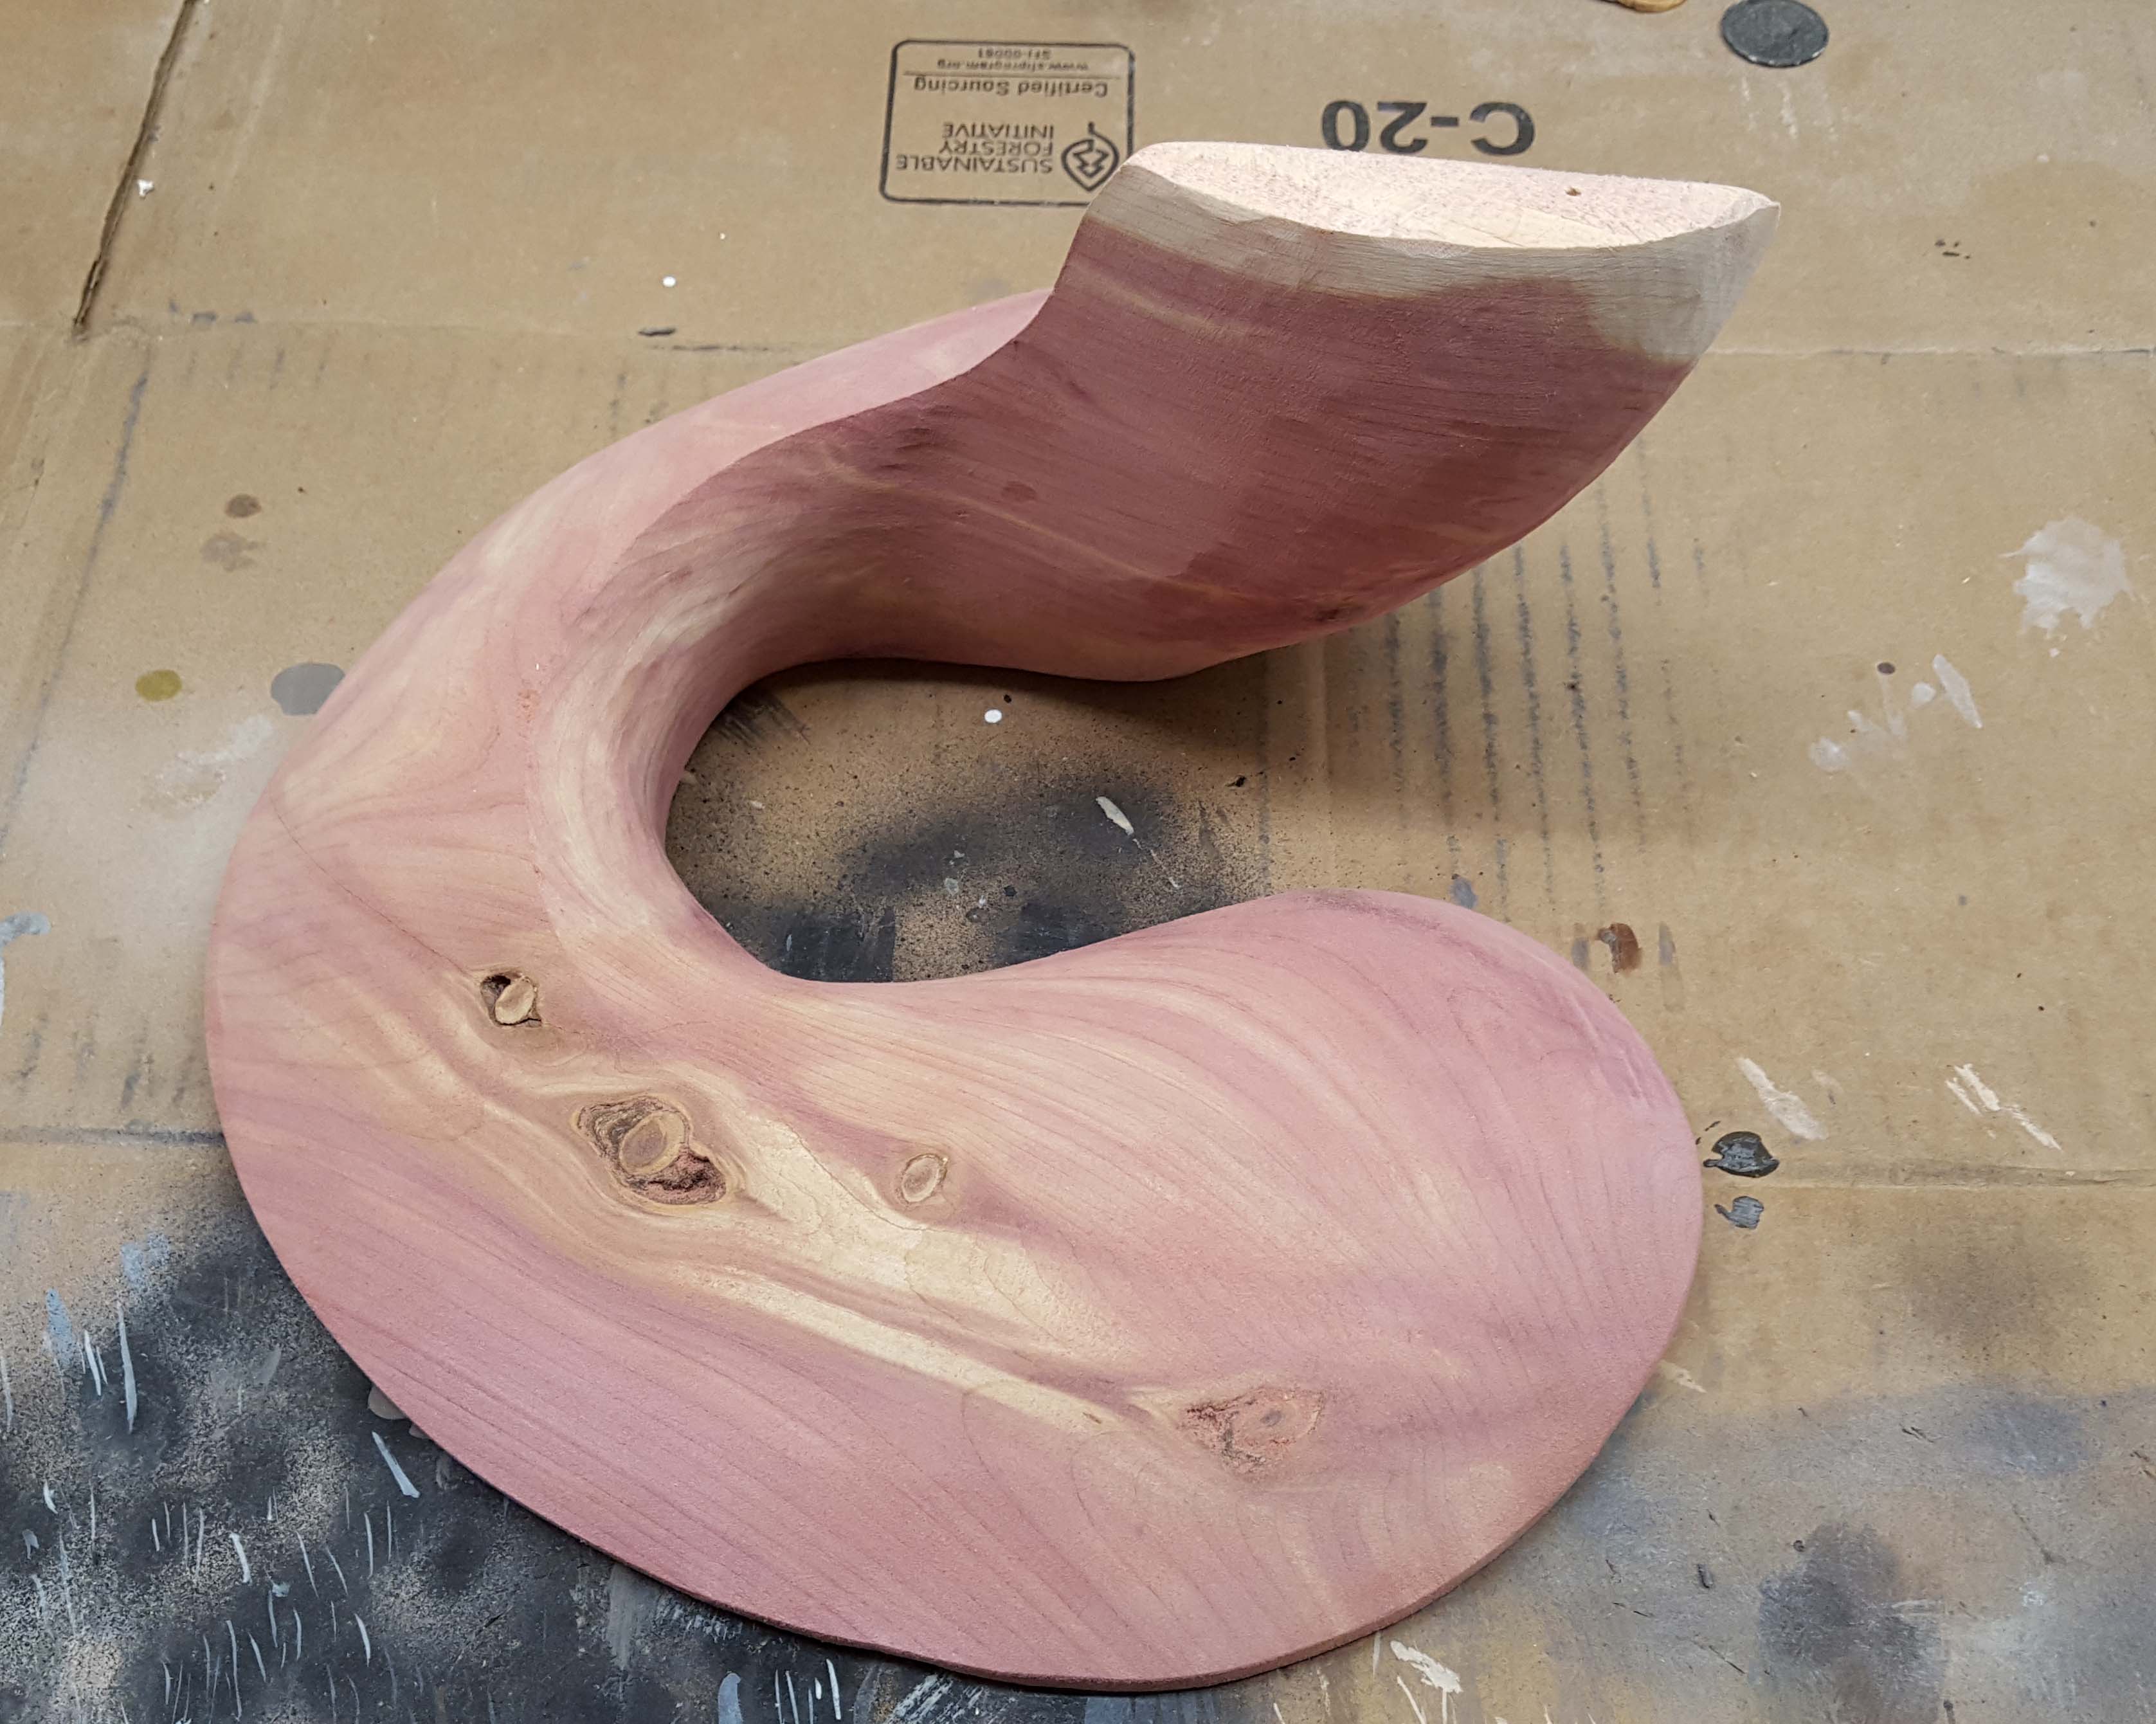
Red Cedar base that will hold the completed fox sculpture.
Starting the Clay Model
I use plasticine clay for this part of the project. Because is does not harden, I make a wood armature for the clay. I also add some quarter inch wire mesh over the surface of the wood to help the clay better adhere to the wood. The wood armature is about 3/8th smaller than the actual sculpture. This allows for some adjustments and adding detail such as creases in the fur.

Clay is being applied to the wooden armature that has wire mesh stapled to the surface.
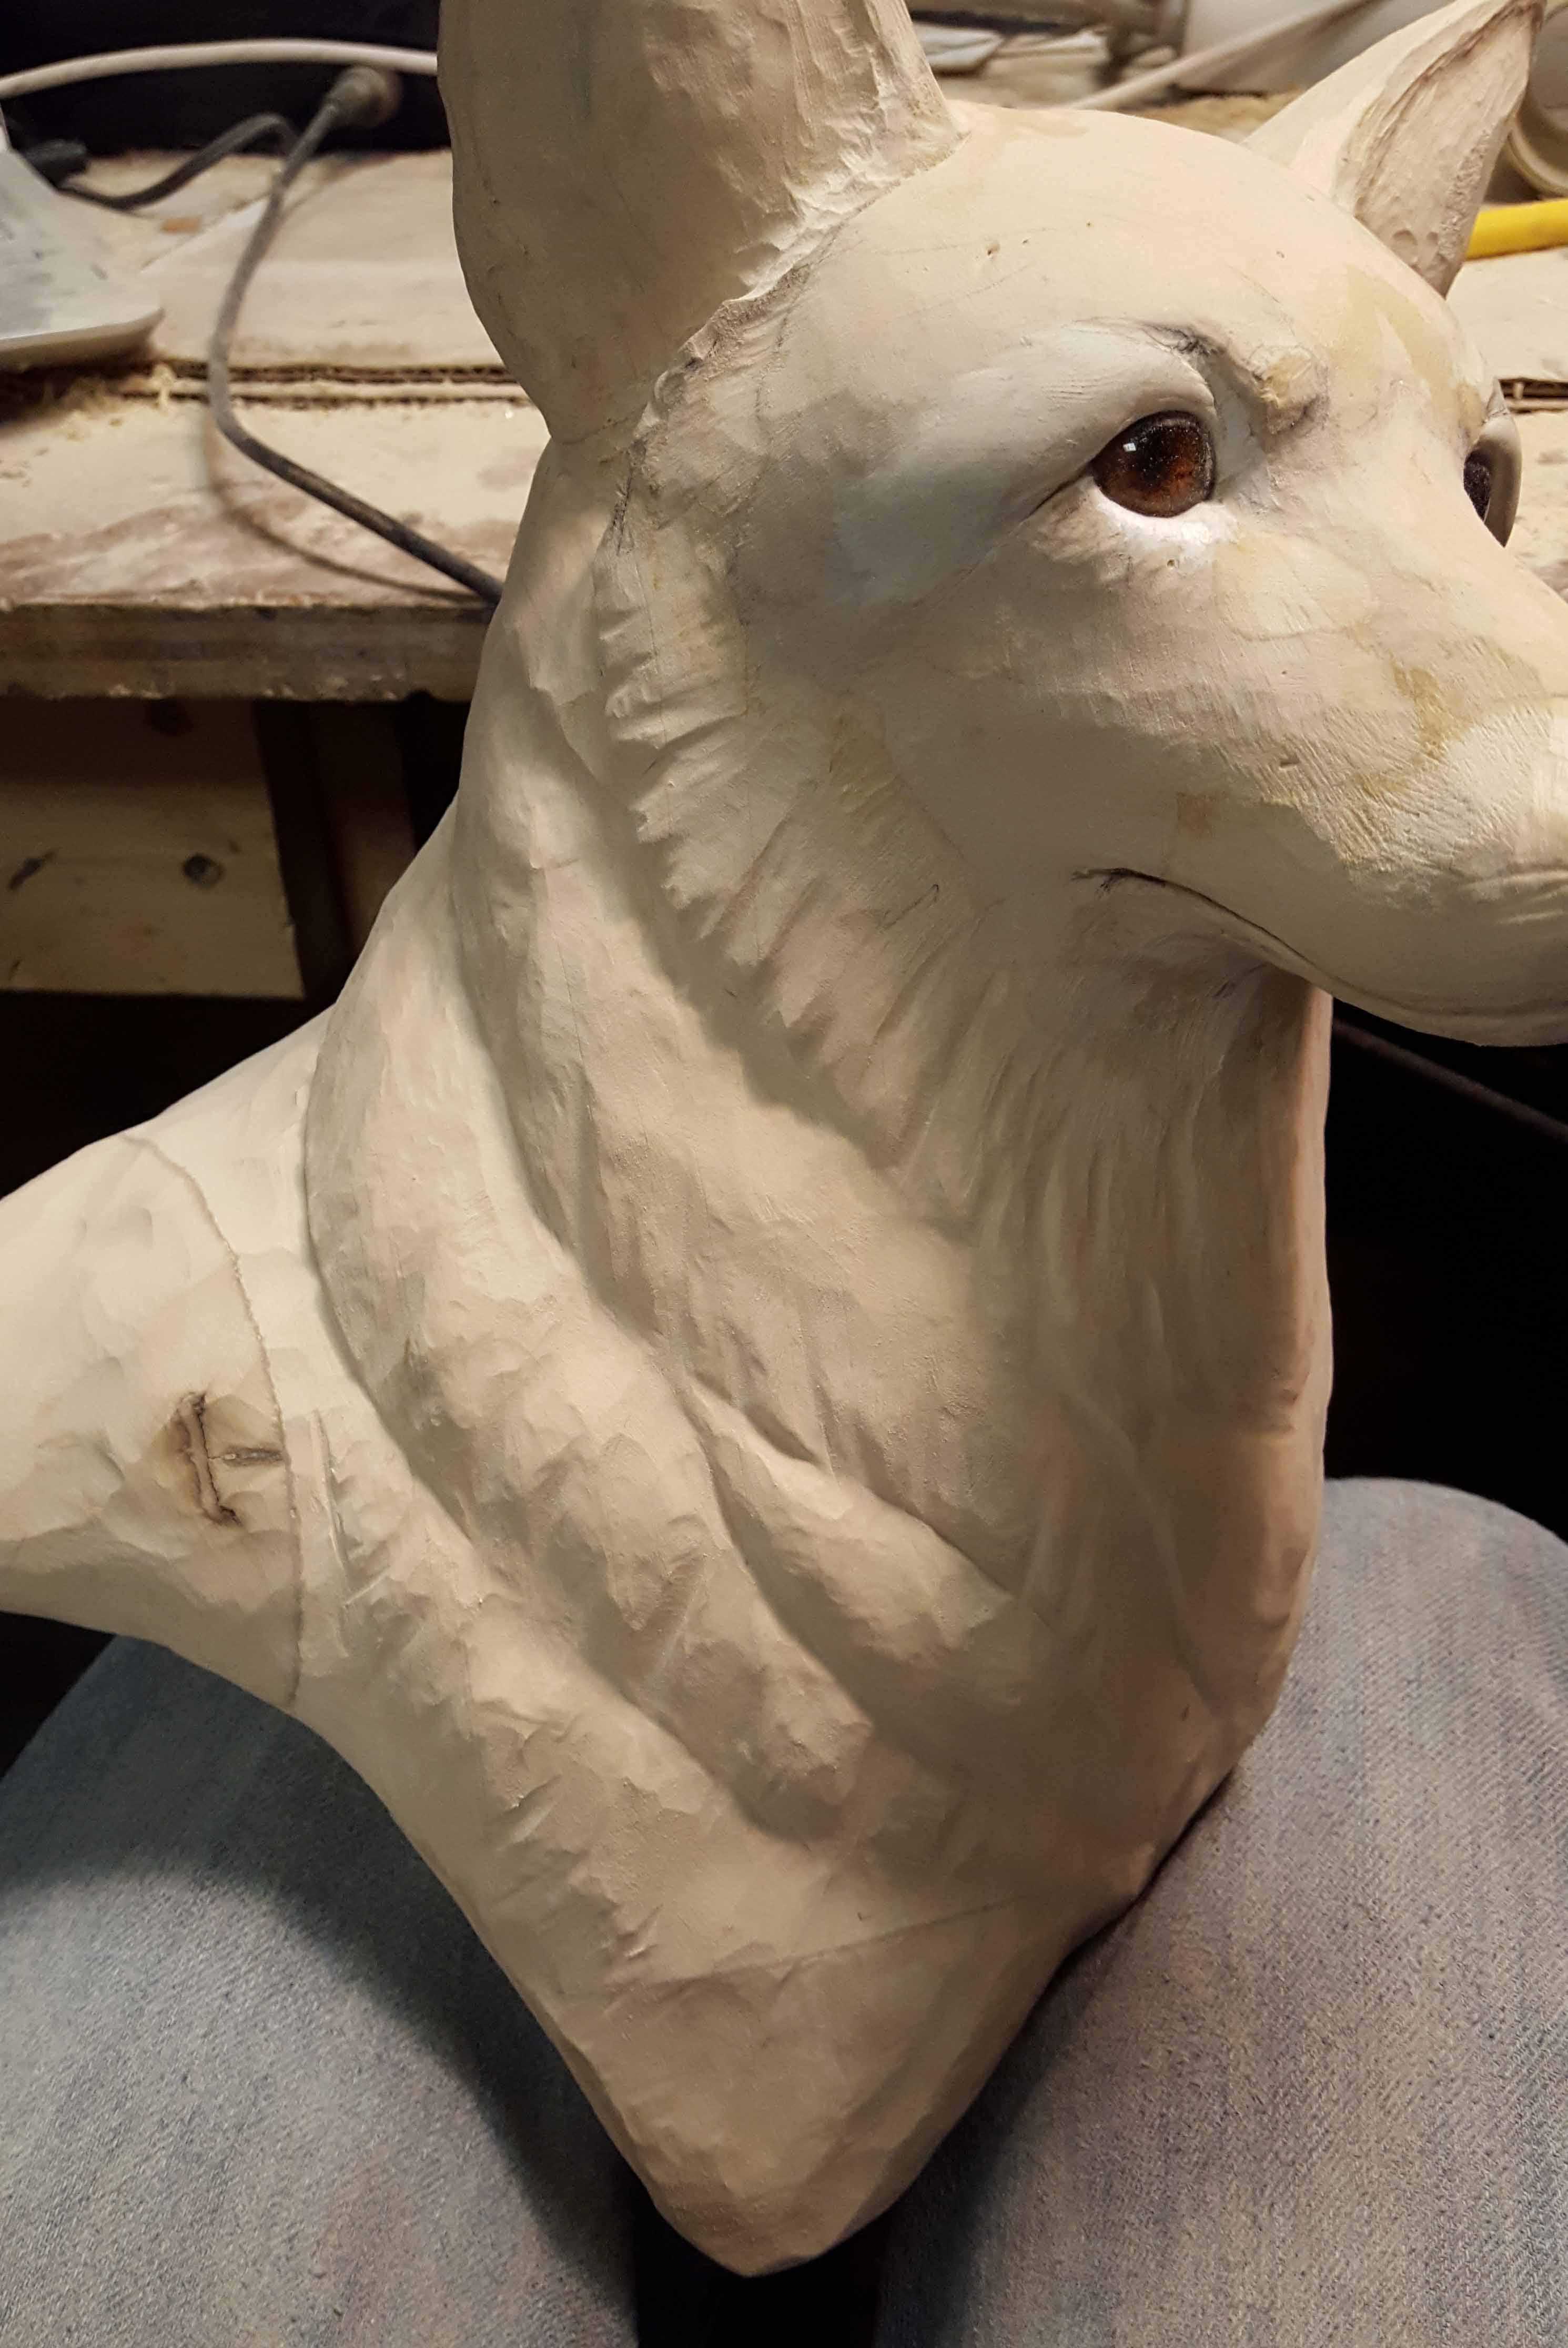
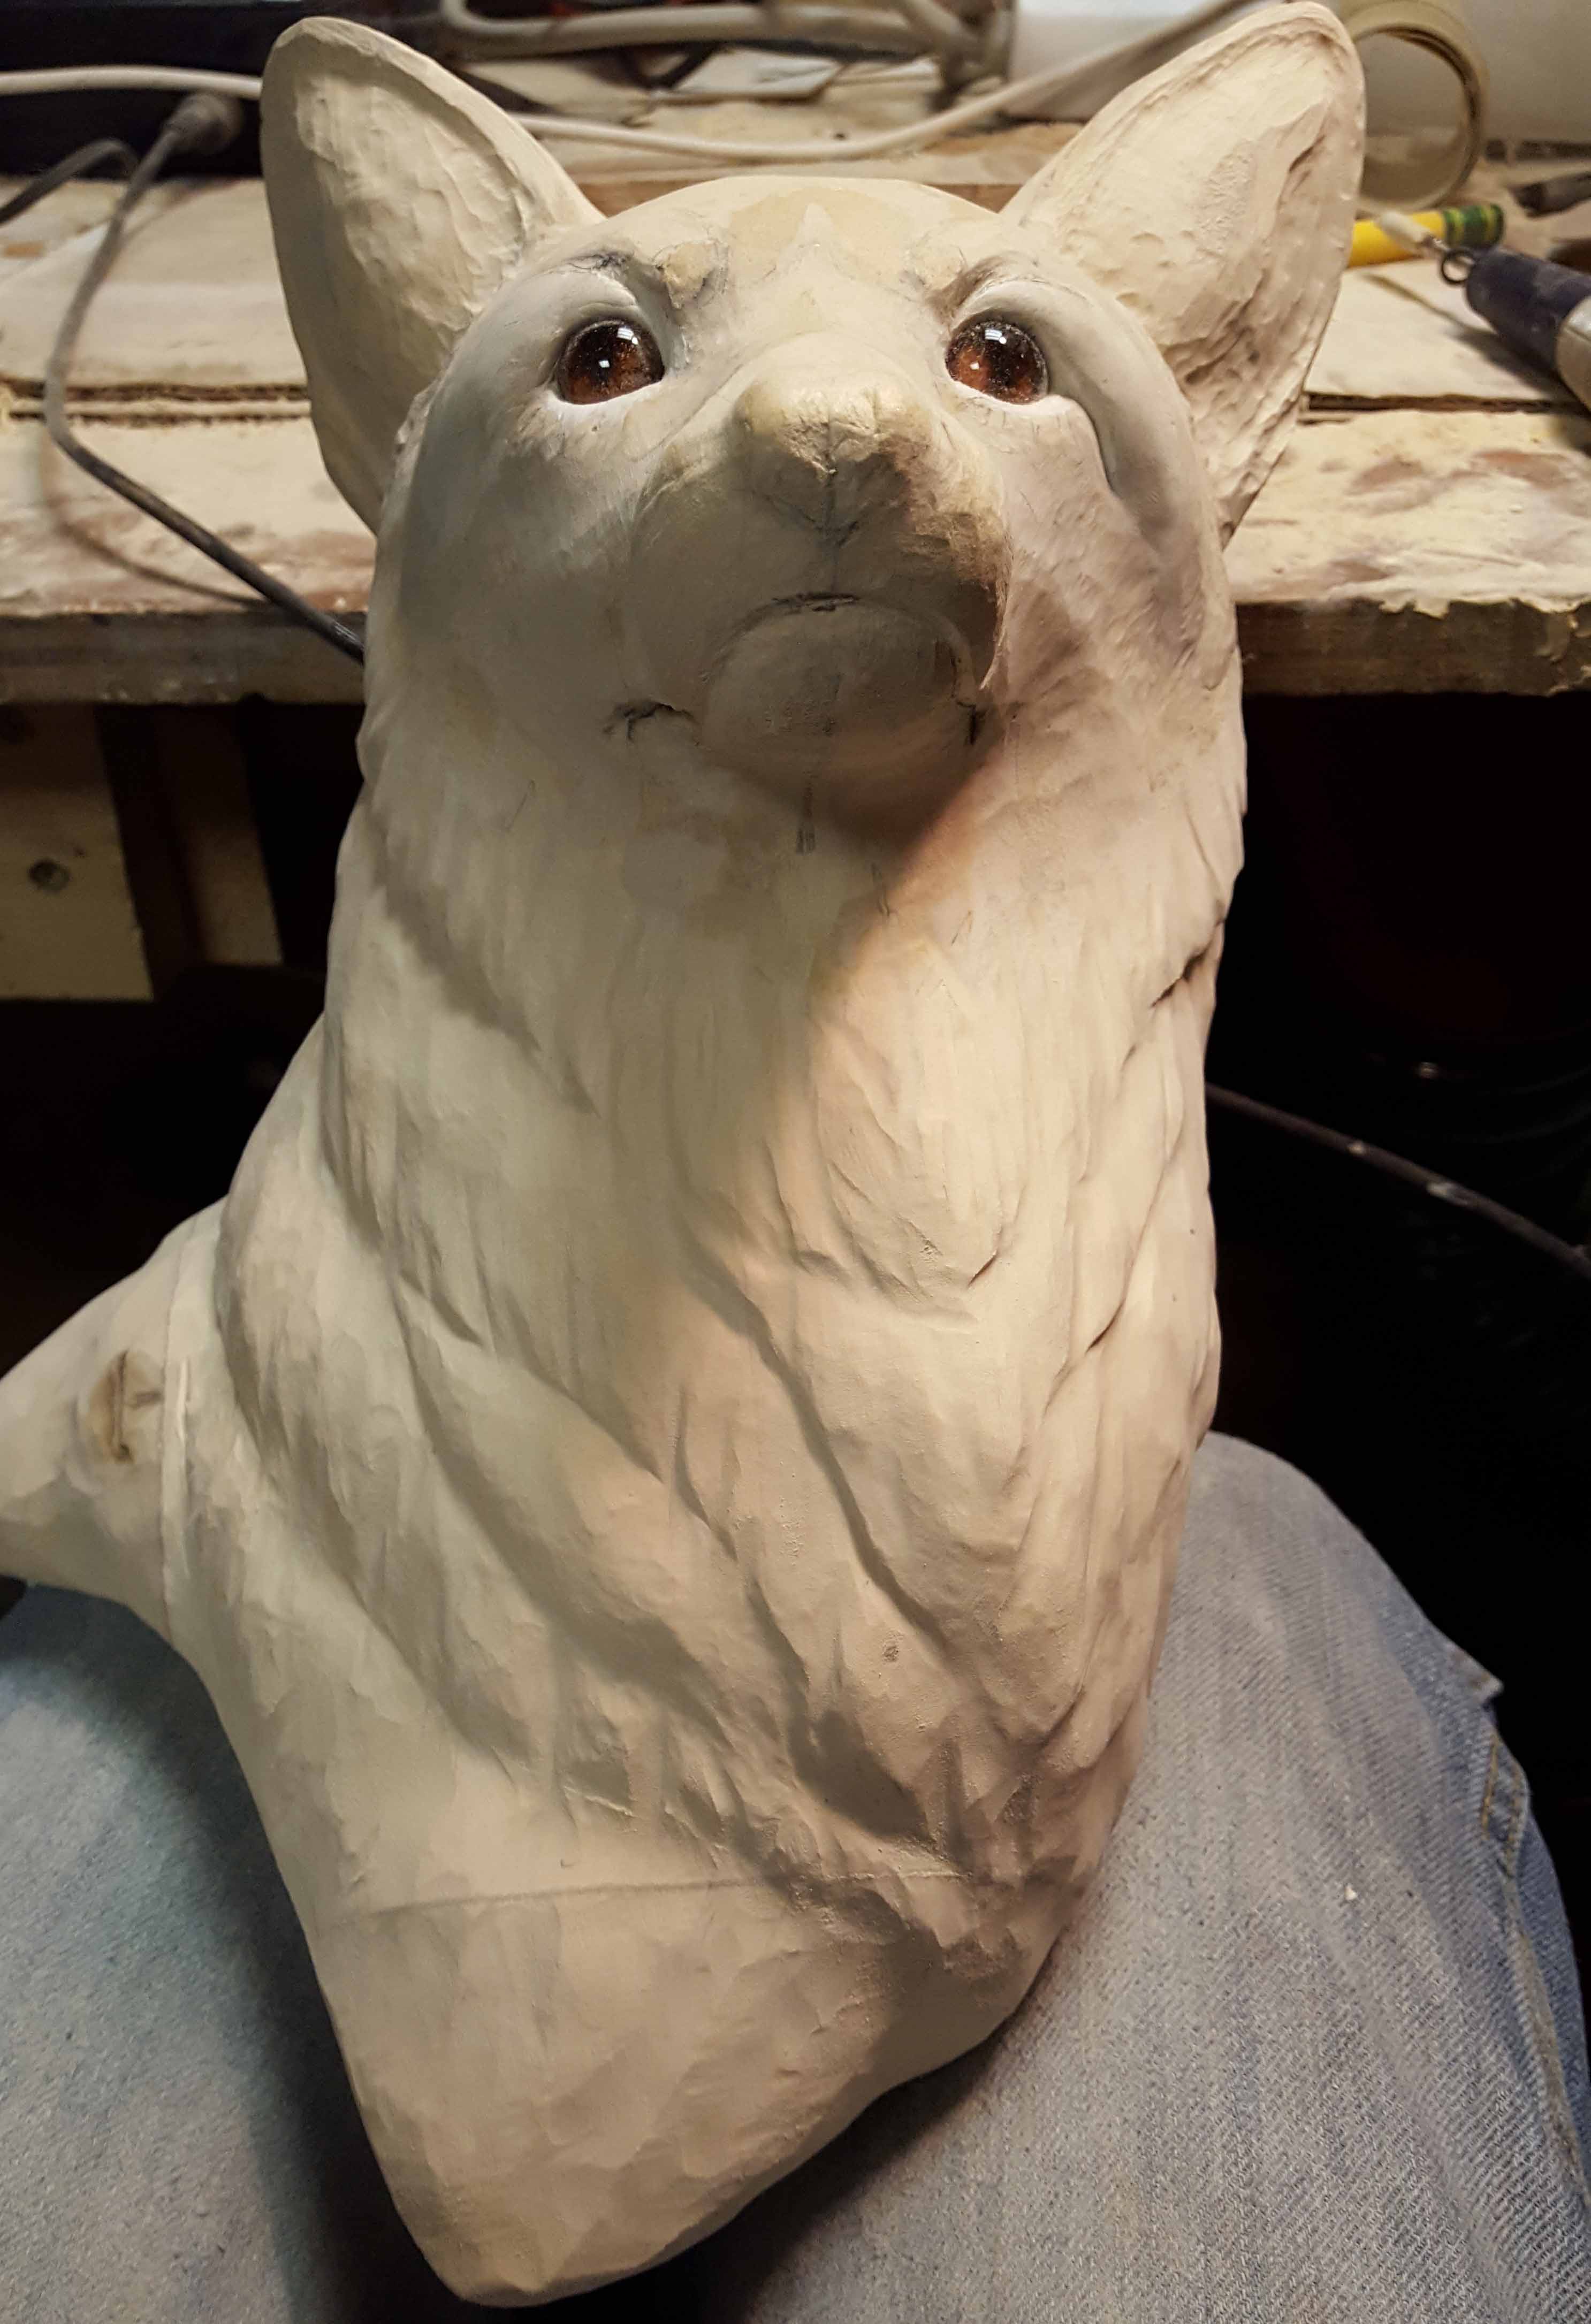
I start by covering the entire armature with clay. Note that some areas, such as the ears and thicker fur, will need additional clay added when refining the over all shape. Once the armature is covered with clay, I focus on the nose and muzzle. Next, I’ll locate the eyes. On this clay model I am initially using wooden eyes that I made from a dowel. I like to use the tip of the nose for most of the measurements on the face and ears.
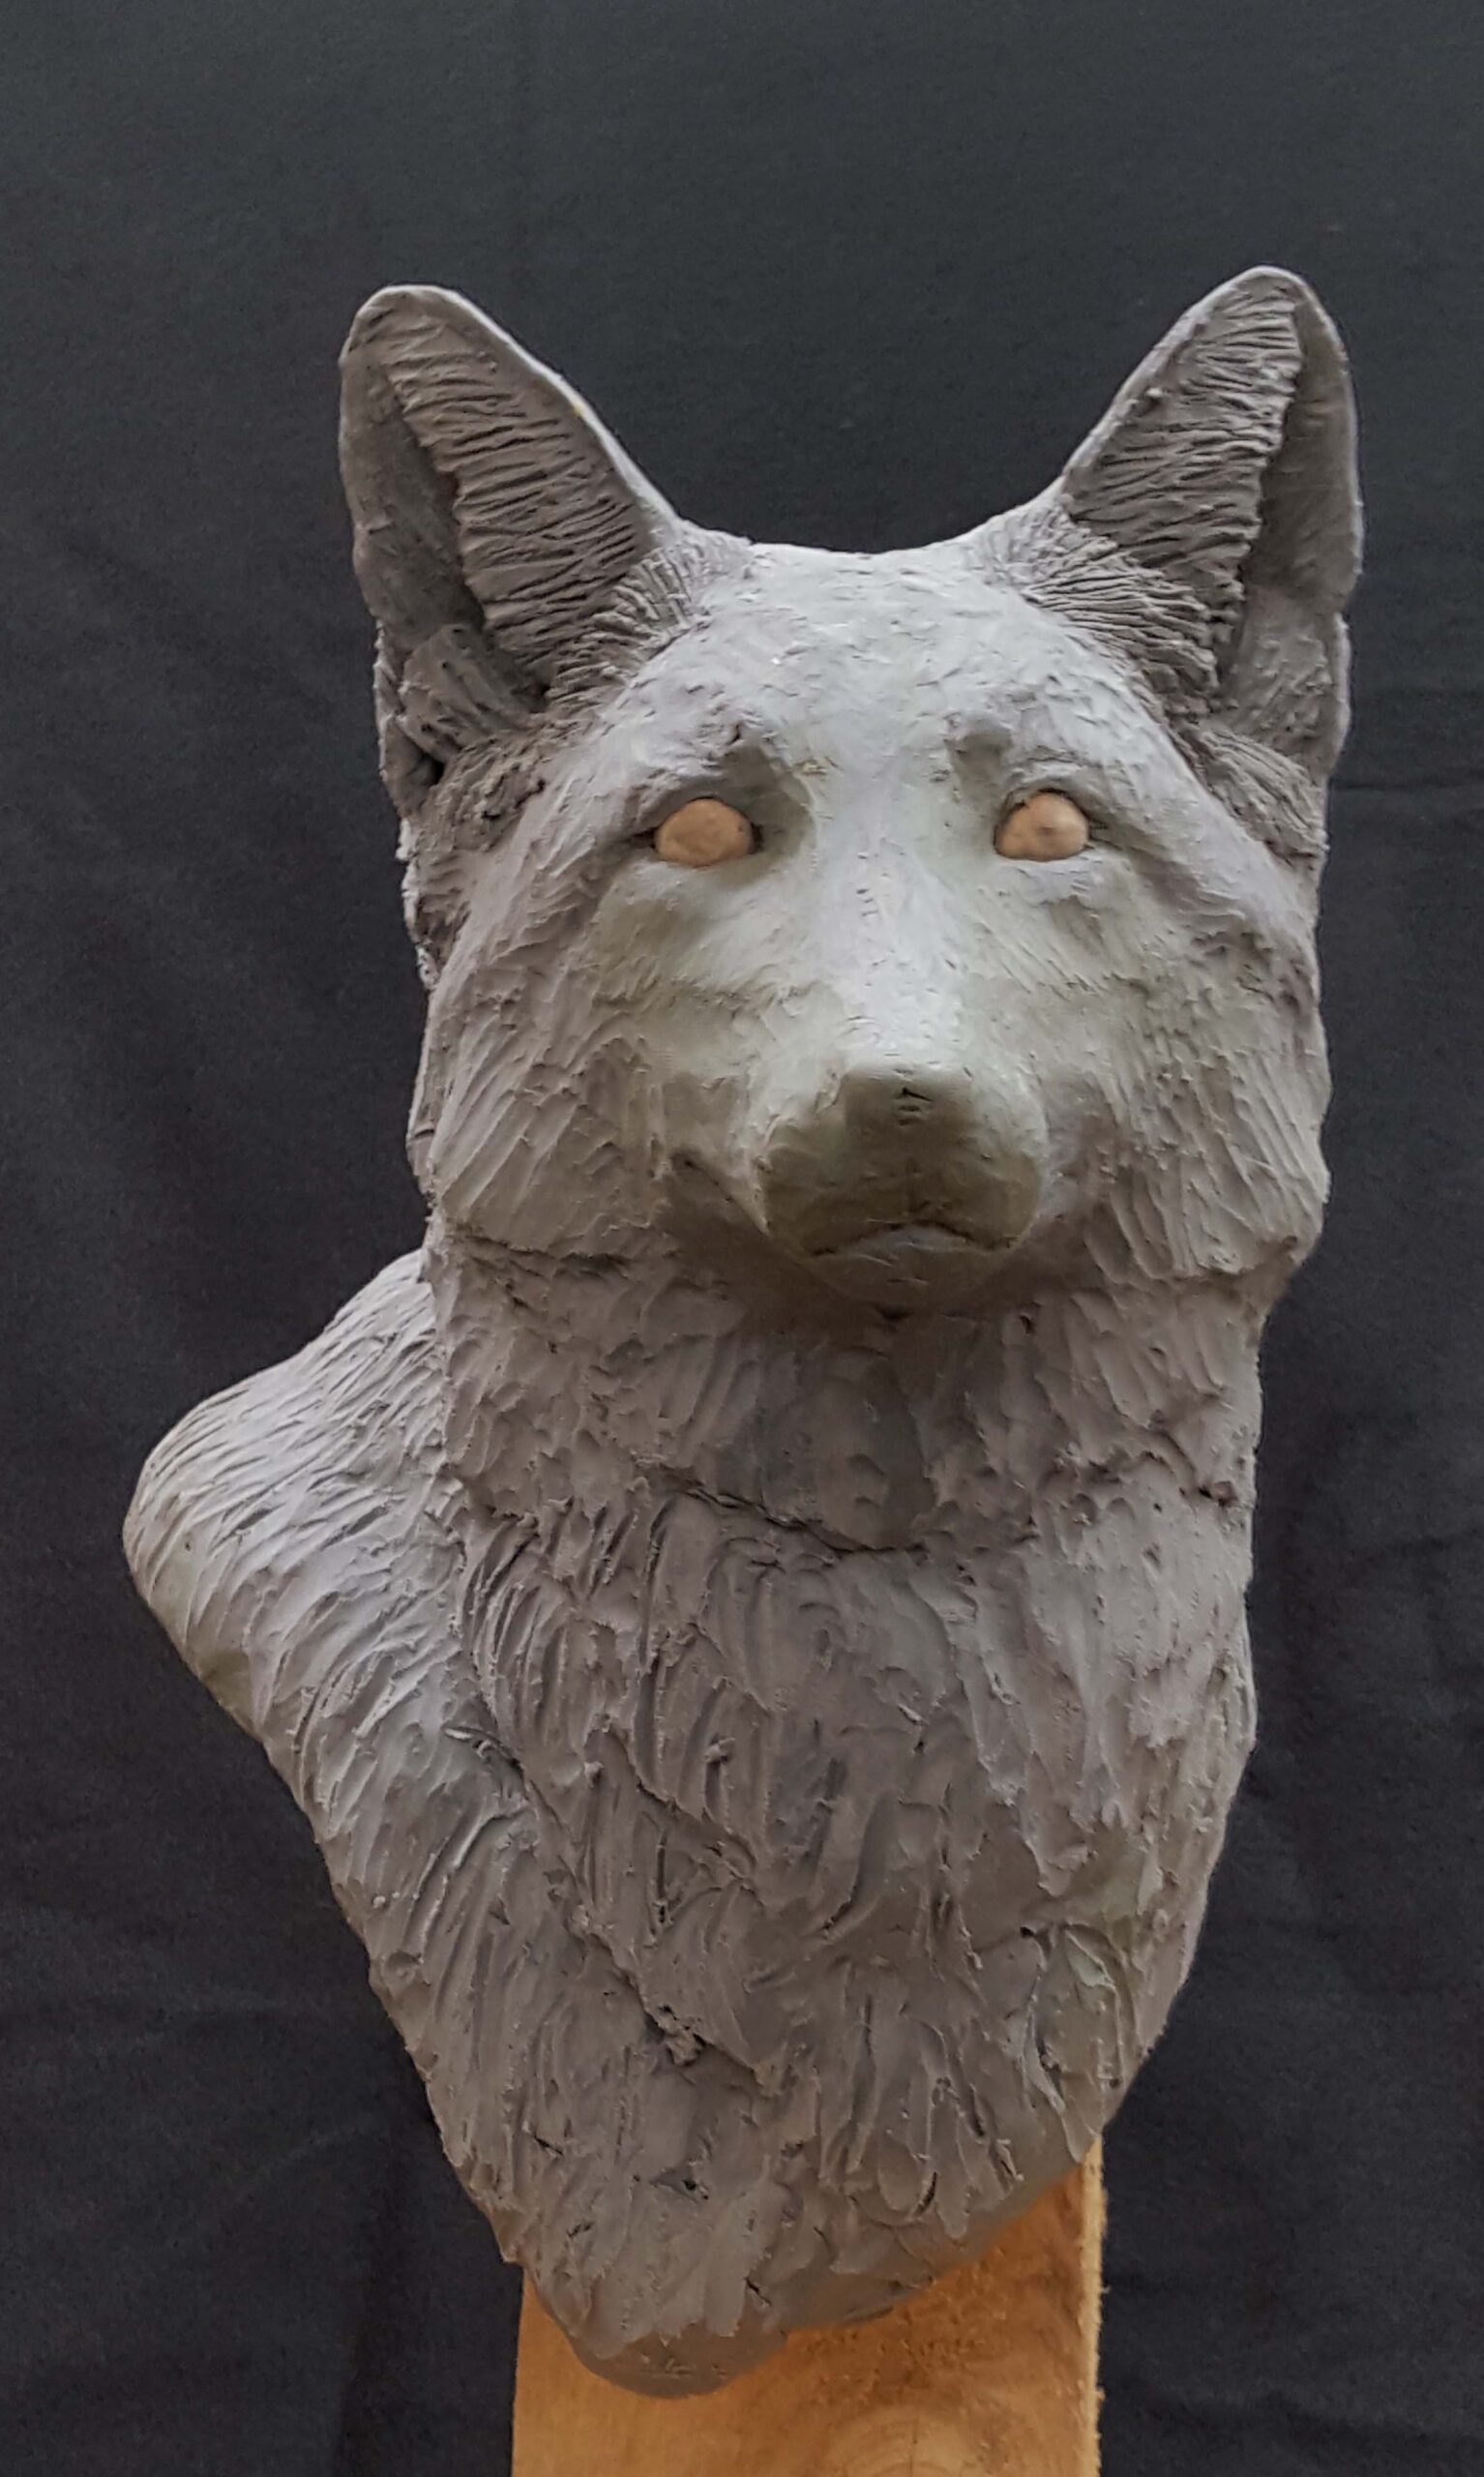
Front view of the clay sculpture that is almost finished.

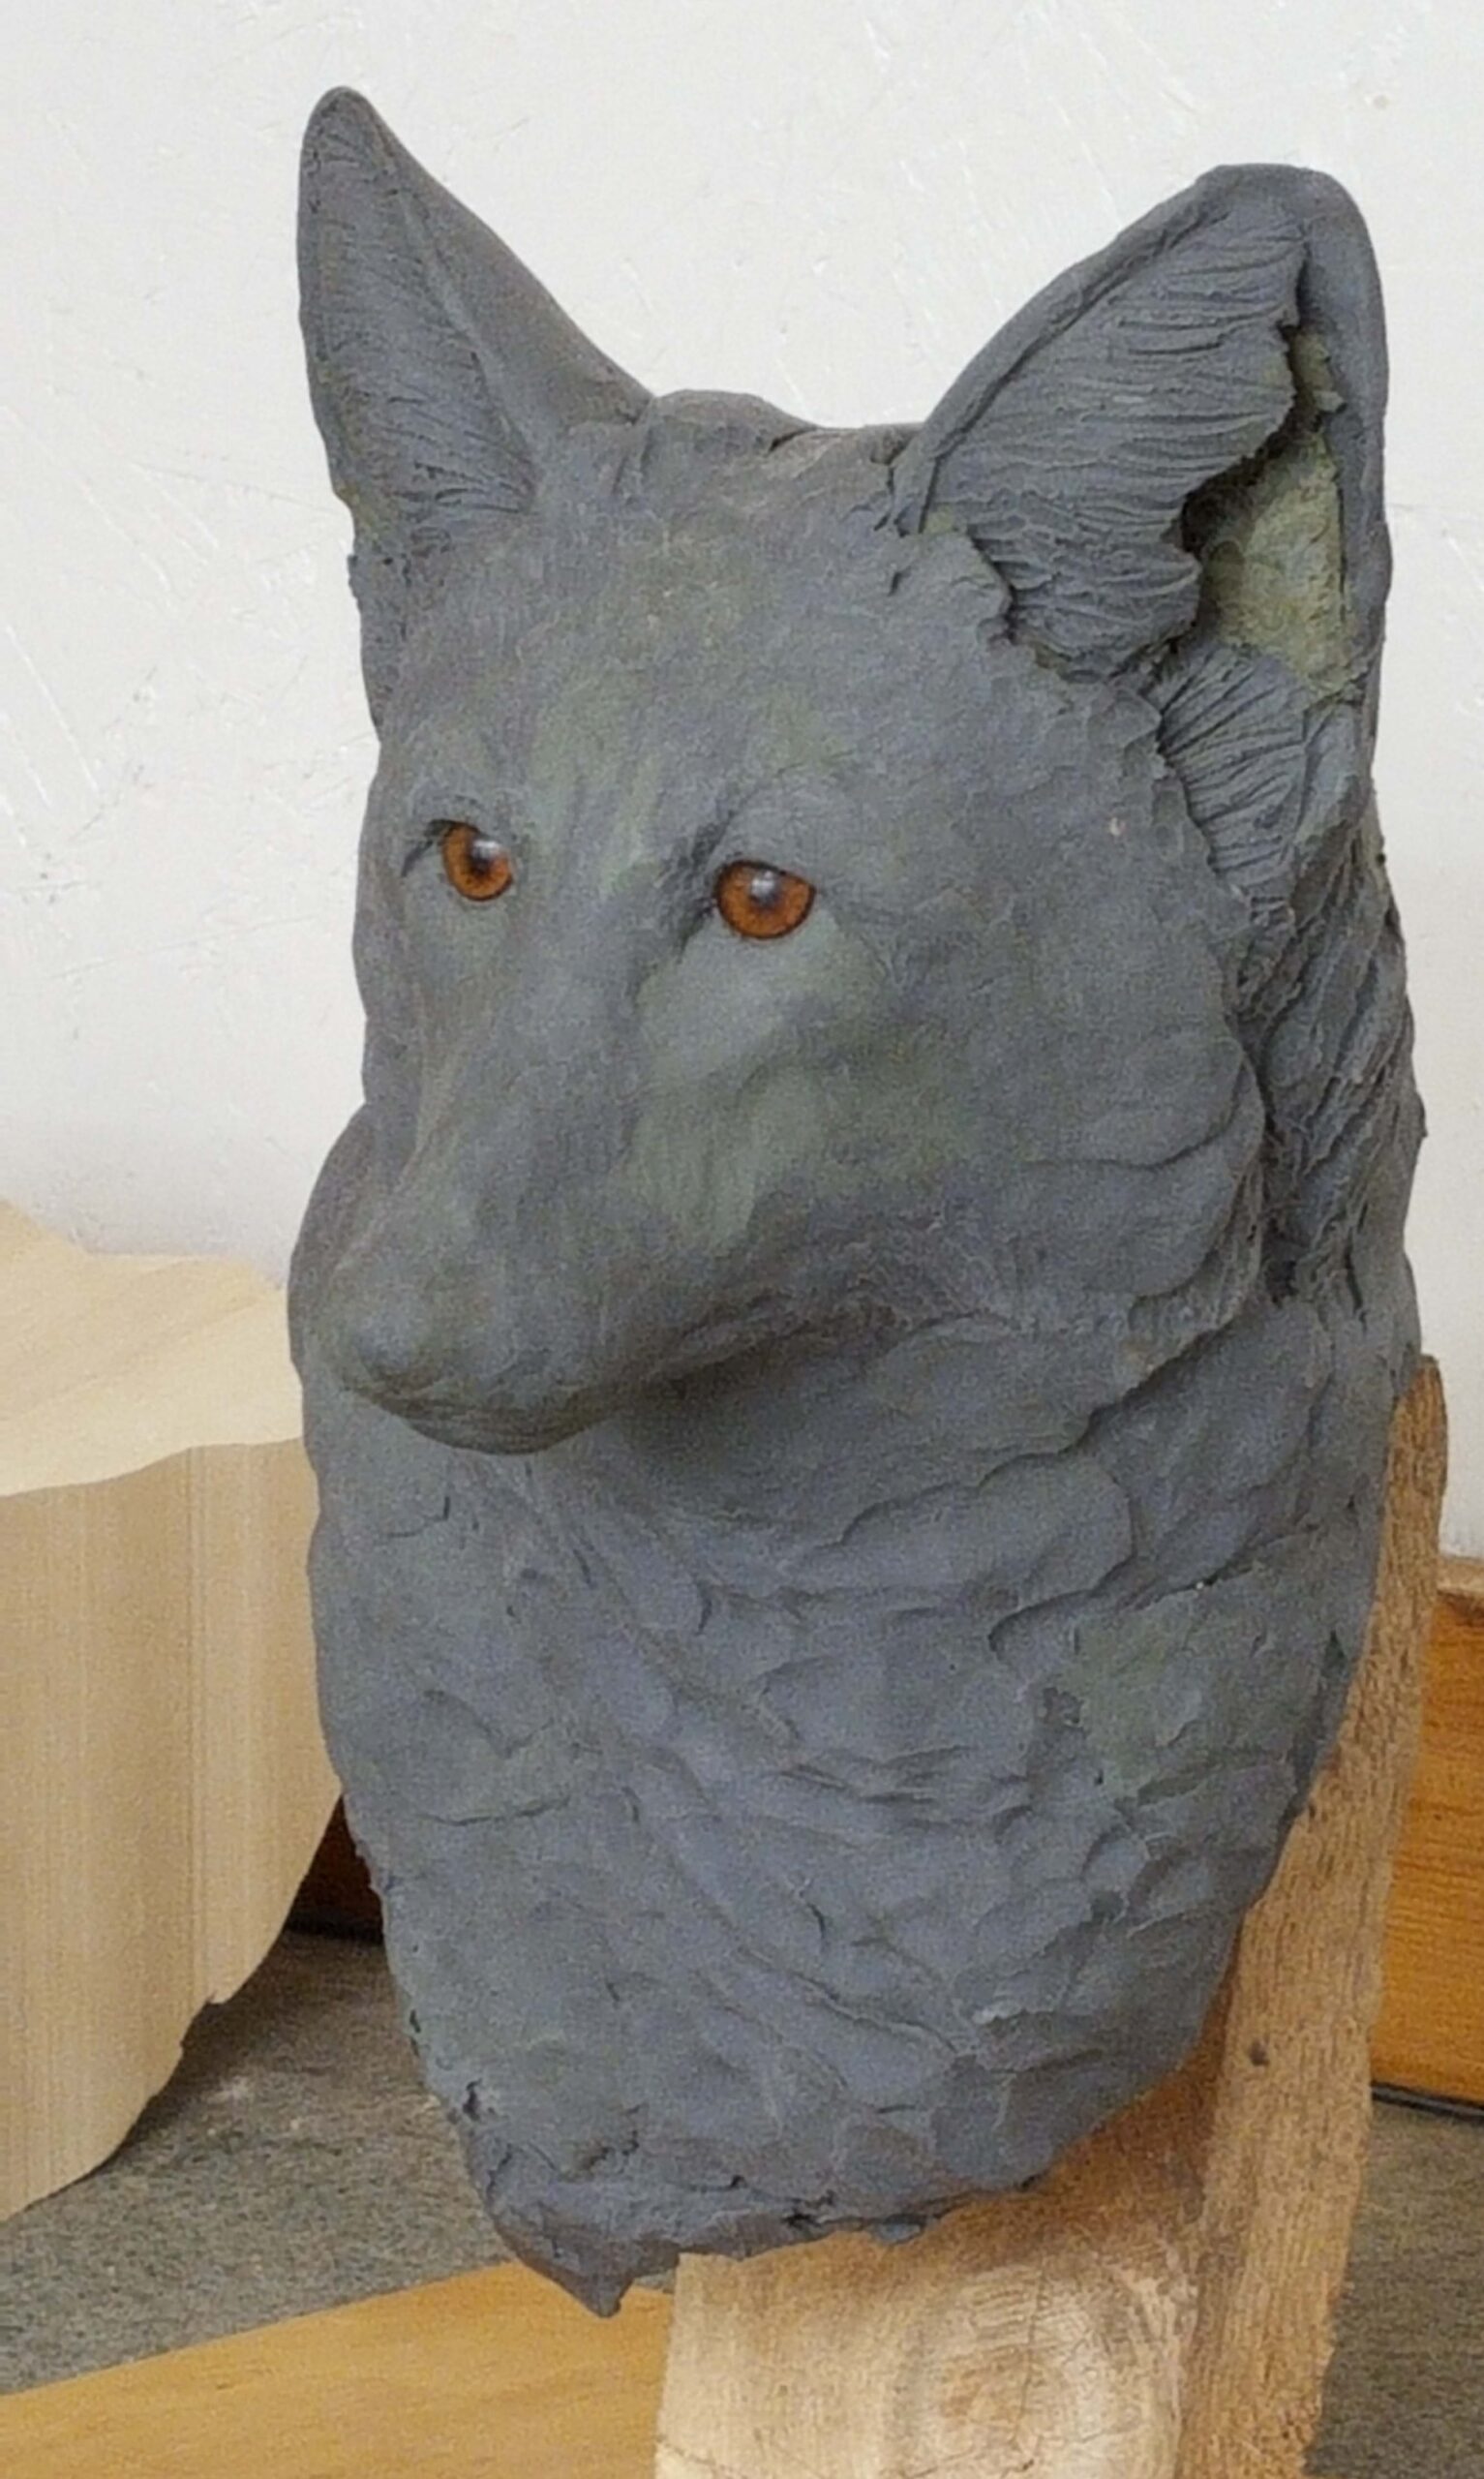
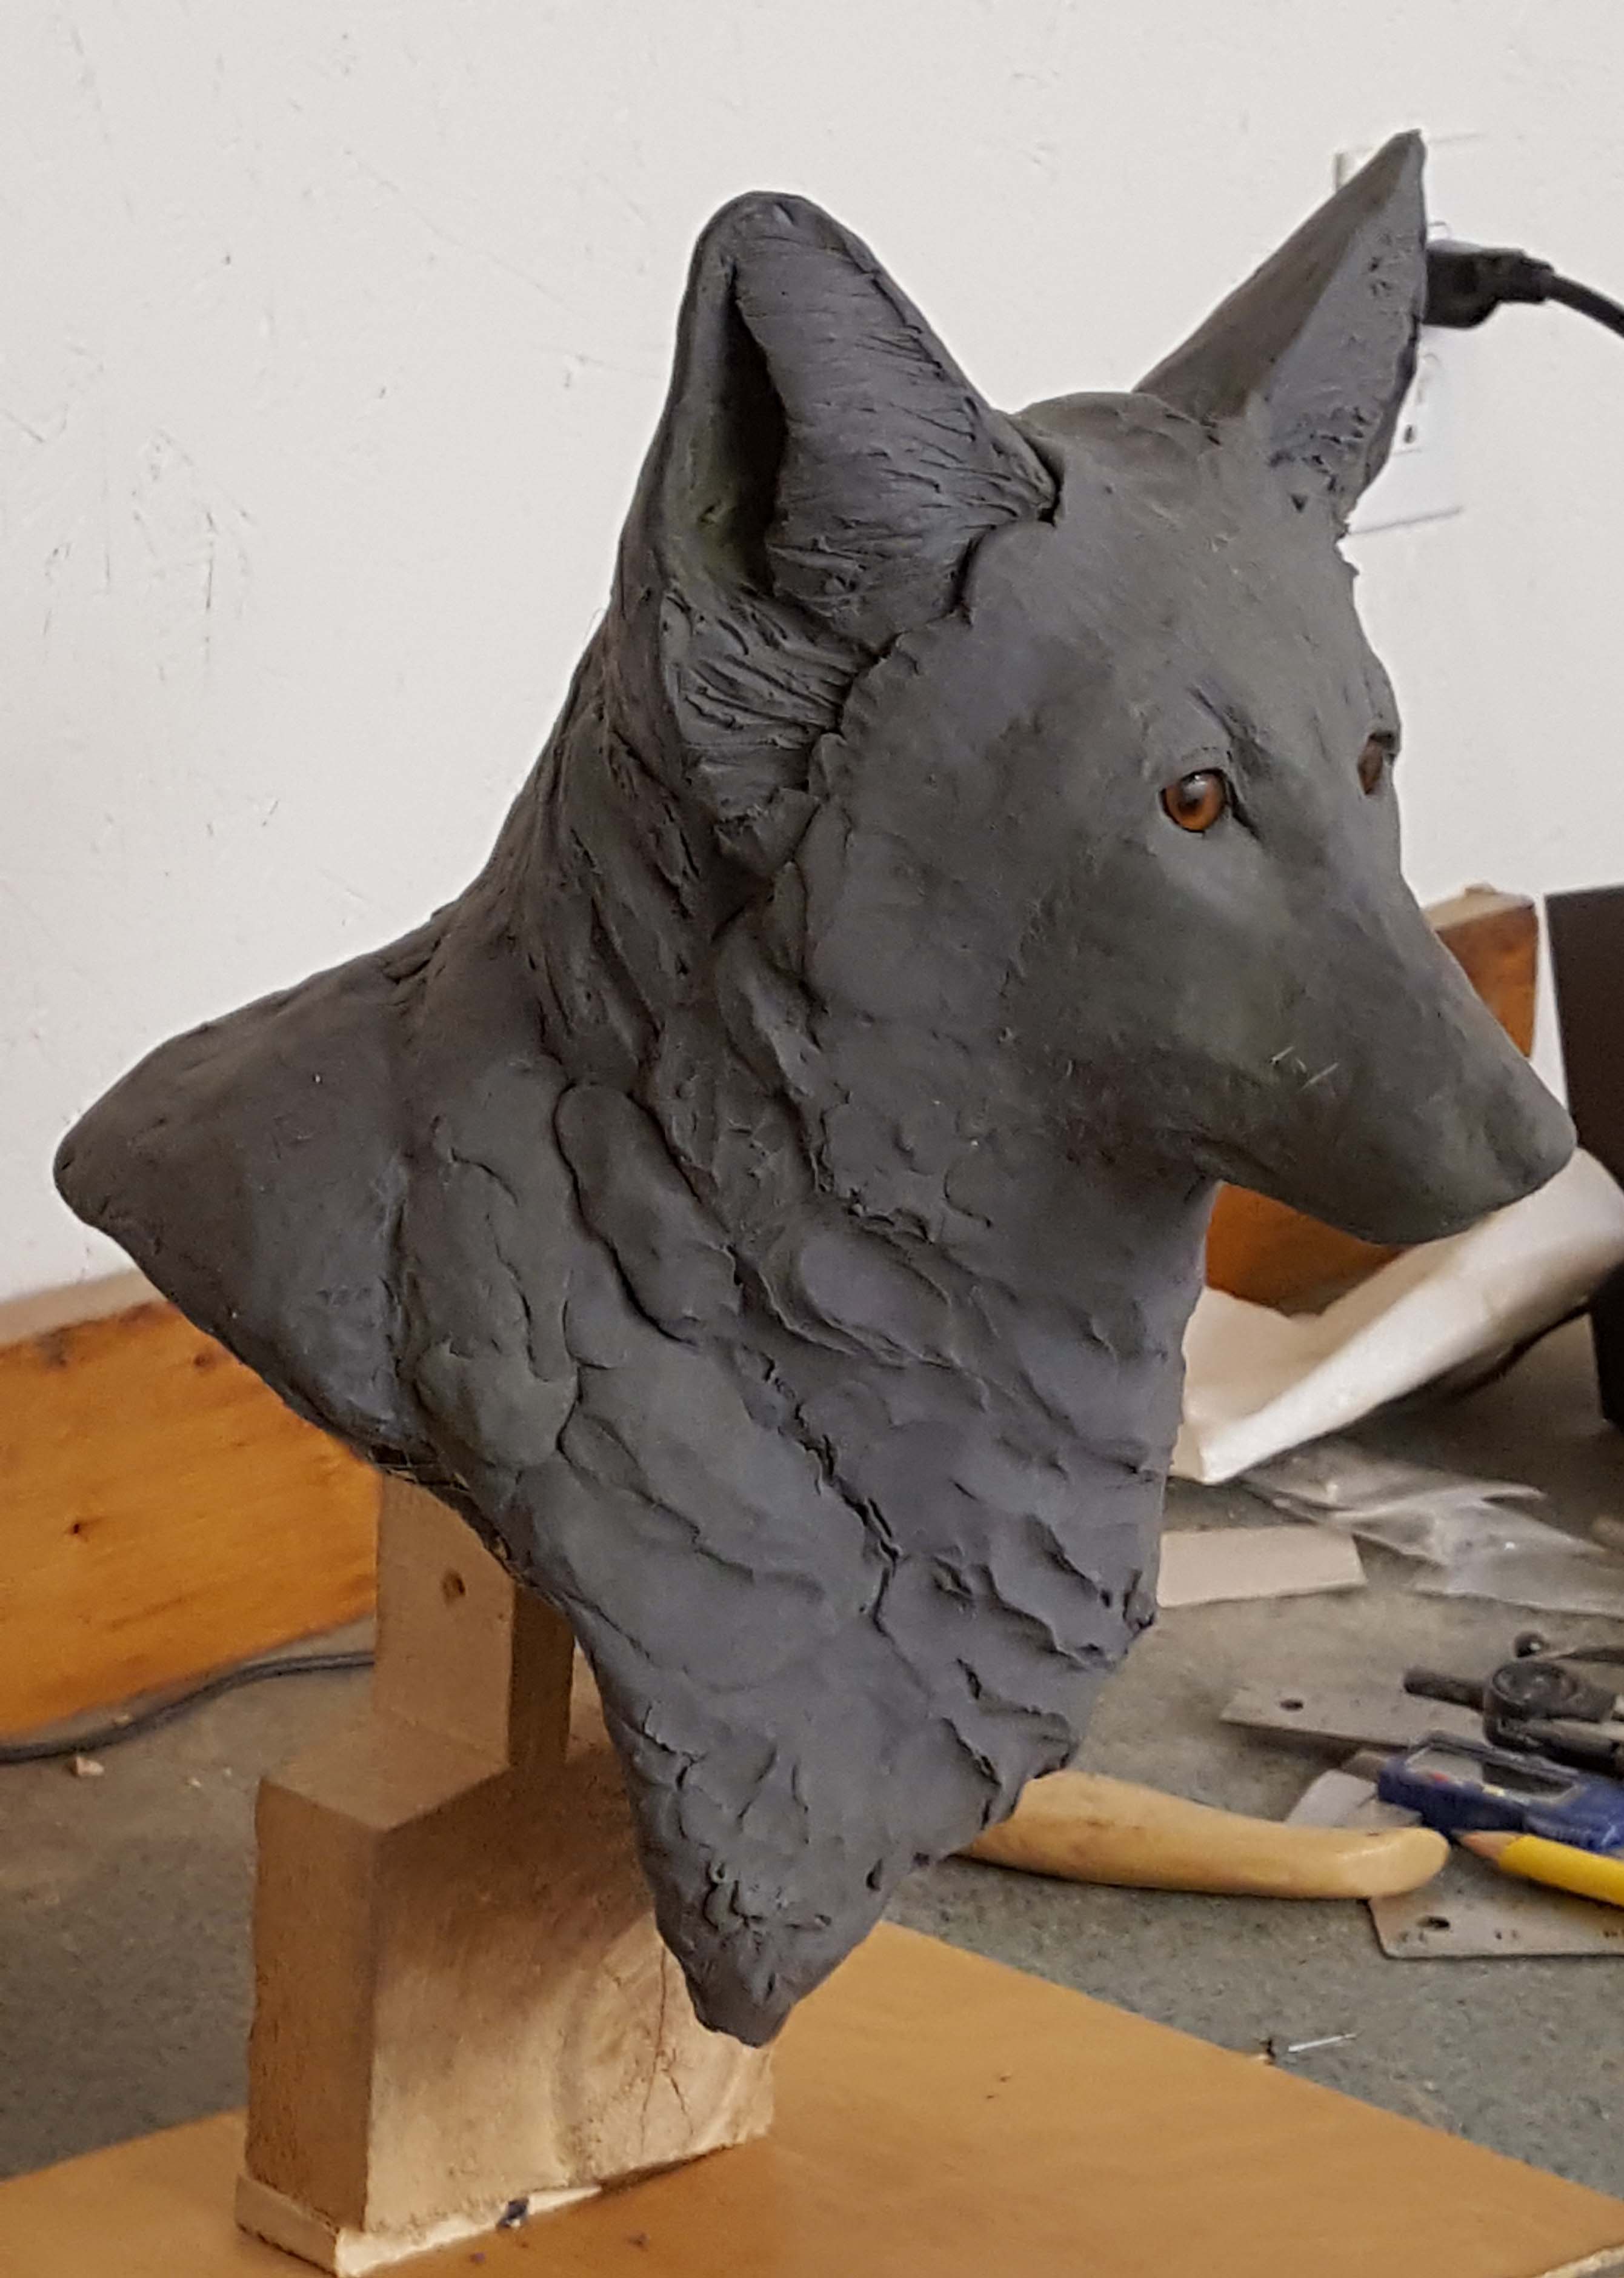
Side view of the red fox clay sculpture.
Time is your friend when sculpting
It is important to note that unless you are very skilled and knowledgeable about your subject, you should take your time. Work on a part of the sculpture until you think it looks okay. I say “okay” because at this point you don’t know how it will look when all the other key features (nose, eyes, ears, lower jaw, lips, bone structure and fur details) are added. I commonly take a break (hours or a day) in between sculpting sessions. A fresh perspective is very helpful as opposed to rushing through.
Shadows are your friend
Light that casts a shadow over your sculpture will help you check for symmetry. This is particularly important on the face. Let the shadows help you. Another way to help keep your sculpture symmetrical is to use both of your hands at the same time. With your thumbs touching each other, use your fingers to feel both sides of the face. You can even close your eyes because your fingers will point out things that you can’t see. Be sure to occasionally step away from your sculpture and look at it from different angles. Most people will see your sculpture from a distance and judge it with first impressions. Check to see if your first impressions are what you intend them to be. If anything unusual catches your eye, then it will most likely be seen by others.
The Final Clay Reference Model
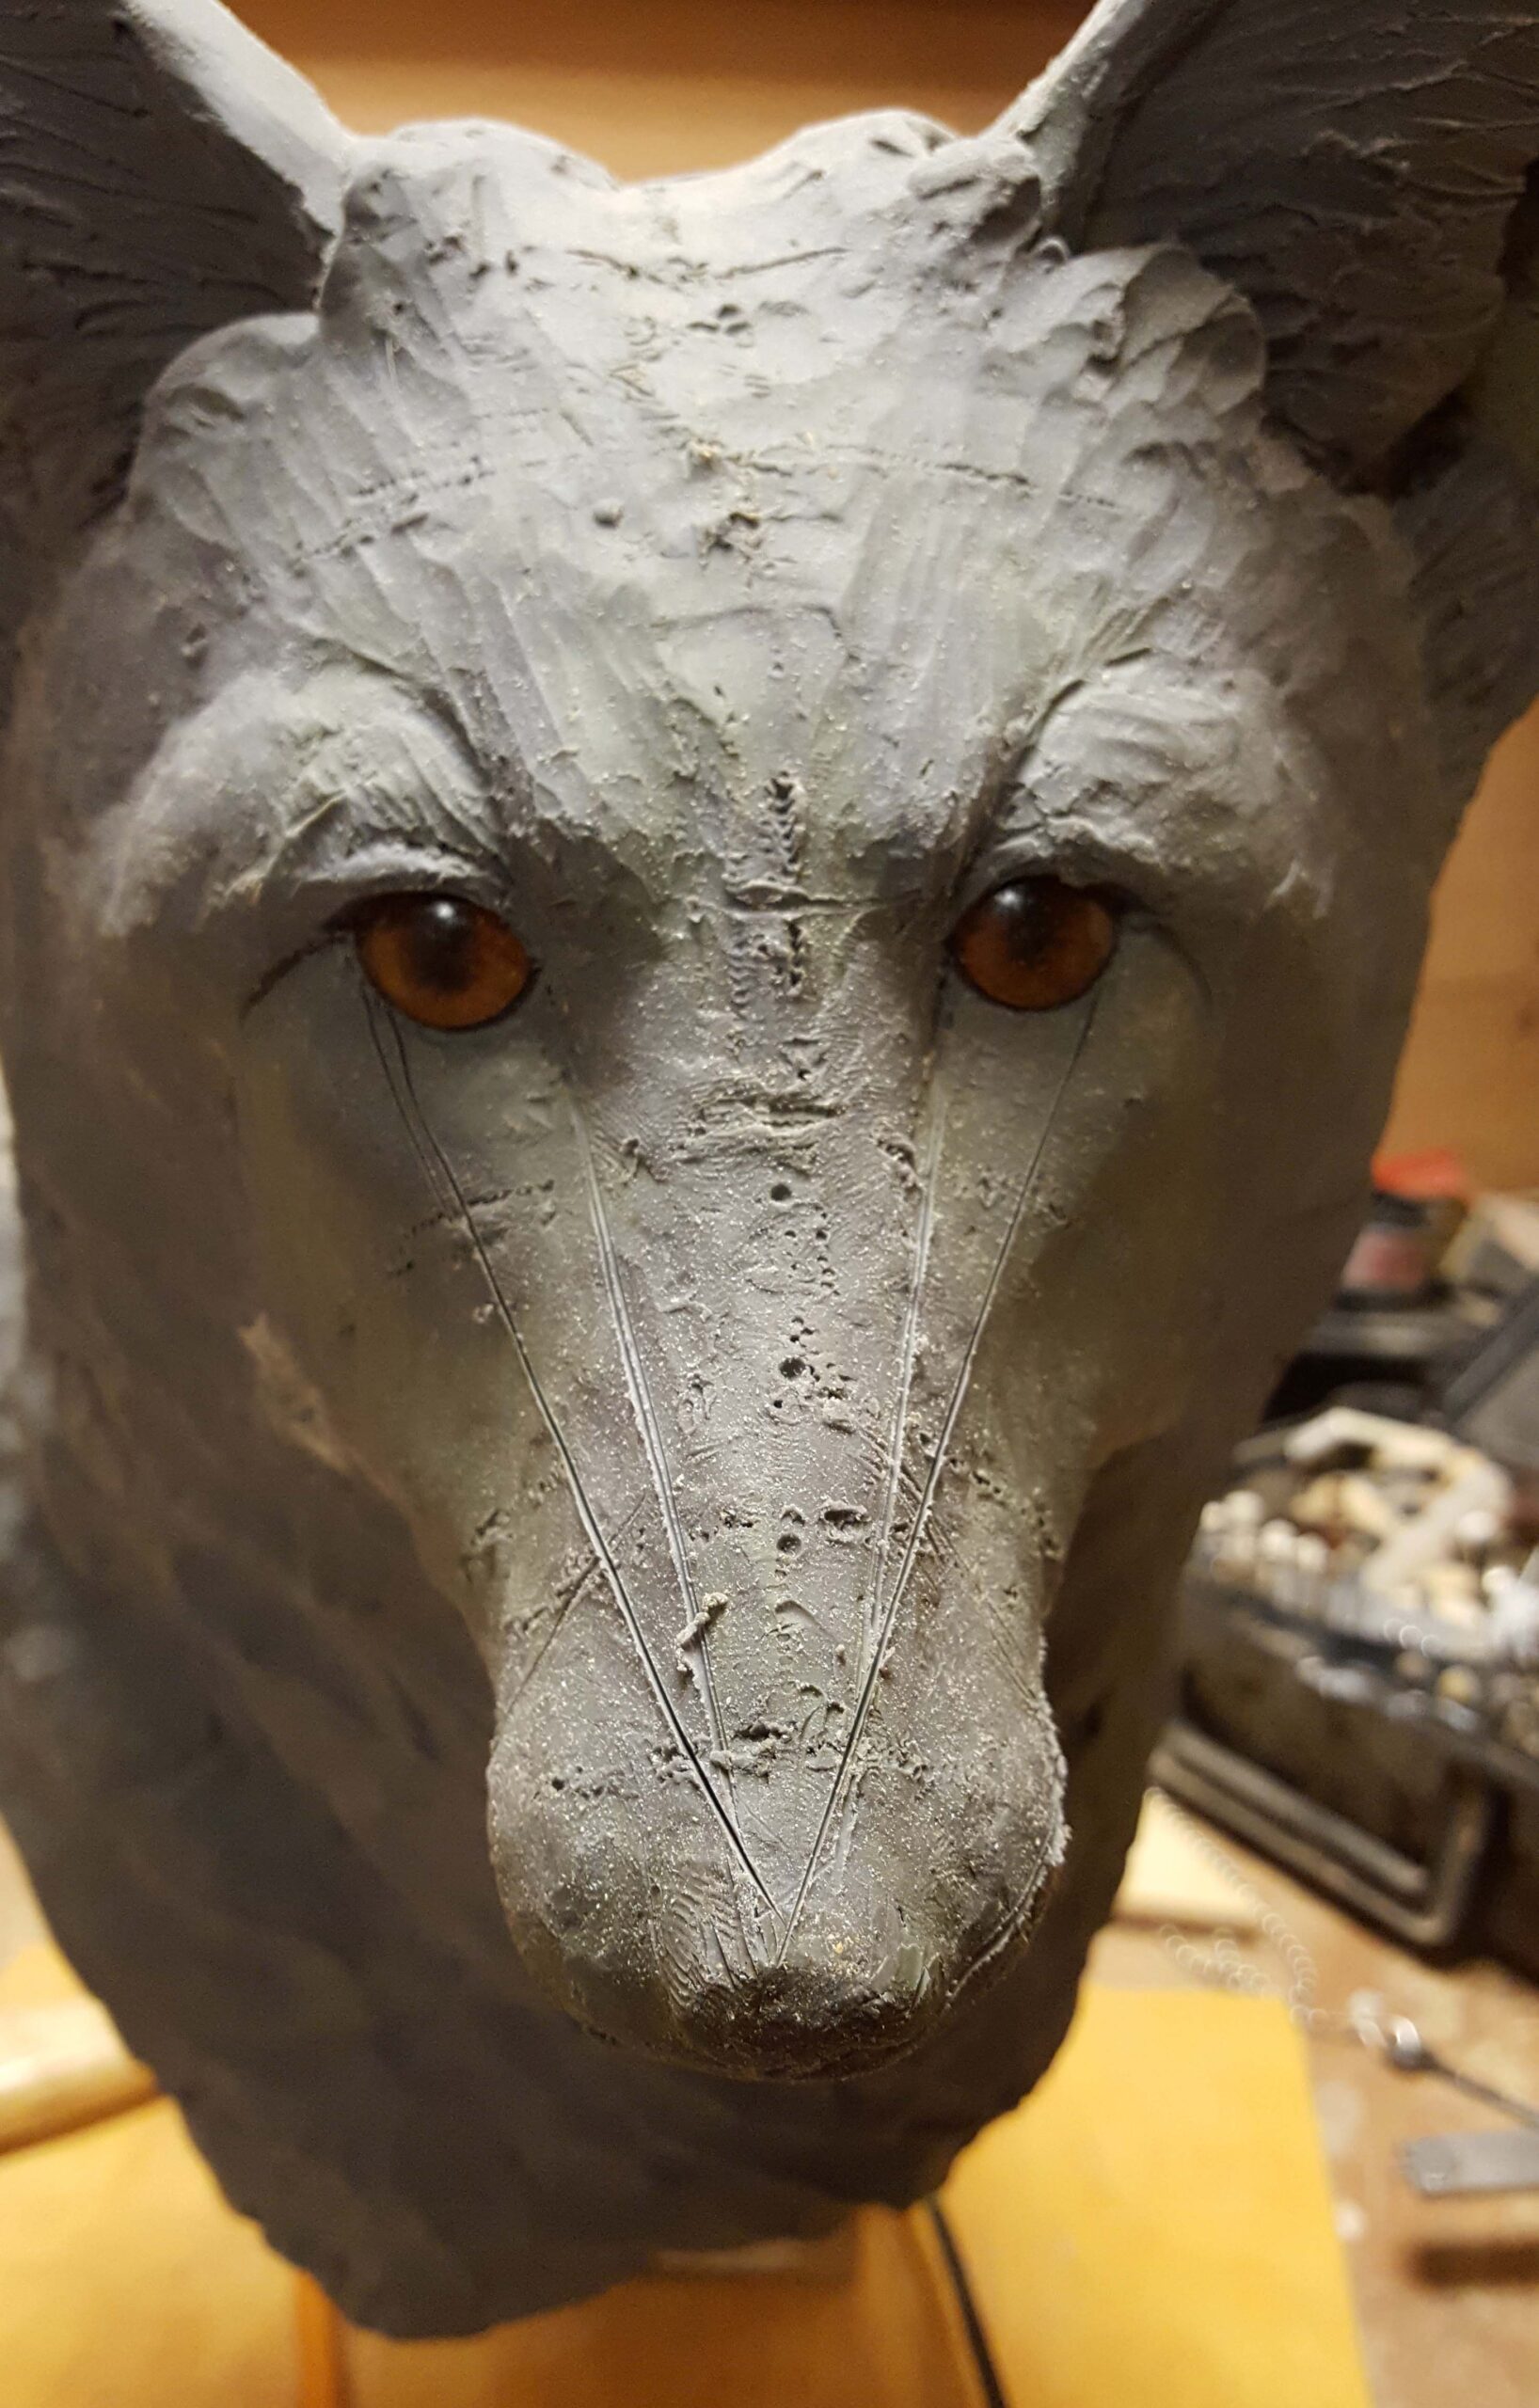
Creating a clay model that will be used as a reference for carving wood is a very important part of the overall project. Experimenting with wood removal can lead to some unrecoverable mistakes. Clay is much more forgiving than wood. The clay sculpture should be done in stages with some planned breaks so that you can look at the sculpture with fresh eyes. After a few days or a week of not looking at the sculpture, you have to trust your first impression. Are the eyes right? Does the face have a personality or attitude that you want to project. The wooden eyes were initially used more as place markers. The difference that the glass eyes make is drastic.

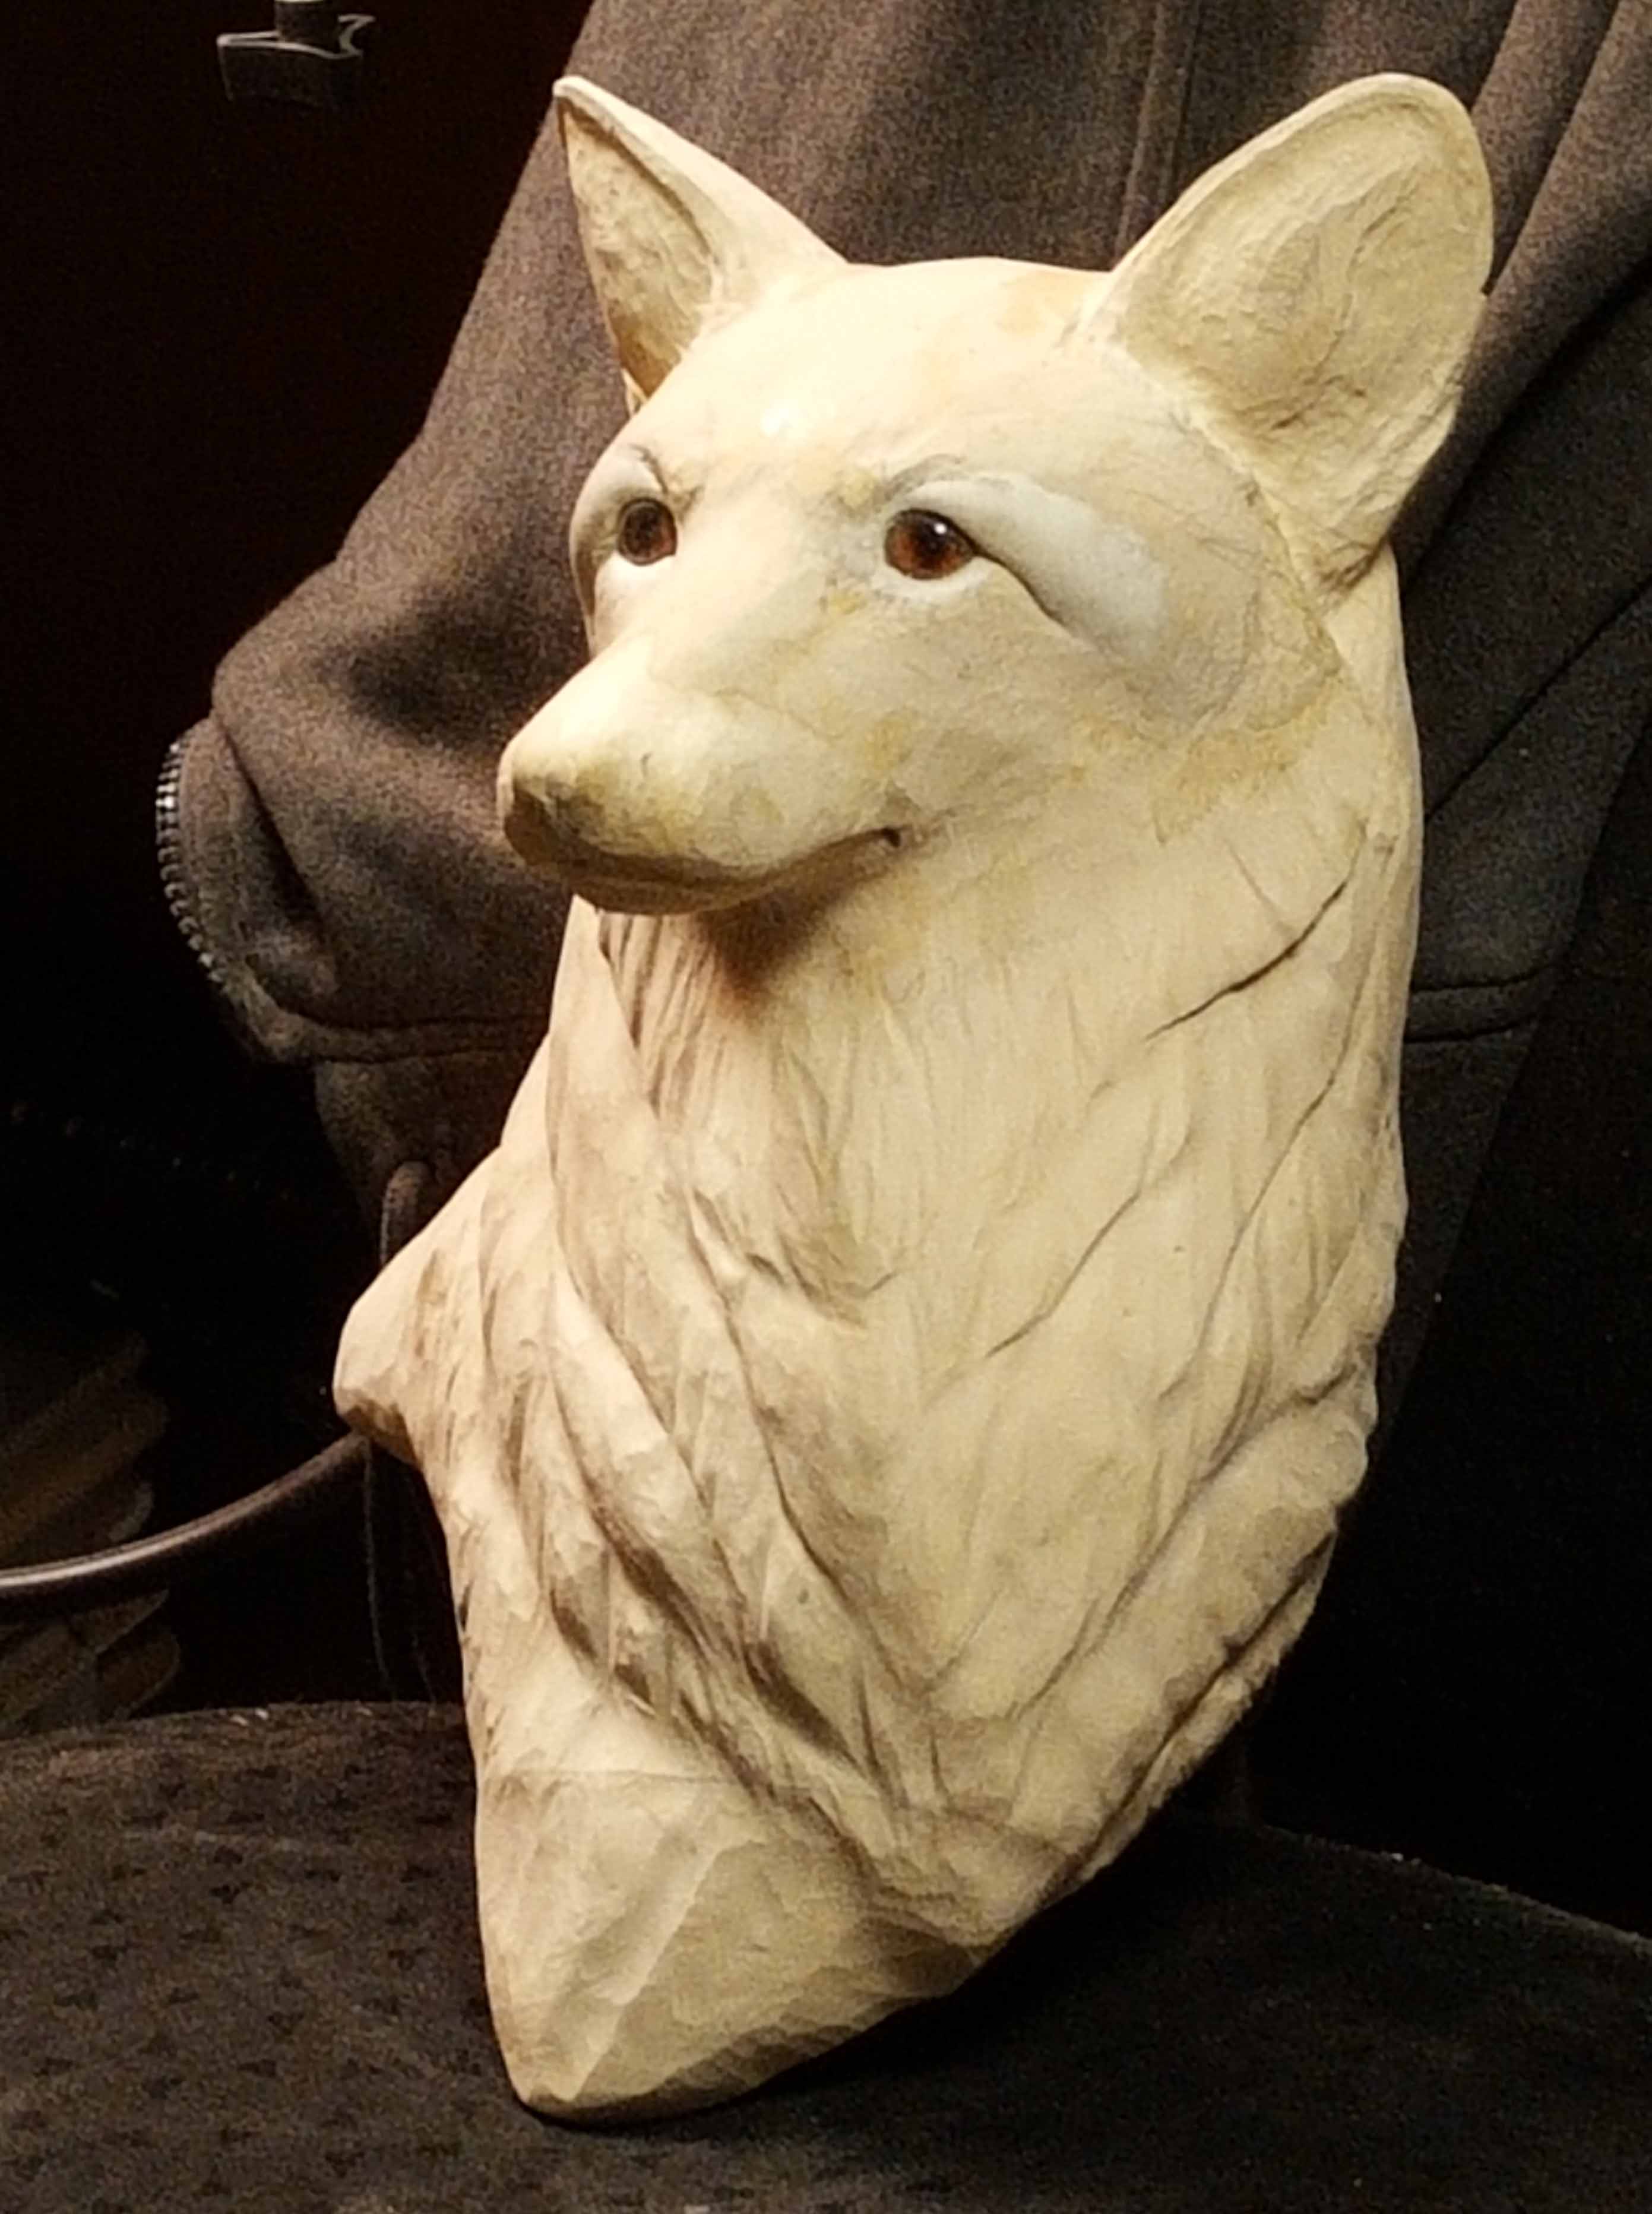
Side profile of the clay Red Fox sculpture.
The final clay sculpture with glass eyes. The last thing I did was to make sure the face had personality
The clay reference model is finished.
Making the pattern for cutting out the wood blank
There are a few ways to make the side, front and top pattern for sculptures. Some people will trace it onto paper. For this piece, because of the size, I used a single ceiling light and placed the clay sculpture directly under the light. The shadow showed up very well on the paper for the top down view. A similar approach was used for the front and side views. A single light was placed directly in front of the sculpture and a pad of paper was placed behind the sculpture and 90 degrees. The light source was about eight feet away. The closer the light, the more distortion you will have. Eight feet is manageable and will project a shadow slightly larger than the clay model. Slightly larger is not a bad thing. It allows some room for making minor adjustments.
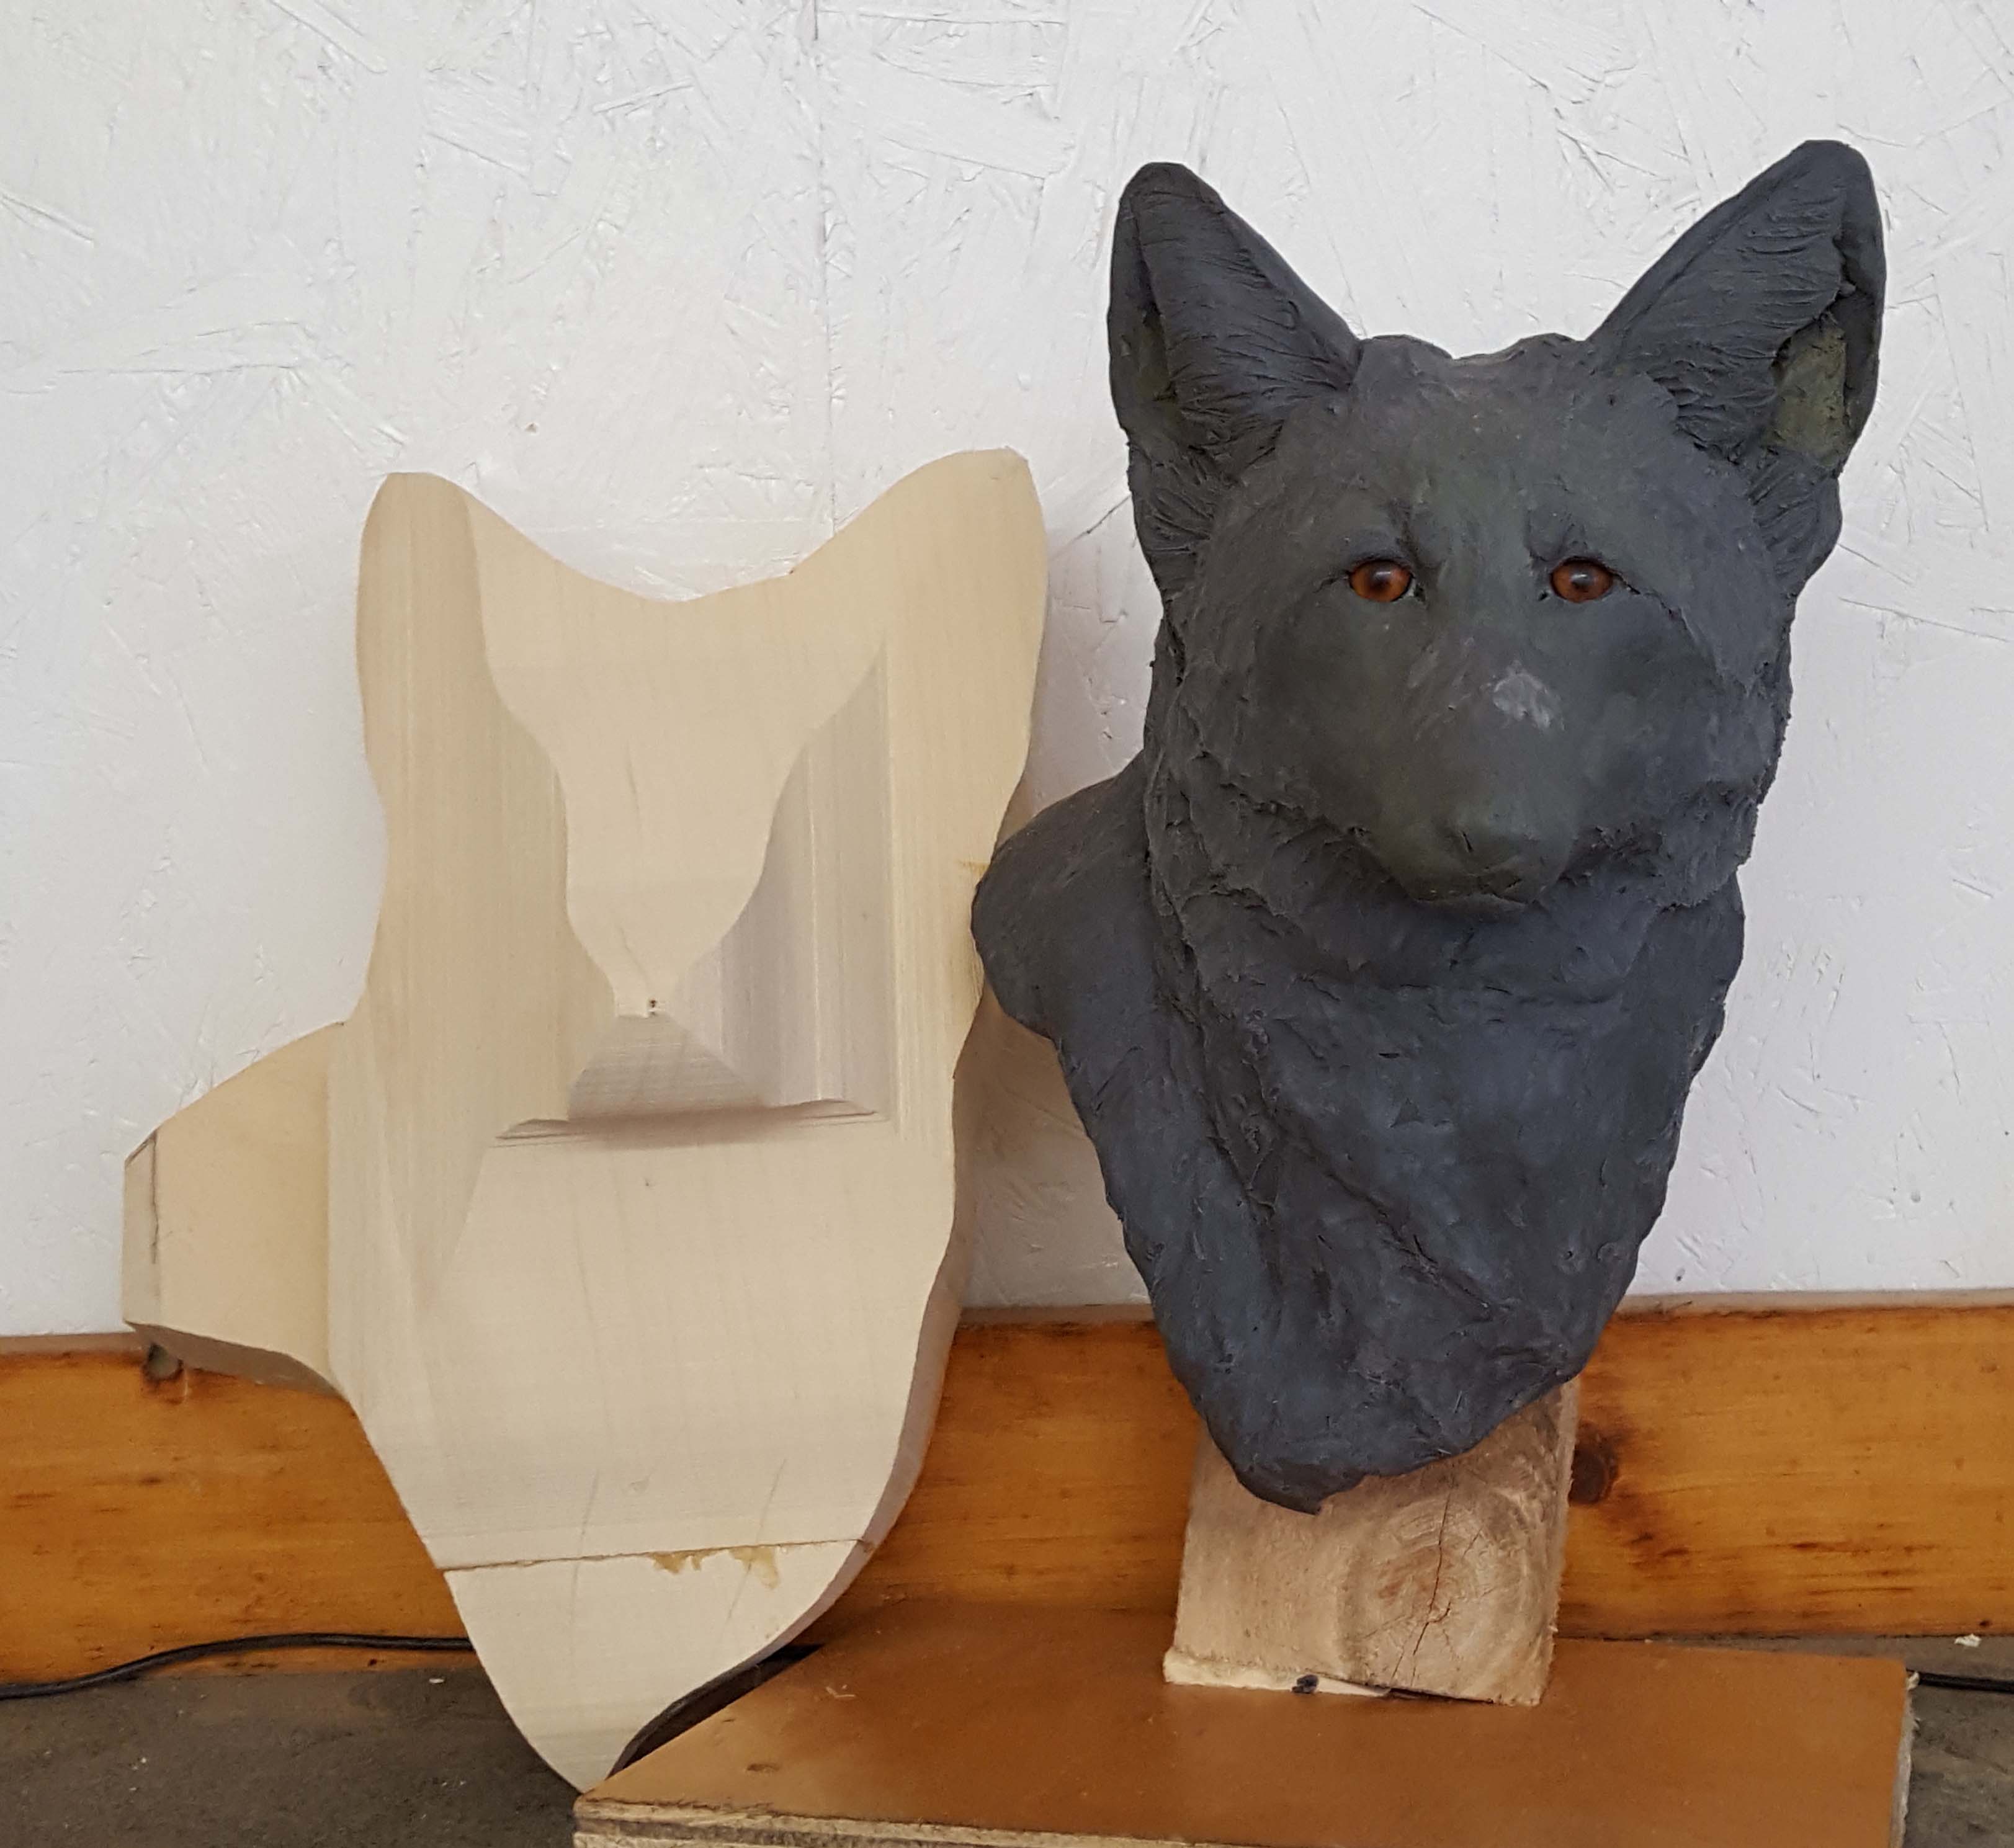
Clay Sculpture of the Red Fox with the wood blank I will use for the carving.
The next step will be making sawdust.
As you may notice, the wooden block has two pieces added. One on the bottom and one on the left side. In order to be able to cut the side, top and front views, the cut out had to be cut so that it would fit in the band saw.
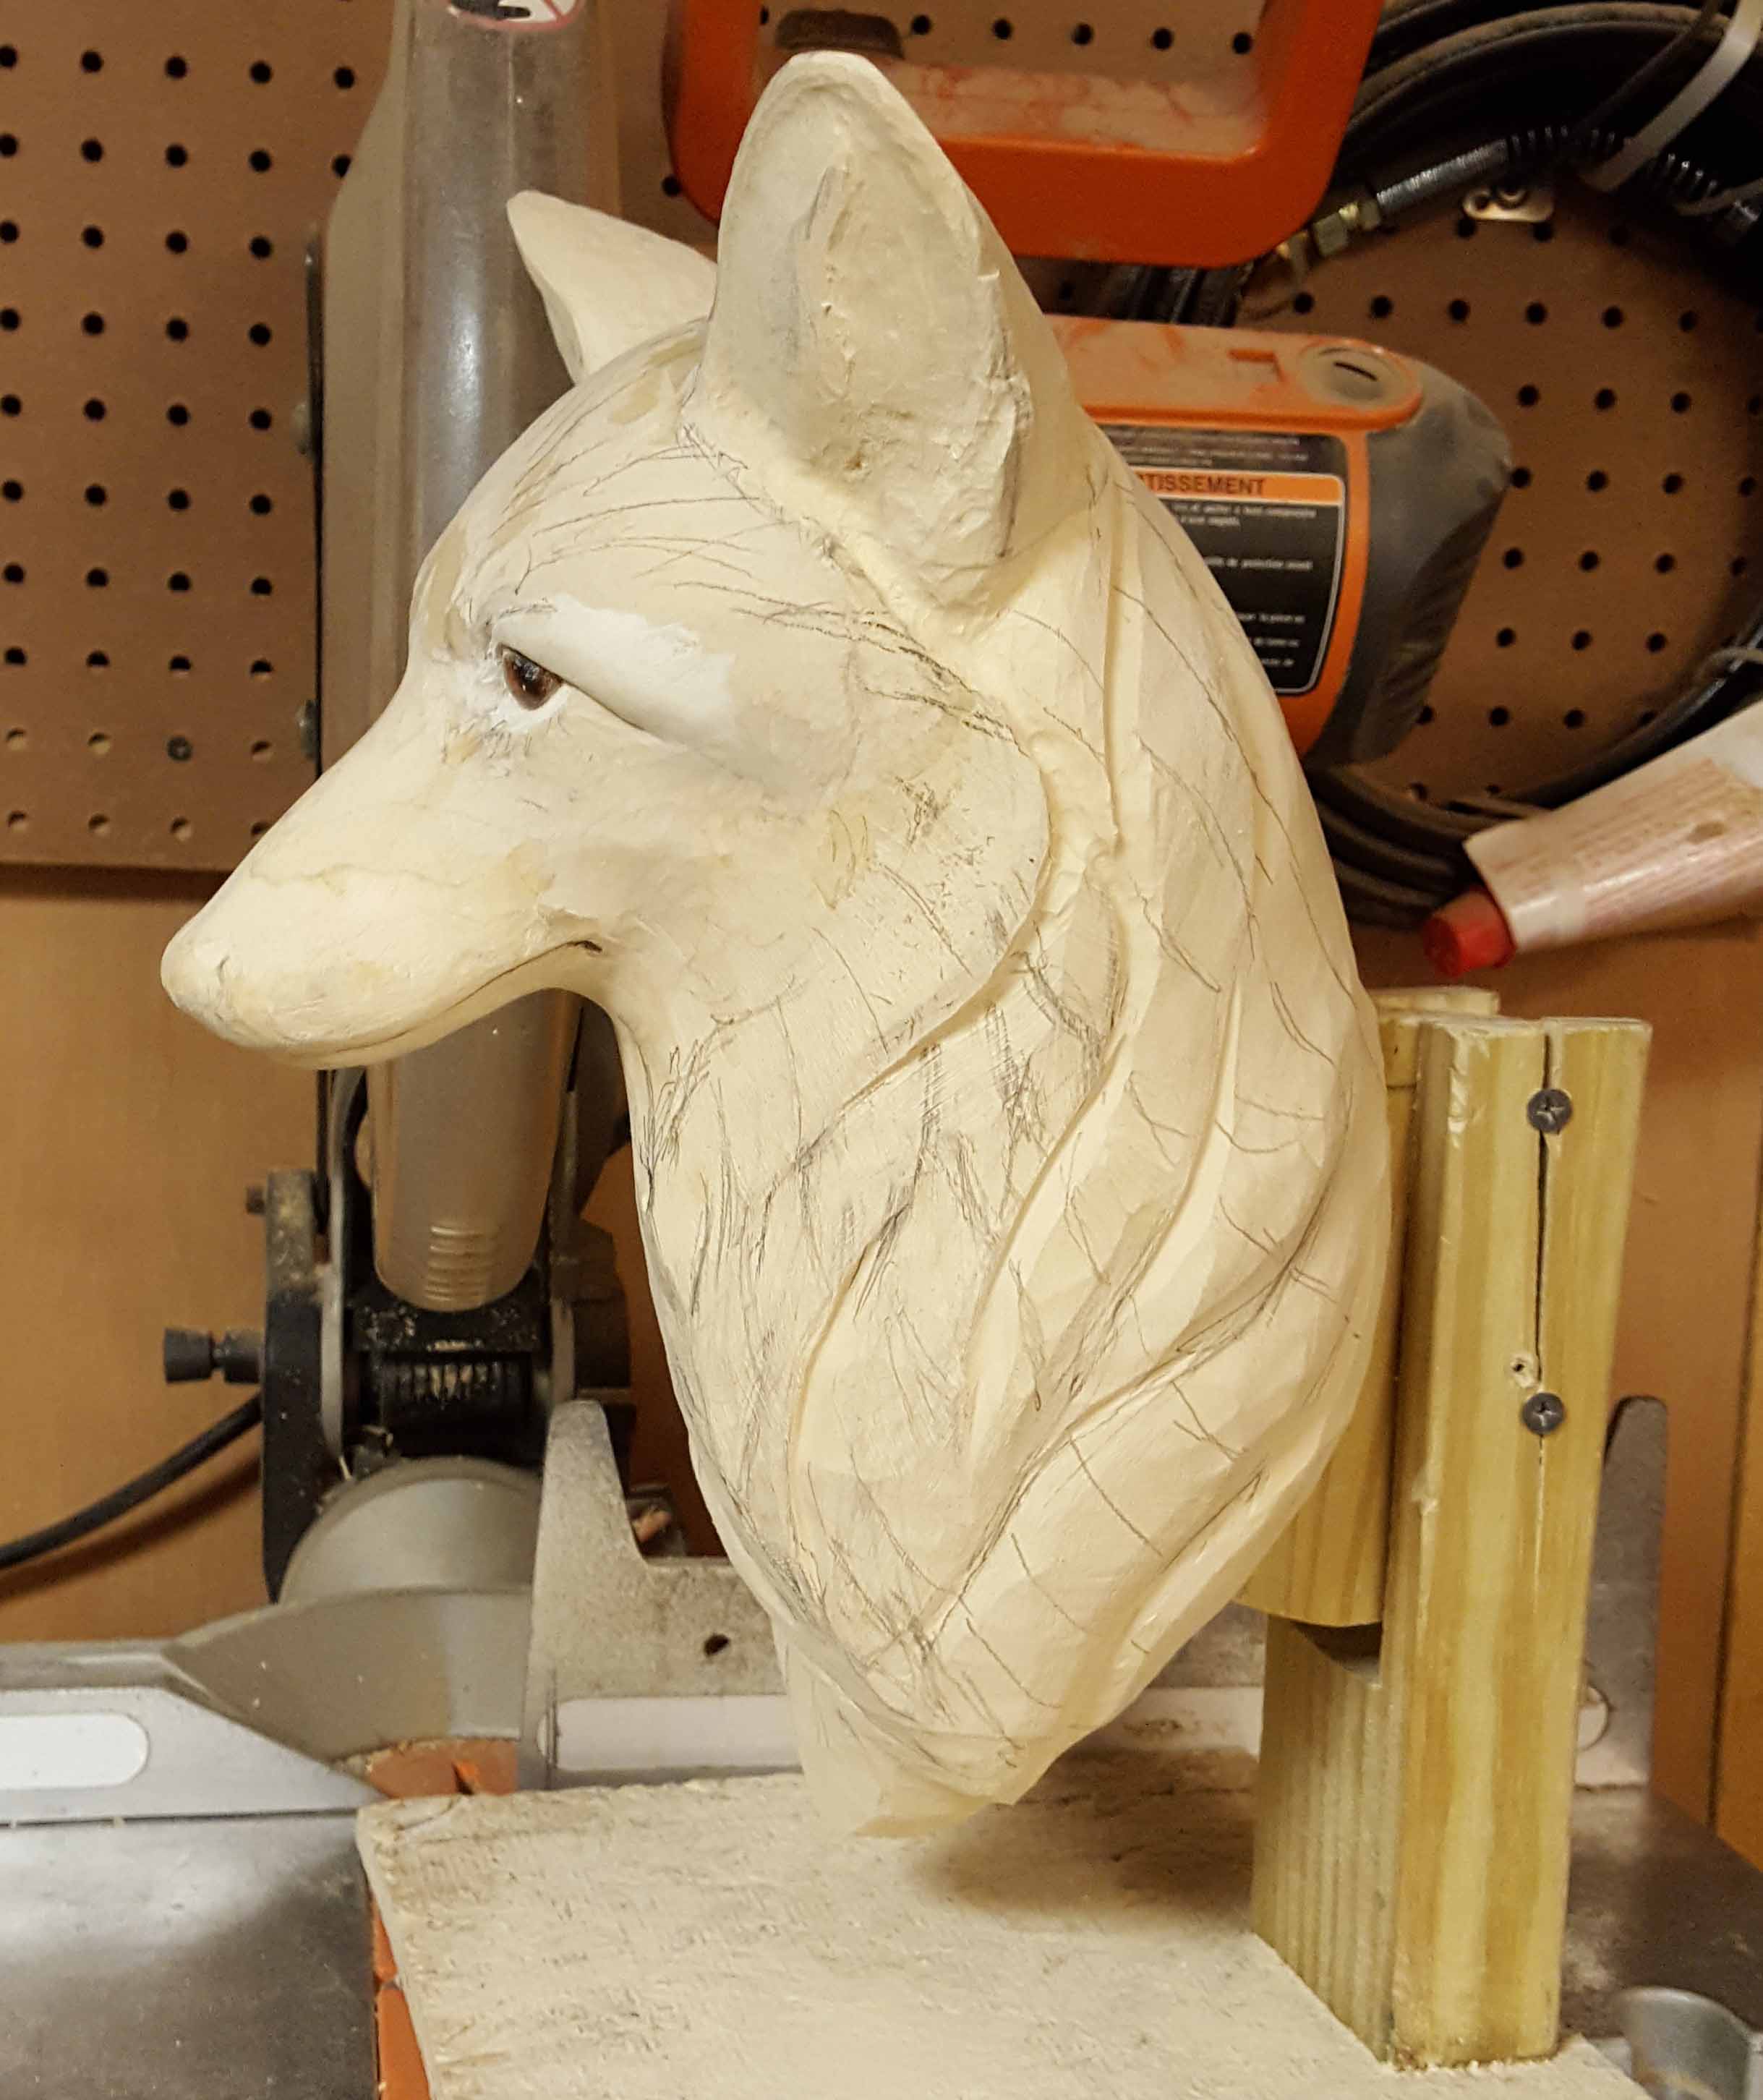
I begin by drawing a center line in the middle of the face. The tip of the nose will be the point that all facial feature measurements will be made. I work from the tip of the nose towards the back of the head. Rough out the shape of the nose and then start rounding the corners. I find it particularly helpful to define the top of the muzzle first. The bony eye orbits are critical to finding the location of the eyes.
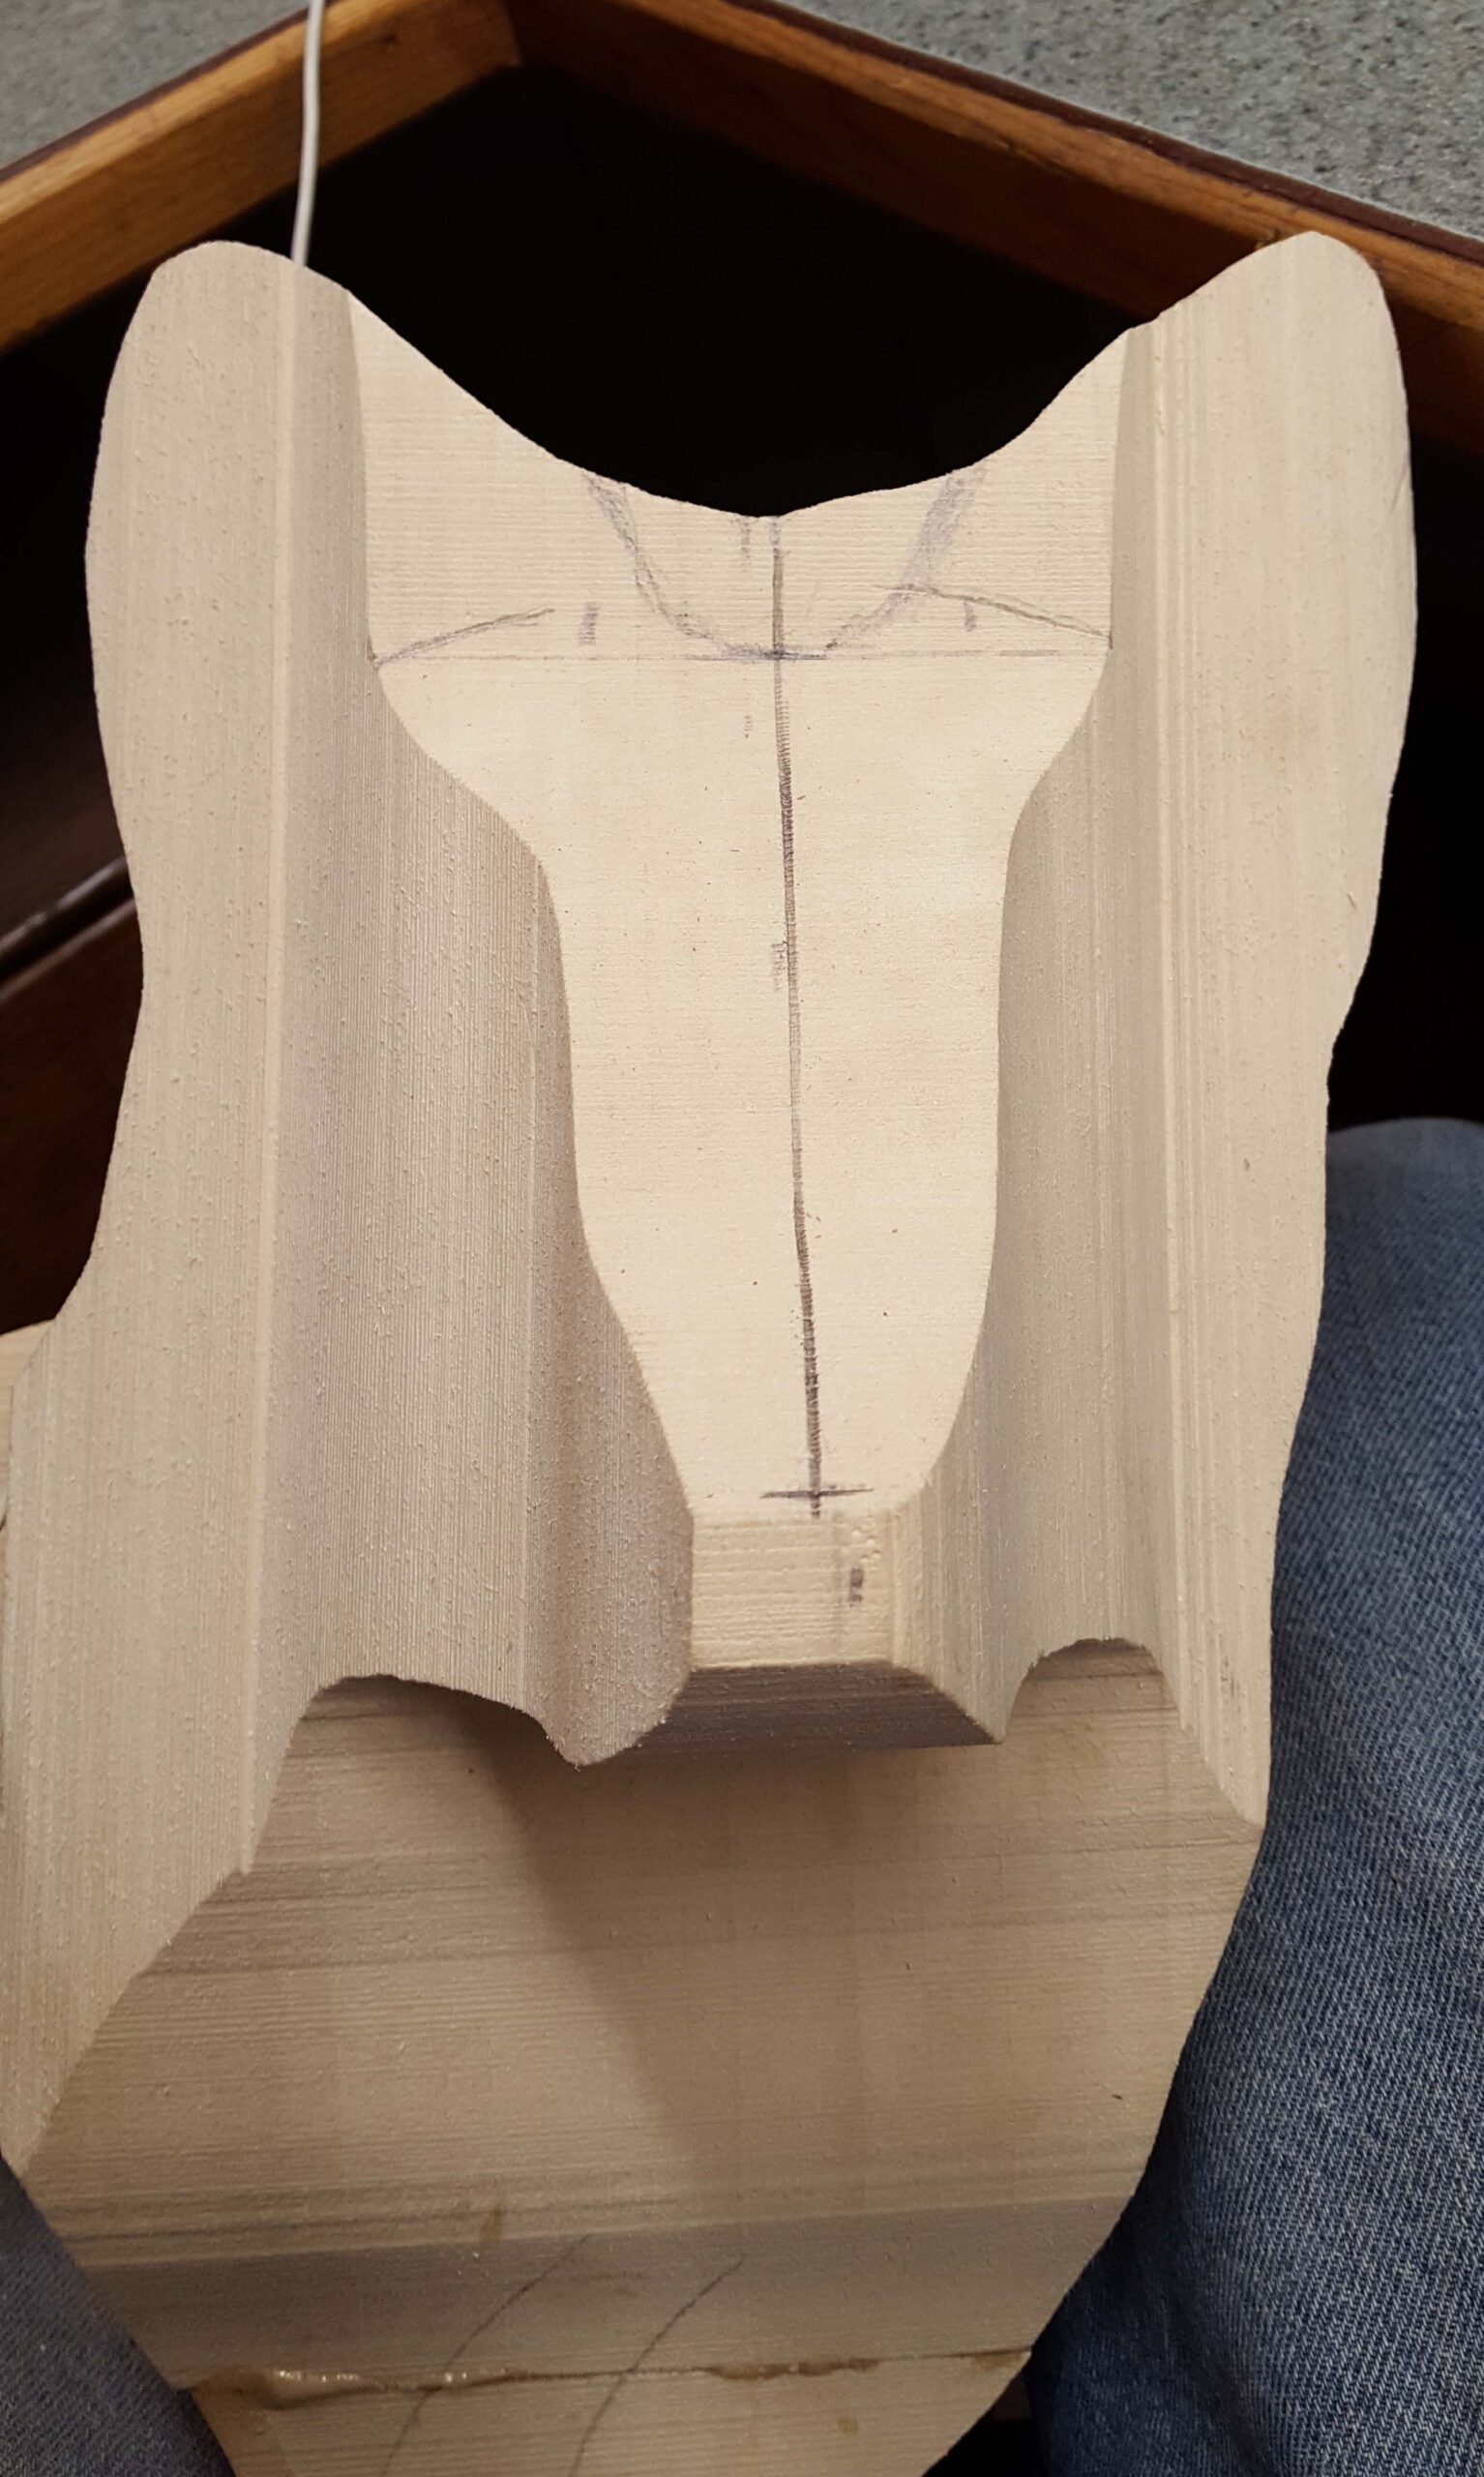
The front, side and top views have been cut out on a band saw.

The point of the nose is the anchor reference point for every feature of the face.
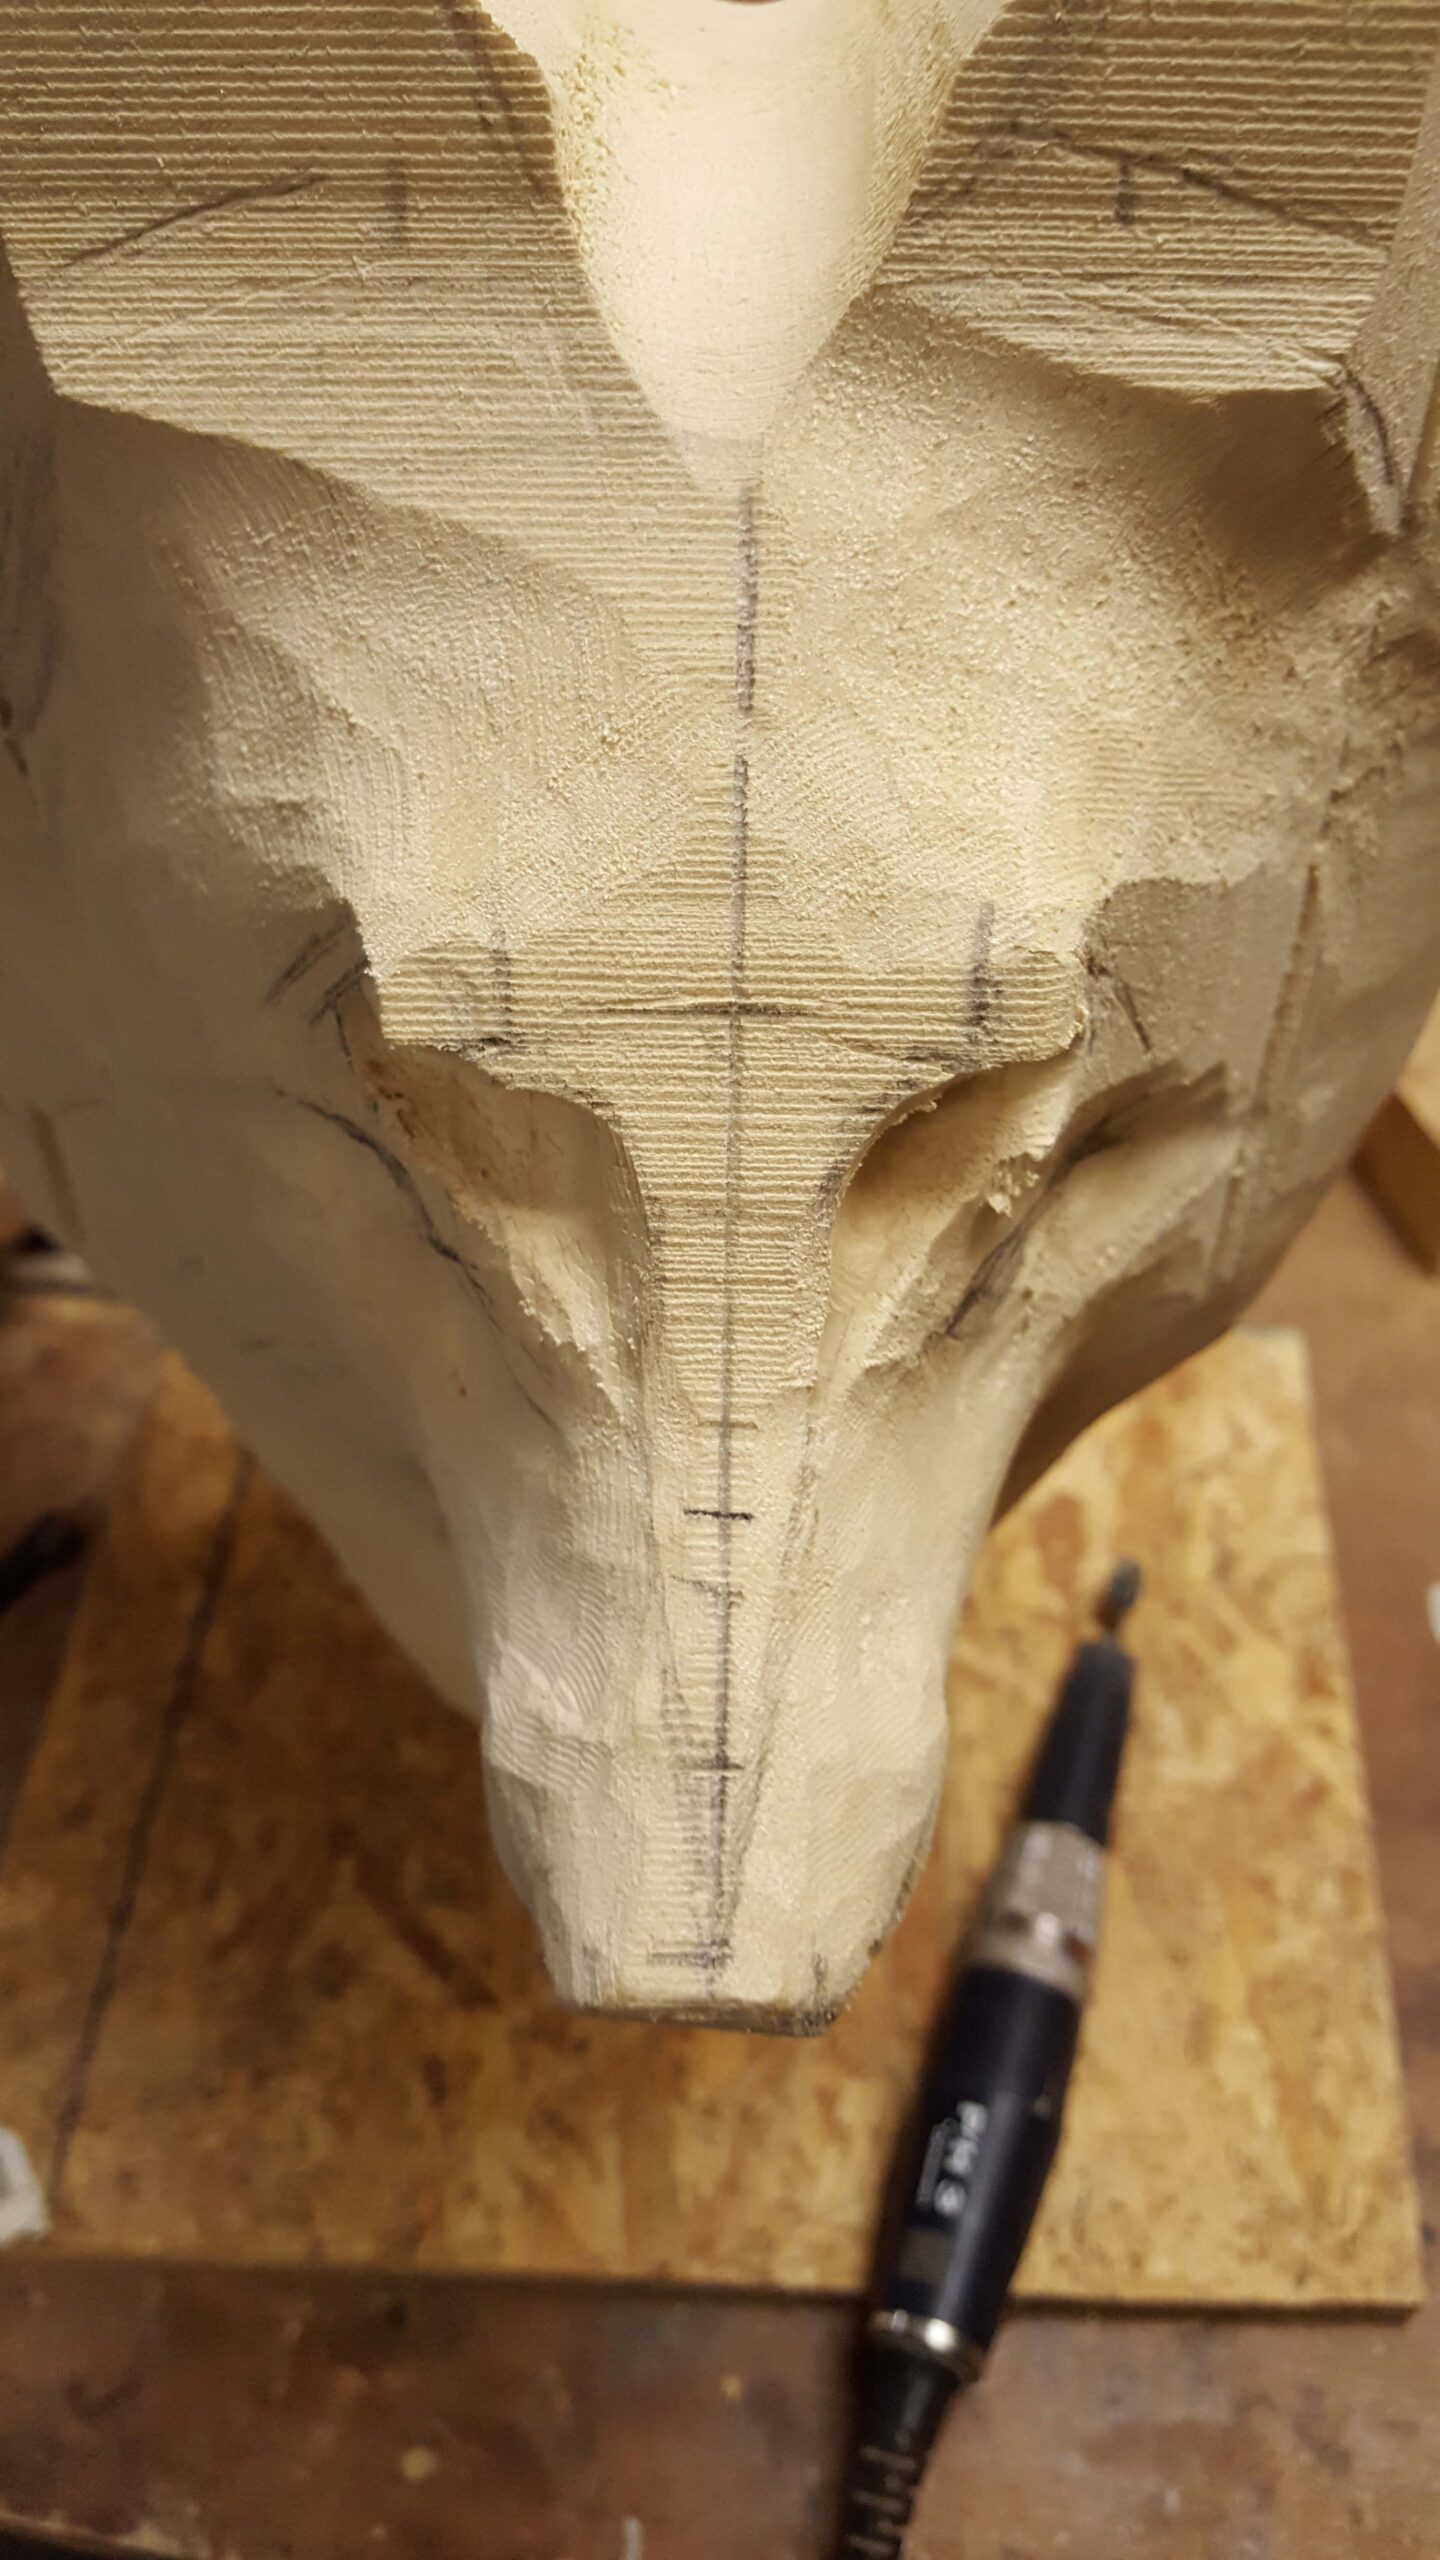
Note the measurement mark and the eye orbital bone placement.
Note the lined that come from the nose to the sides of the eyes.
Three dimensional art requires that you view your goal and progress from three different views. Initially I like to establish the side profile first. Then round the edges a bit so that I can draw features as seen from the top of the head. The eyes are critical for a successful sculpture. Take your time. When I think that I have identified the eye locations (distance from the nose, height from the top of the muzzle, distance apart from one another, distance below the forehead….) I intentionally make the eye holes smaller than the final eye. This allows for adjustments later in the process.

Clay and wood sculptures side by side for comparison
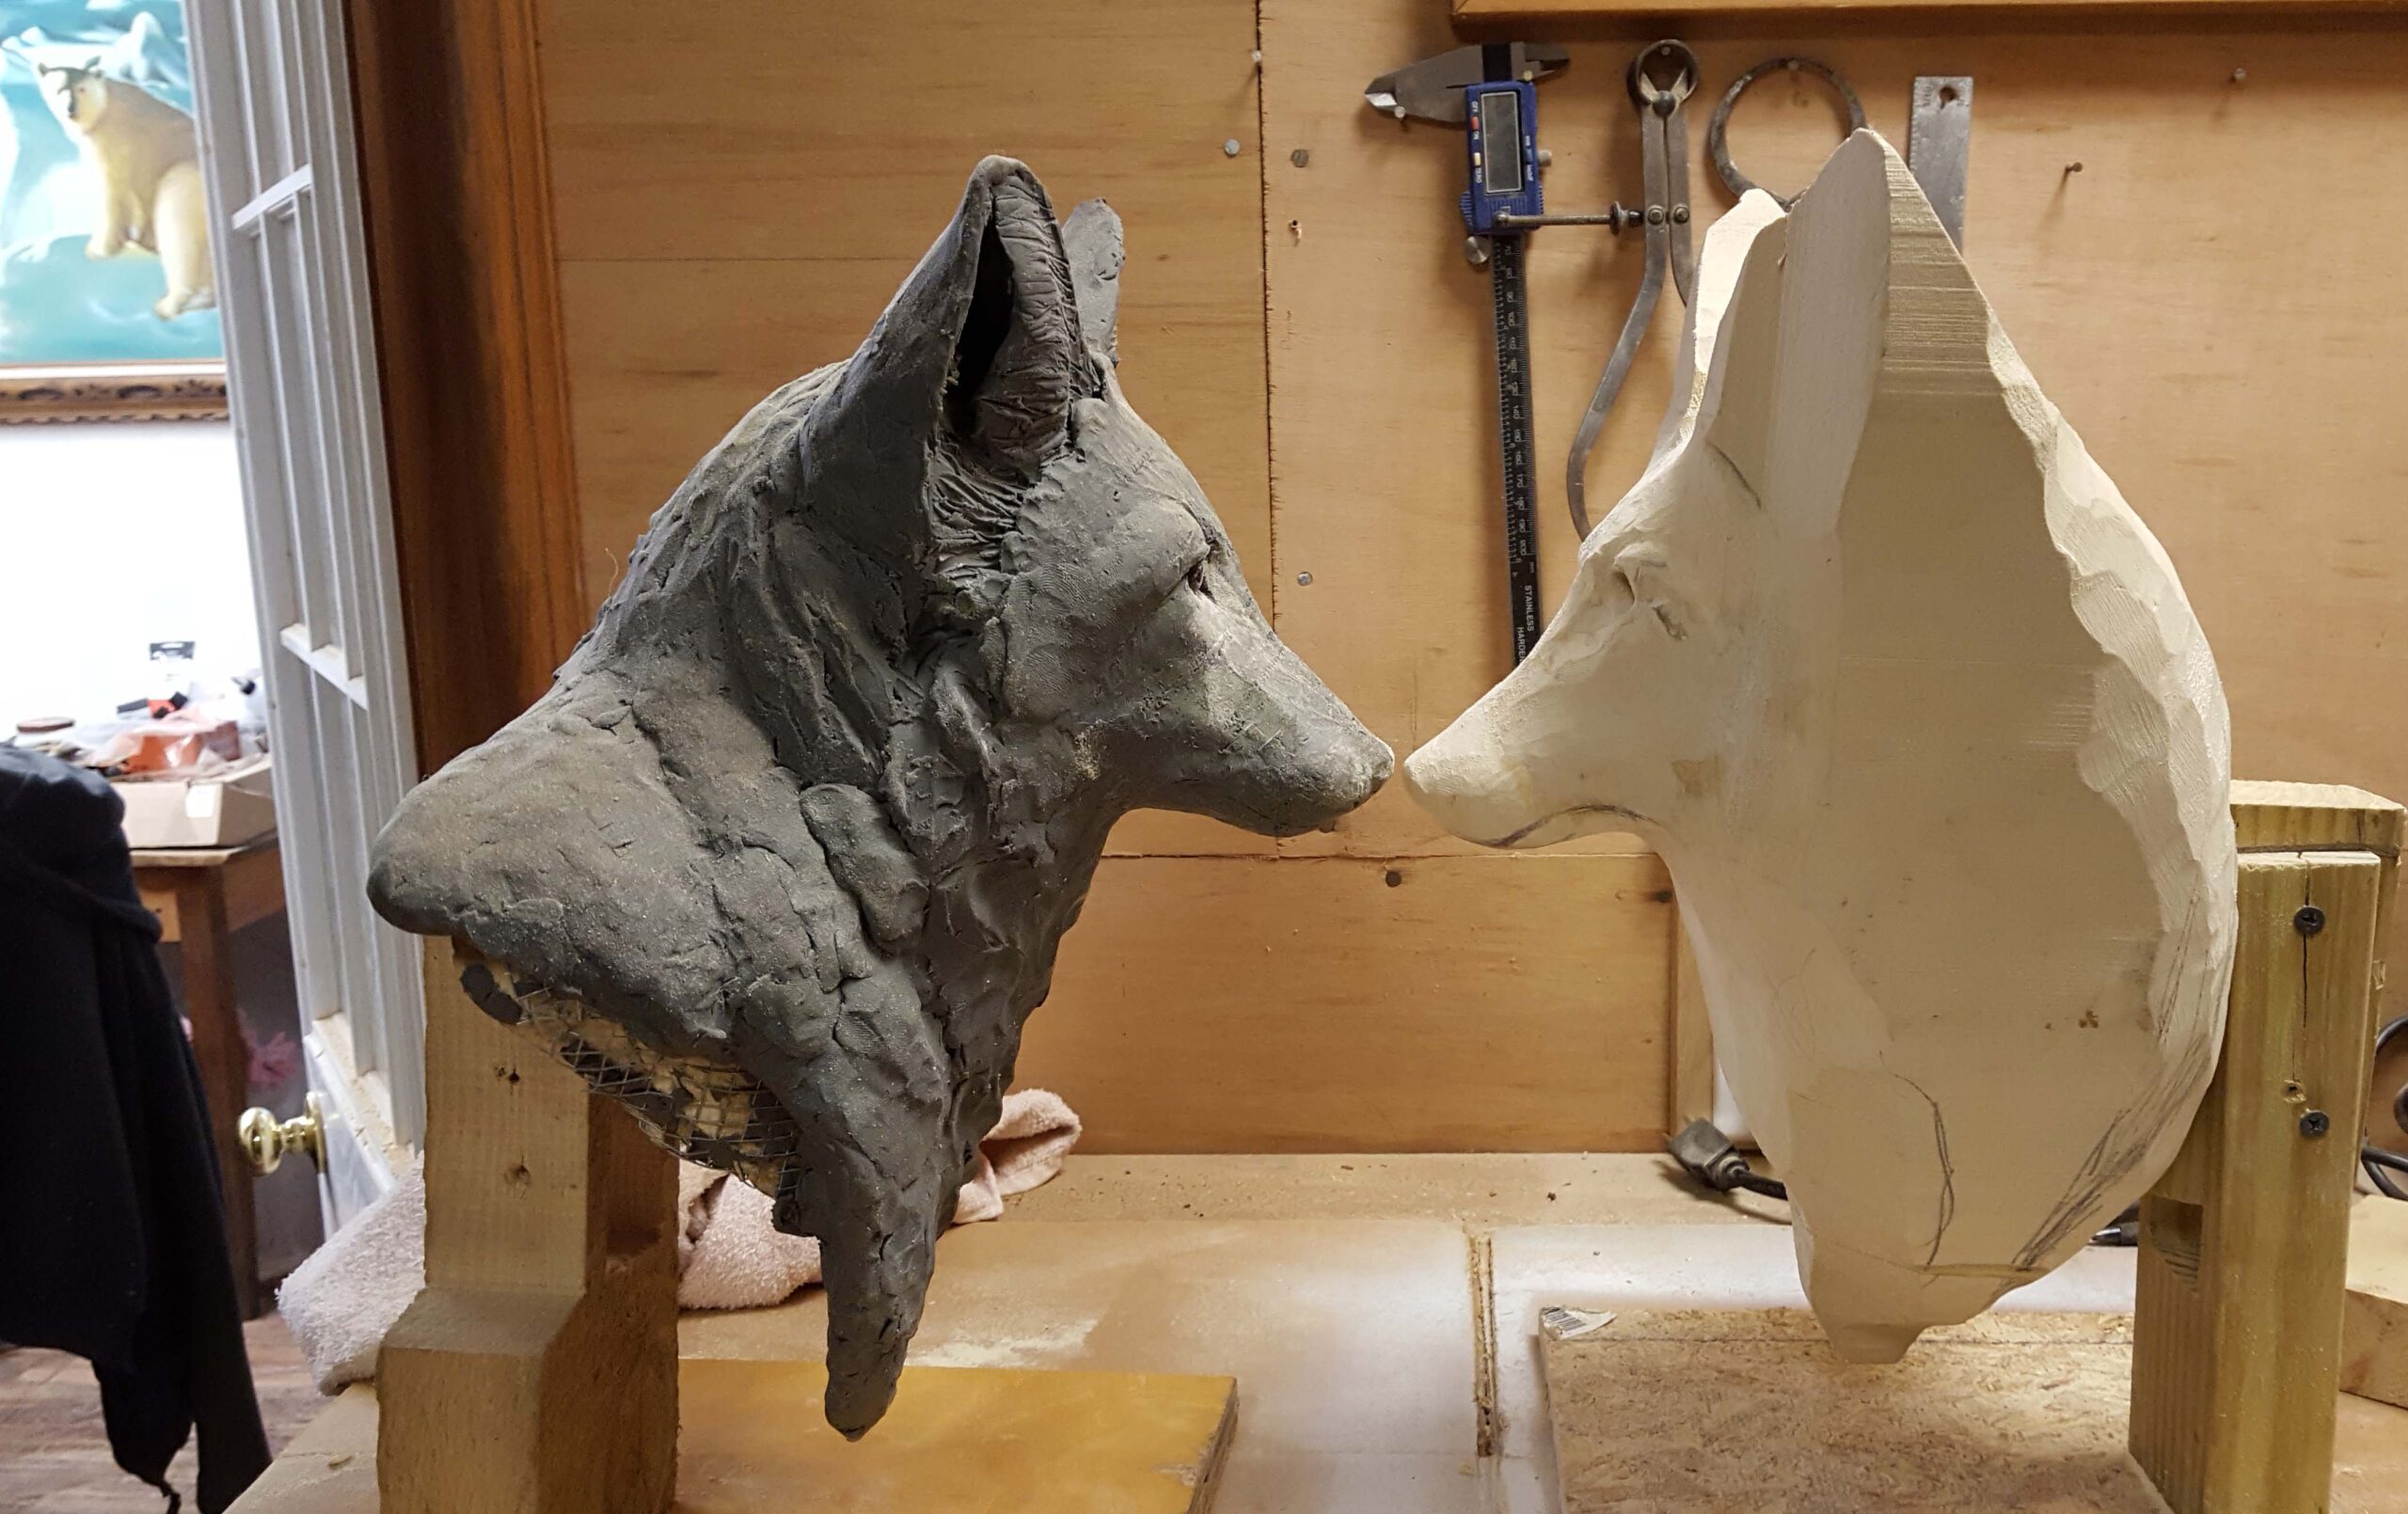
Clay and wood, nose to nose for comparison.
Only when you have the eye location established, can you move back to the ears. I advise people to not get too detailed at this point of the wood removal. I like to leave some extra wood thickness that will allow me to refine all the features before sanding and preparing for the painting process.
Refining the shape of the face
This part of the process can make or break your sculpture. Refer to the clay model and use it as a reference as much as possible. For this piece, the more I studied pictures, the more I refined the look of the sculpture. I now feel that I should have studied the red fox in more detail before moving onto the wood. Practice makes perfect. And in you modify your plans in a way that improves the final product, then it’s all worth it.
At this point, the glass eyes have been installed, all the key structural parts of the face are defined. With the facial features in place, I move to the ears. And then to contouring the fur.
Adding contours that represent fur
The first step is to draw lines that illustrate where you want creases in the fur. These lines will represent folds in the fur or areas where the fur separates. This fox sculpture is looking to it’s right side. Thus the fur should have bumps where the skin would wrinkle when compressed. On the other side, the contours should represent where the fur is separating as the skin is stretched. Look at the fur on your furry pets to see what I am talking about. These contours are elongated bumps which were make with a one inch diameter sanding sleeve. Additional detail will be added later.
Once the foundational contours are added, use a pencil to draw lines that indicate the direction or flow of the fur. Use curved lines. “S” shaped lines add interest to the fur too.
Notice the flow lines that indicate the direction of the fur.
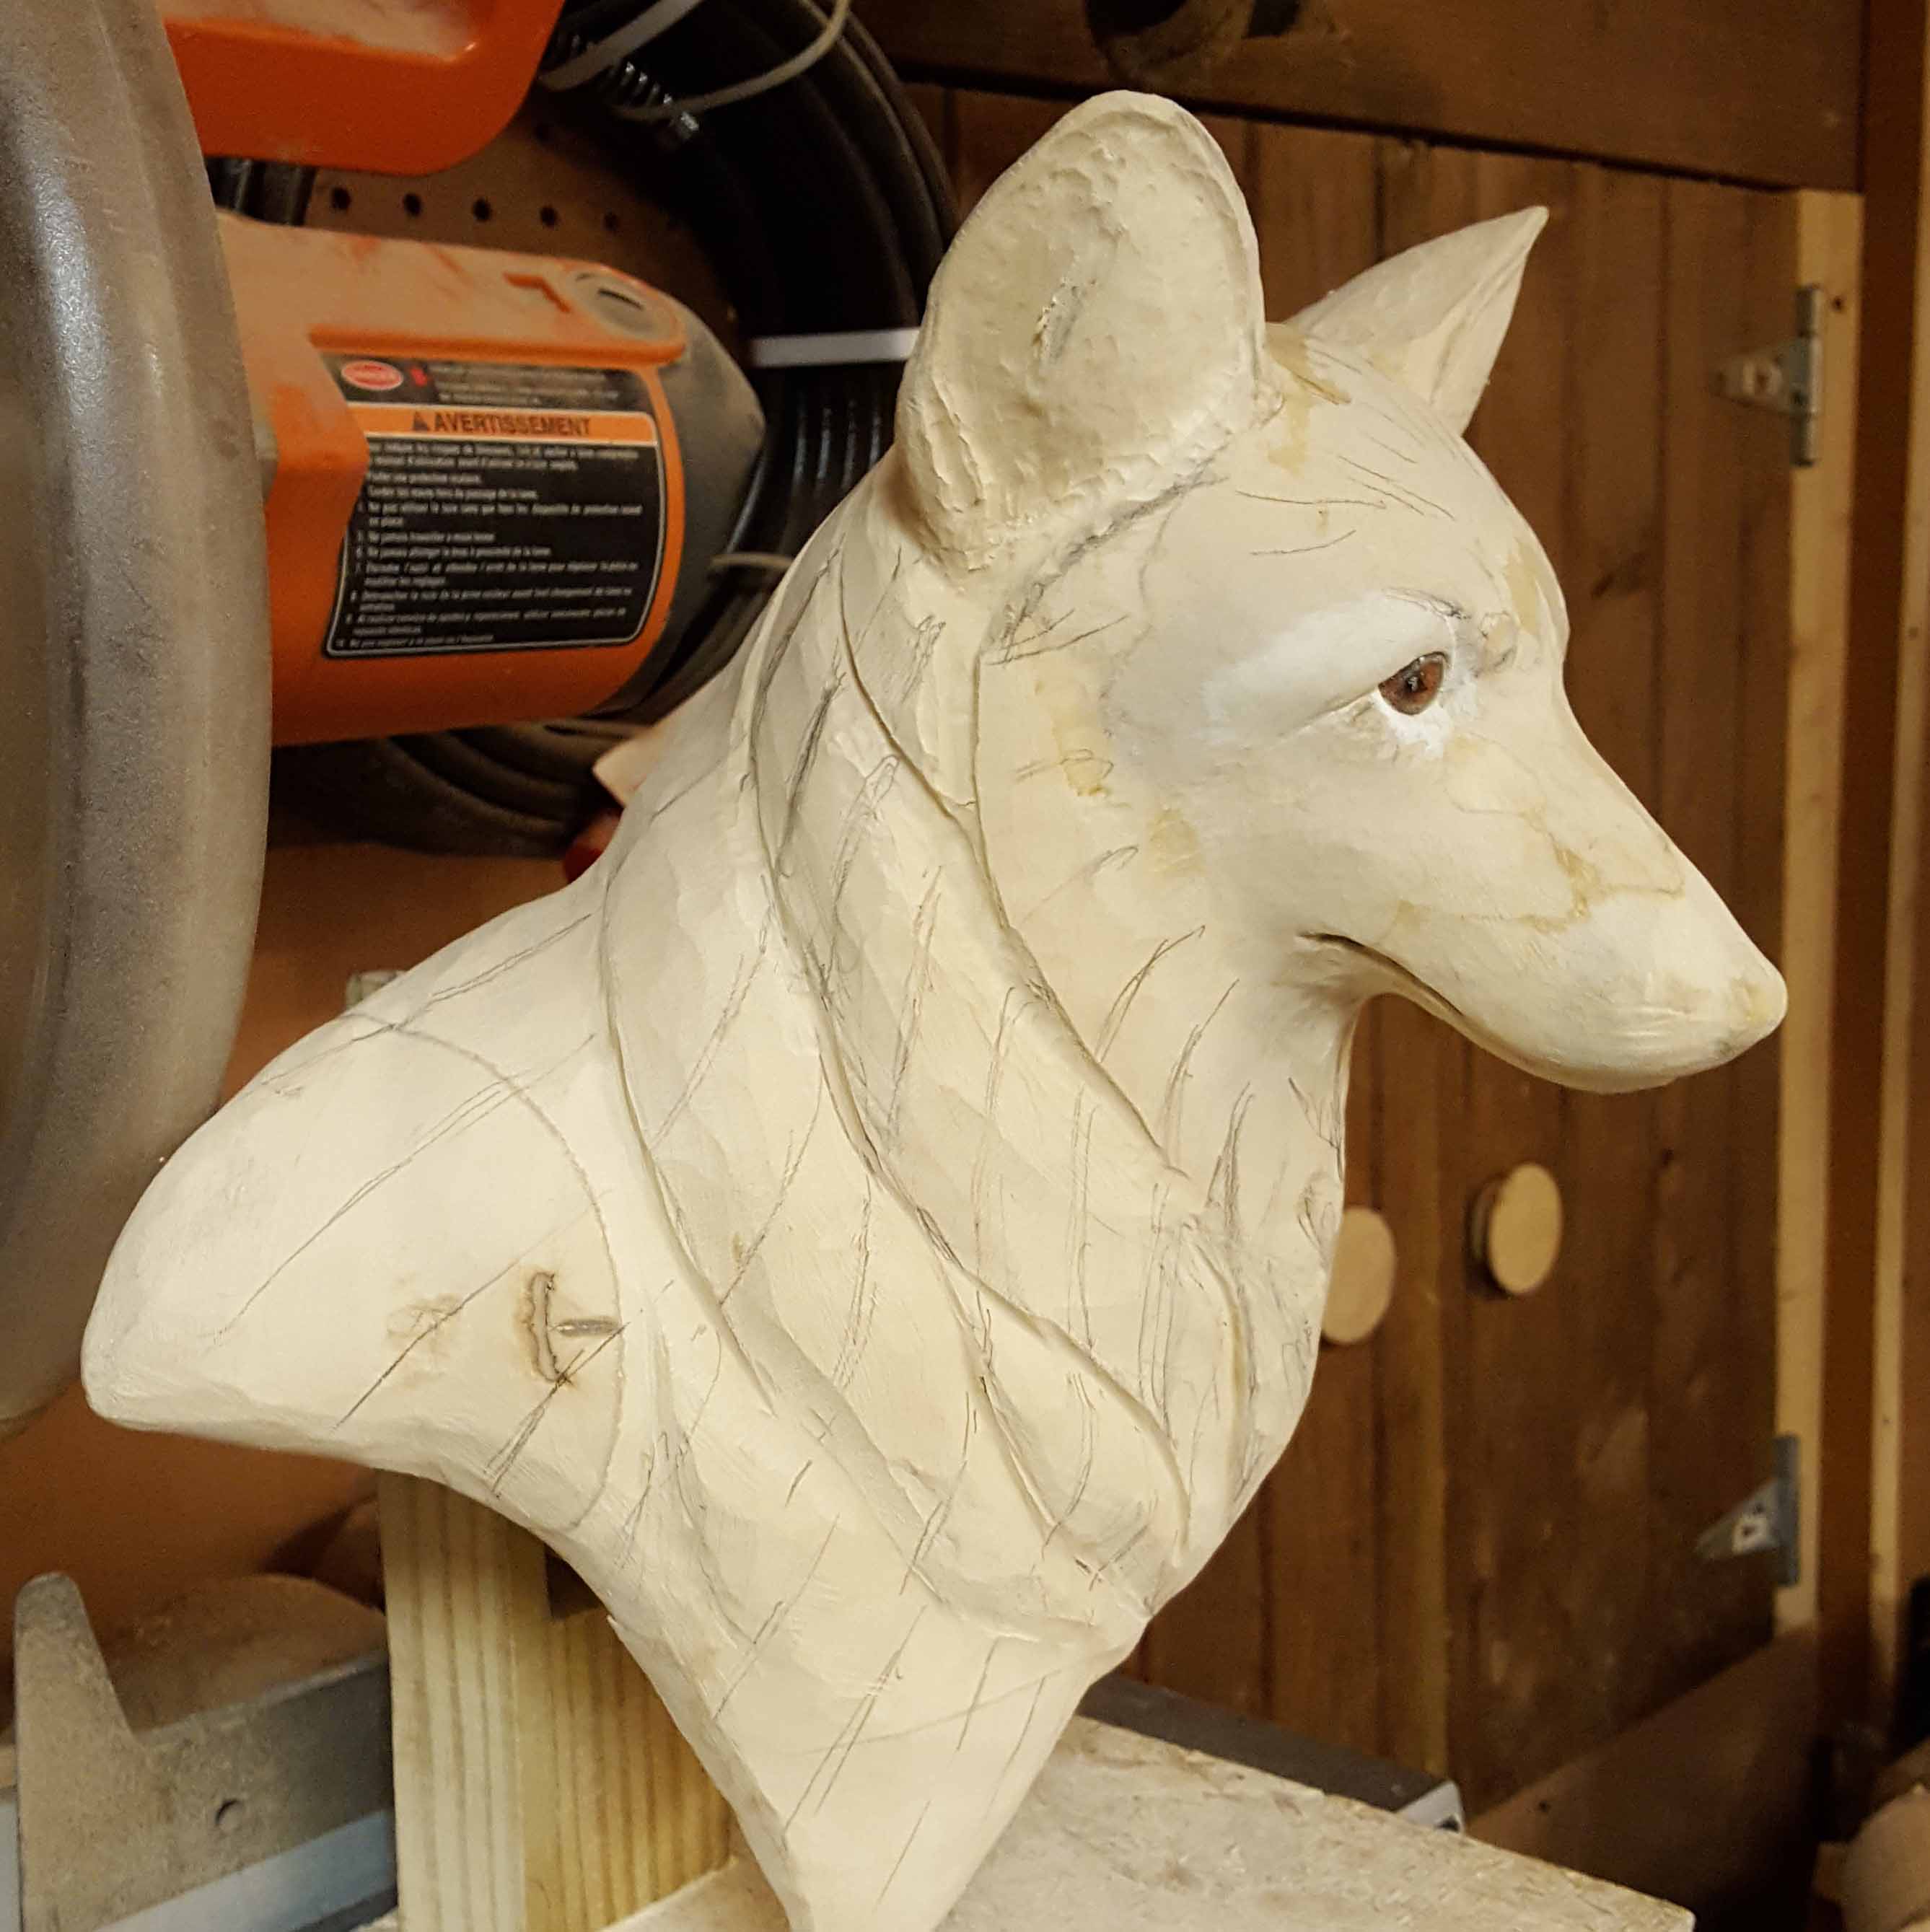
Flow lines added onto the initial fur contours.
The second step in the contouring
Using the one inch diameter sanding sleeve, I drag the end of the 1 inch sanding sleeve (so that I leave a rounded groove) in the direction of the flow lines. Be sure to make the spacing and depth random. Real fur has no discernable pattern. Random contours are much more interesting and pleasing to the eye. Note that at this time I did not include the fur just under the mouth in this step. The fur there is more smooth because it is shorter.
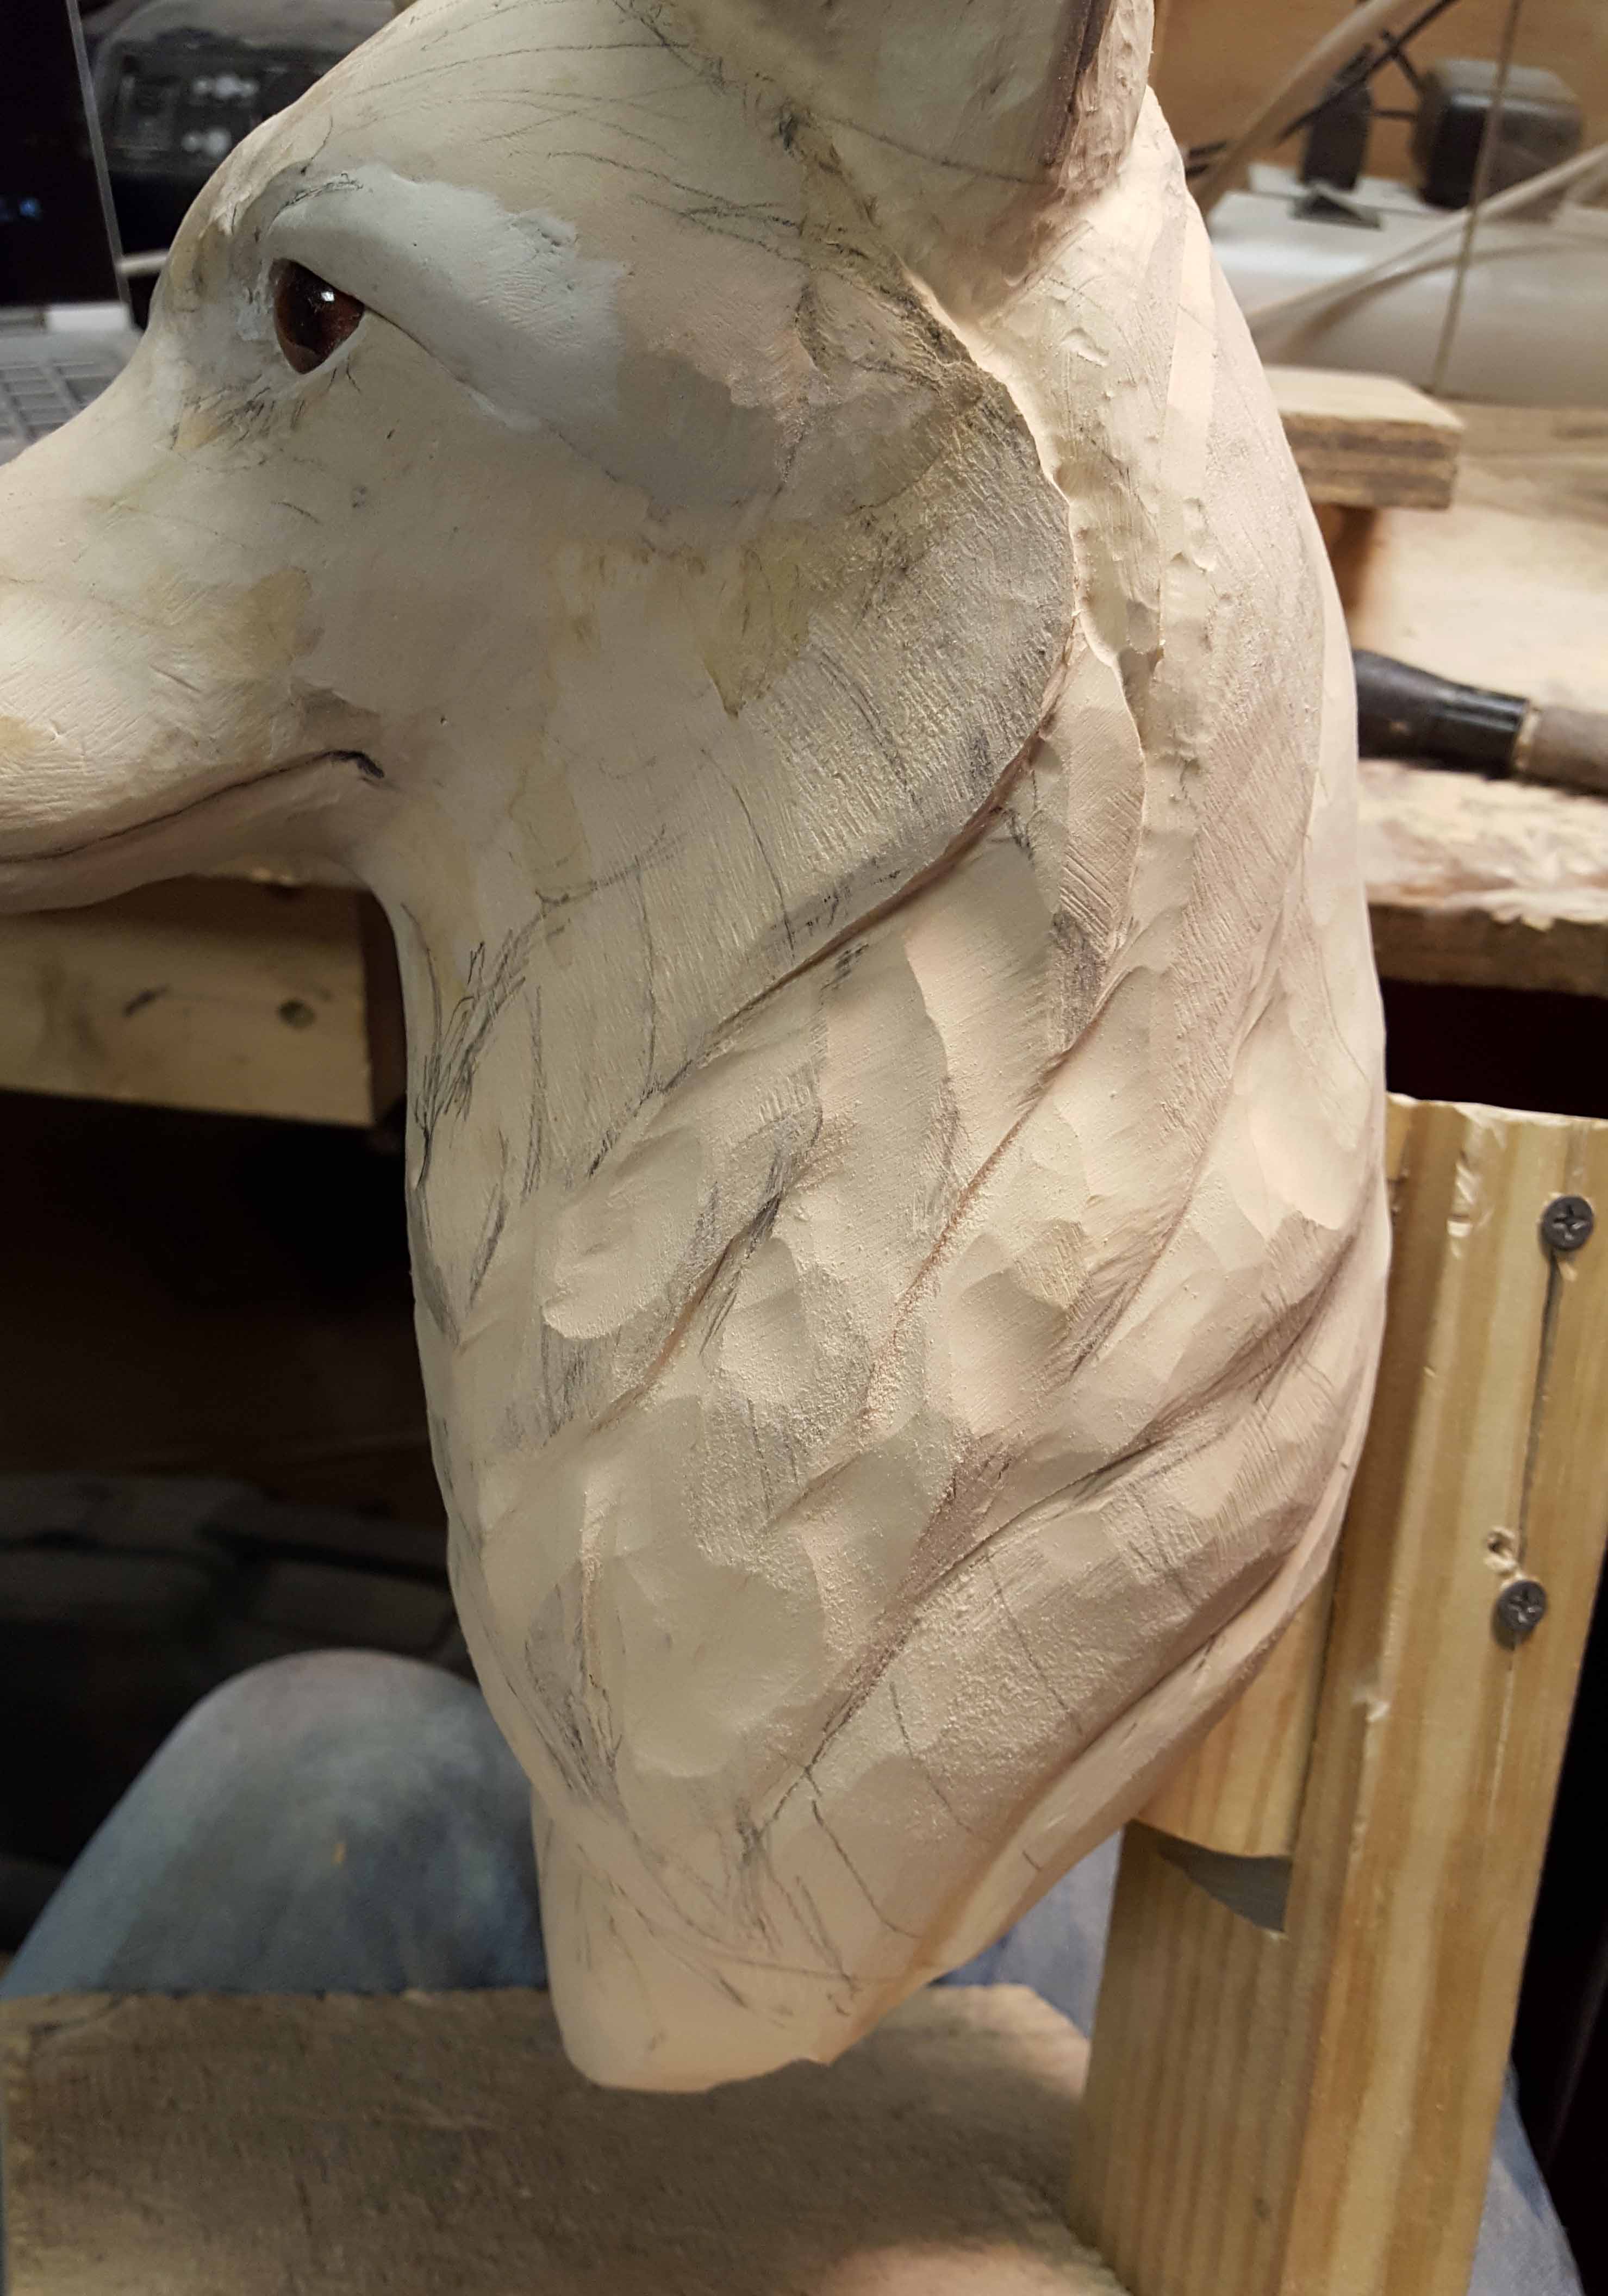
Converting smooth contours to a more random pattern that softens the look.
Softened contours now ready for some directional cuts.
The third step of contouring
Once again use a pencil to add flow lines. You will need them to make sure the directional cuts with the edge of the 1 inch sanding sleeve are in the proper direction. These directional cuts (following the flow lines) are, at this point mostly on the bottom edge of the larger contours you just softened up. The cuts should be randomly spaced, with some varying depth and length. No repeated patterns. These directional cuts leave a “V” cut in the wood.
The directional cuts have been added to the first contour under the jaw.
Continue this process along all the edges of the larger fur contours.
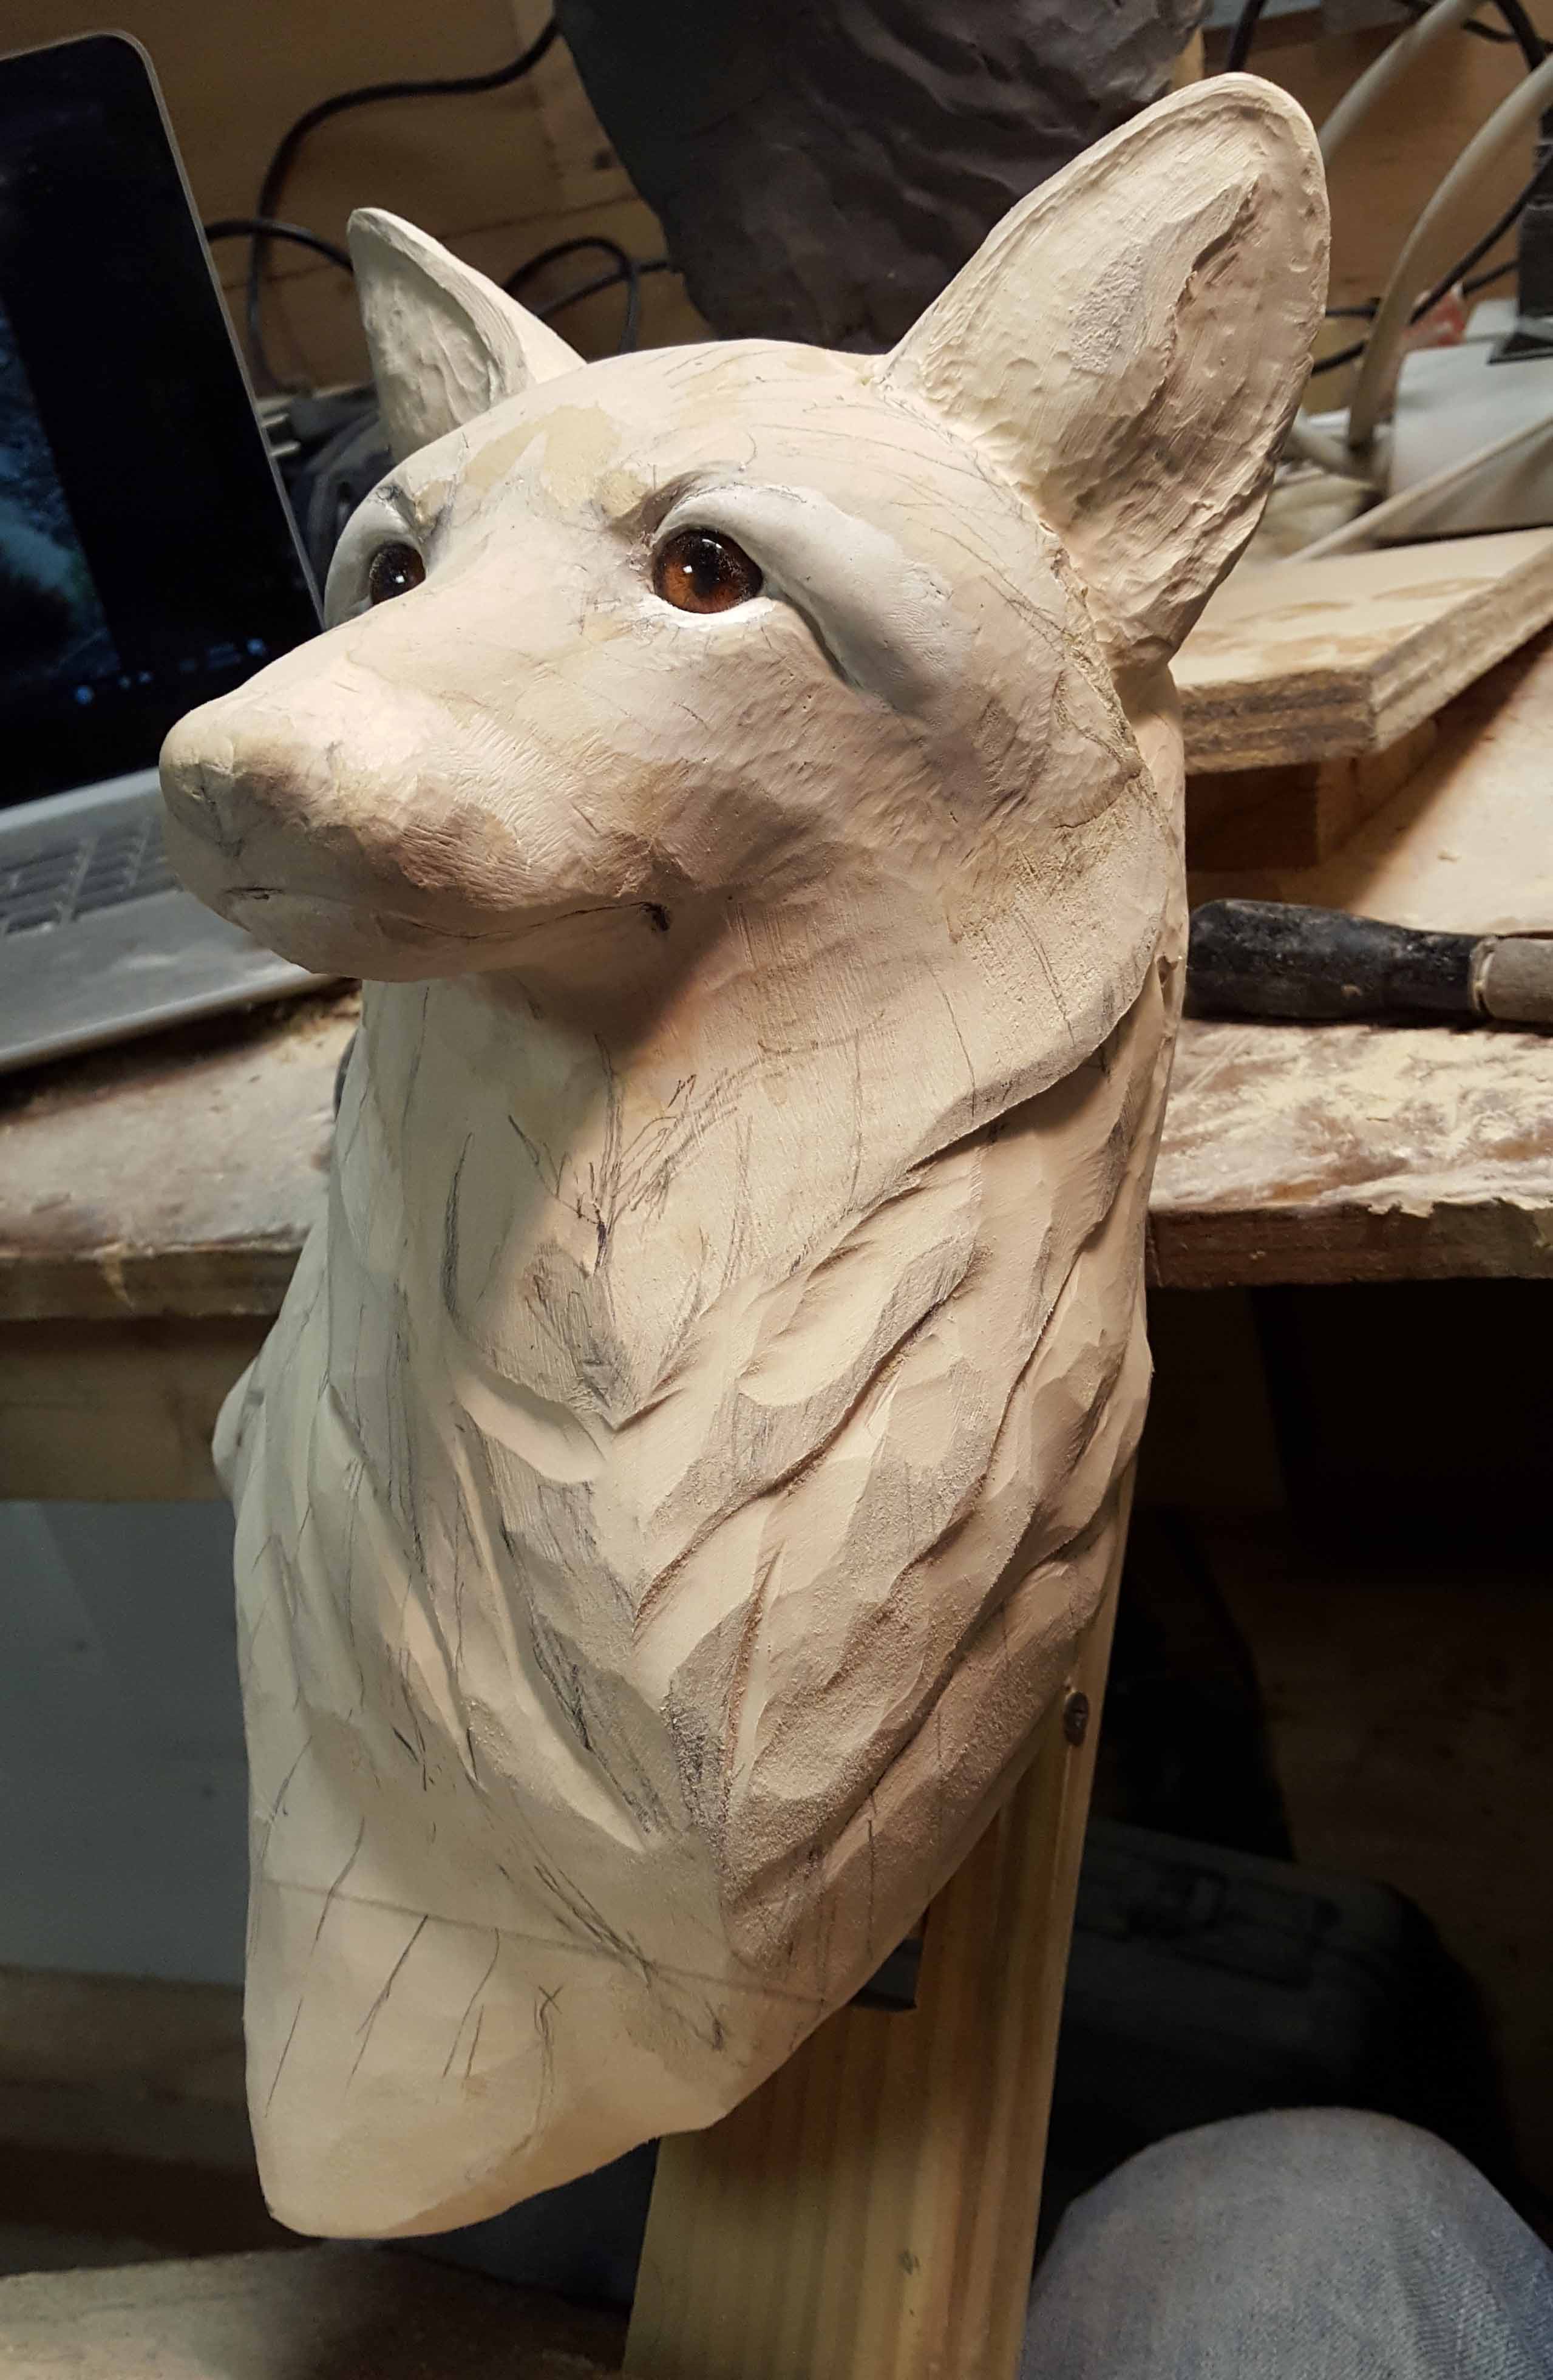
The fourth step in contouring the fur
Having made the directional cuts on all the contours, I then use a split mandrel and self adhesive 220 grit sand paper to soften all the sharp edges that were just added in the previous step. This tool can also add subtle shallow grooves in the fur where you think it could add additional interest or texture.
It’s starting to look like a red fox. Each step to the contouring adds a little more life and interest to the sculpture.
The fifth step of contouring
In the next steps I start to add the detail. Initially I’ll use a diamond flame shaped bit to define the larger splits in the fur. Those splits will also follow the flow lines. Once the bigger splits are in place, I use an abrasive stone bit to add smaller line. In fact I’ll use a bigger diameter stone to start with. A bigger diameter bit cuts deeper than smaller ones. I’ll progress from the larger stone to the smaller ones that will finish off the fur.
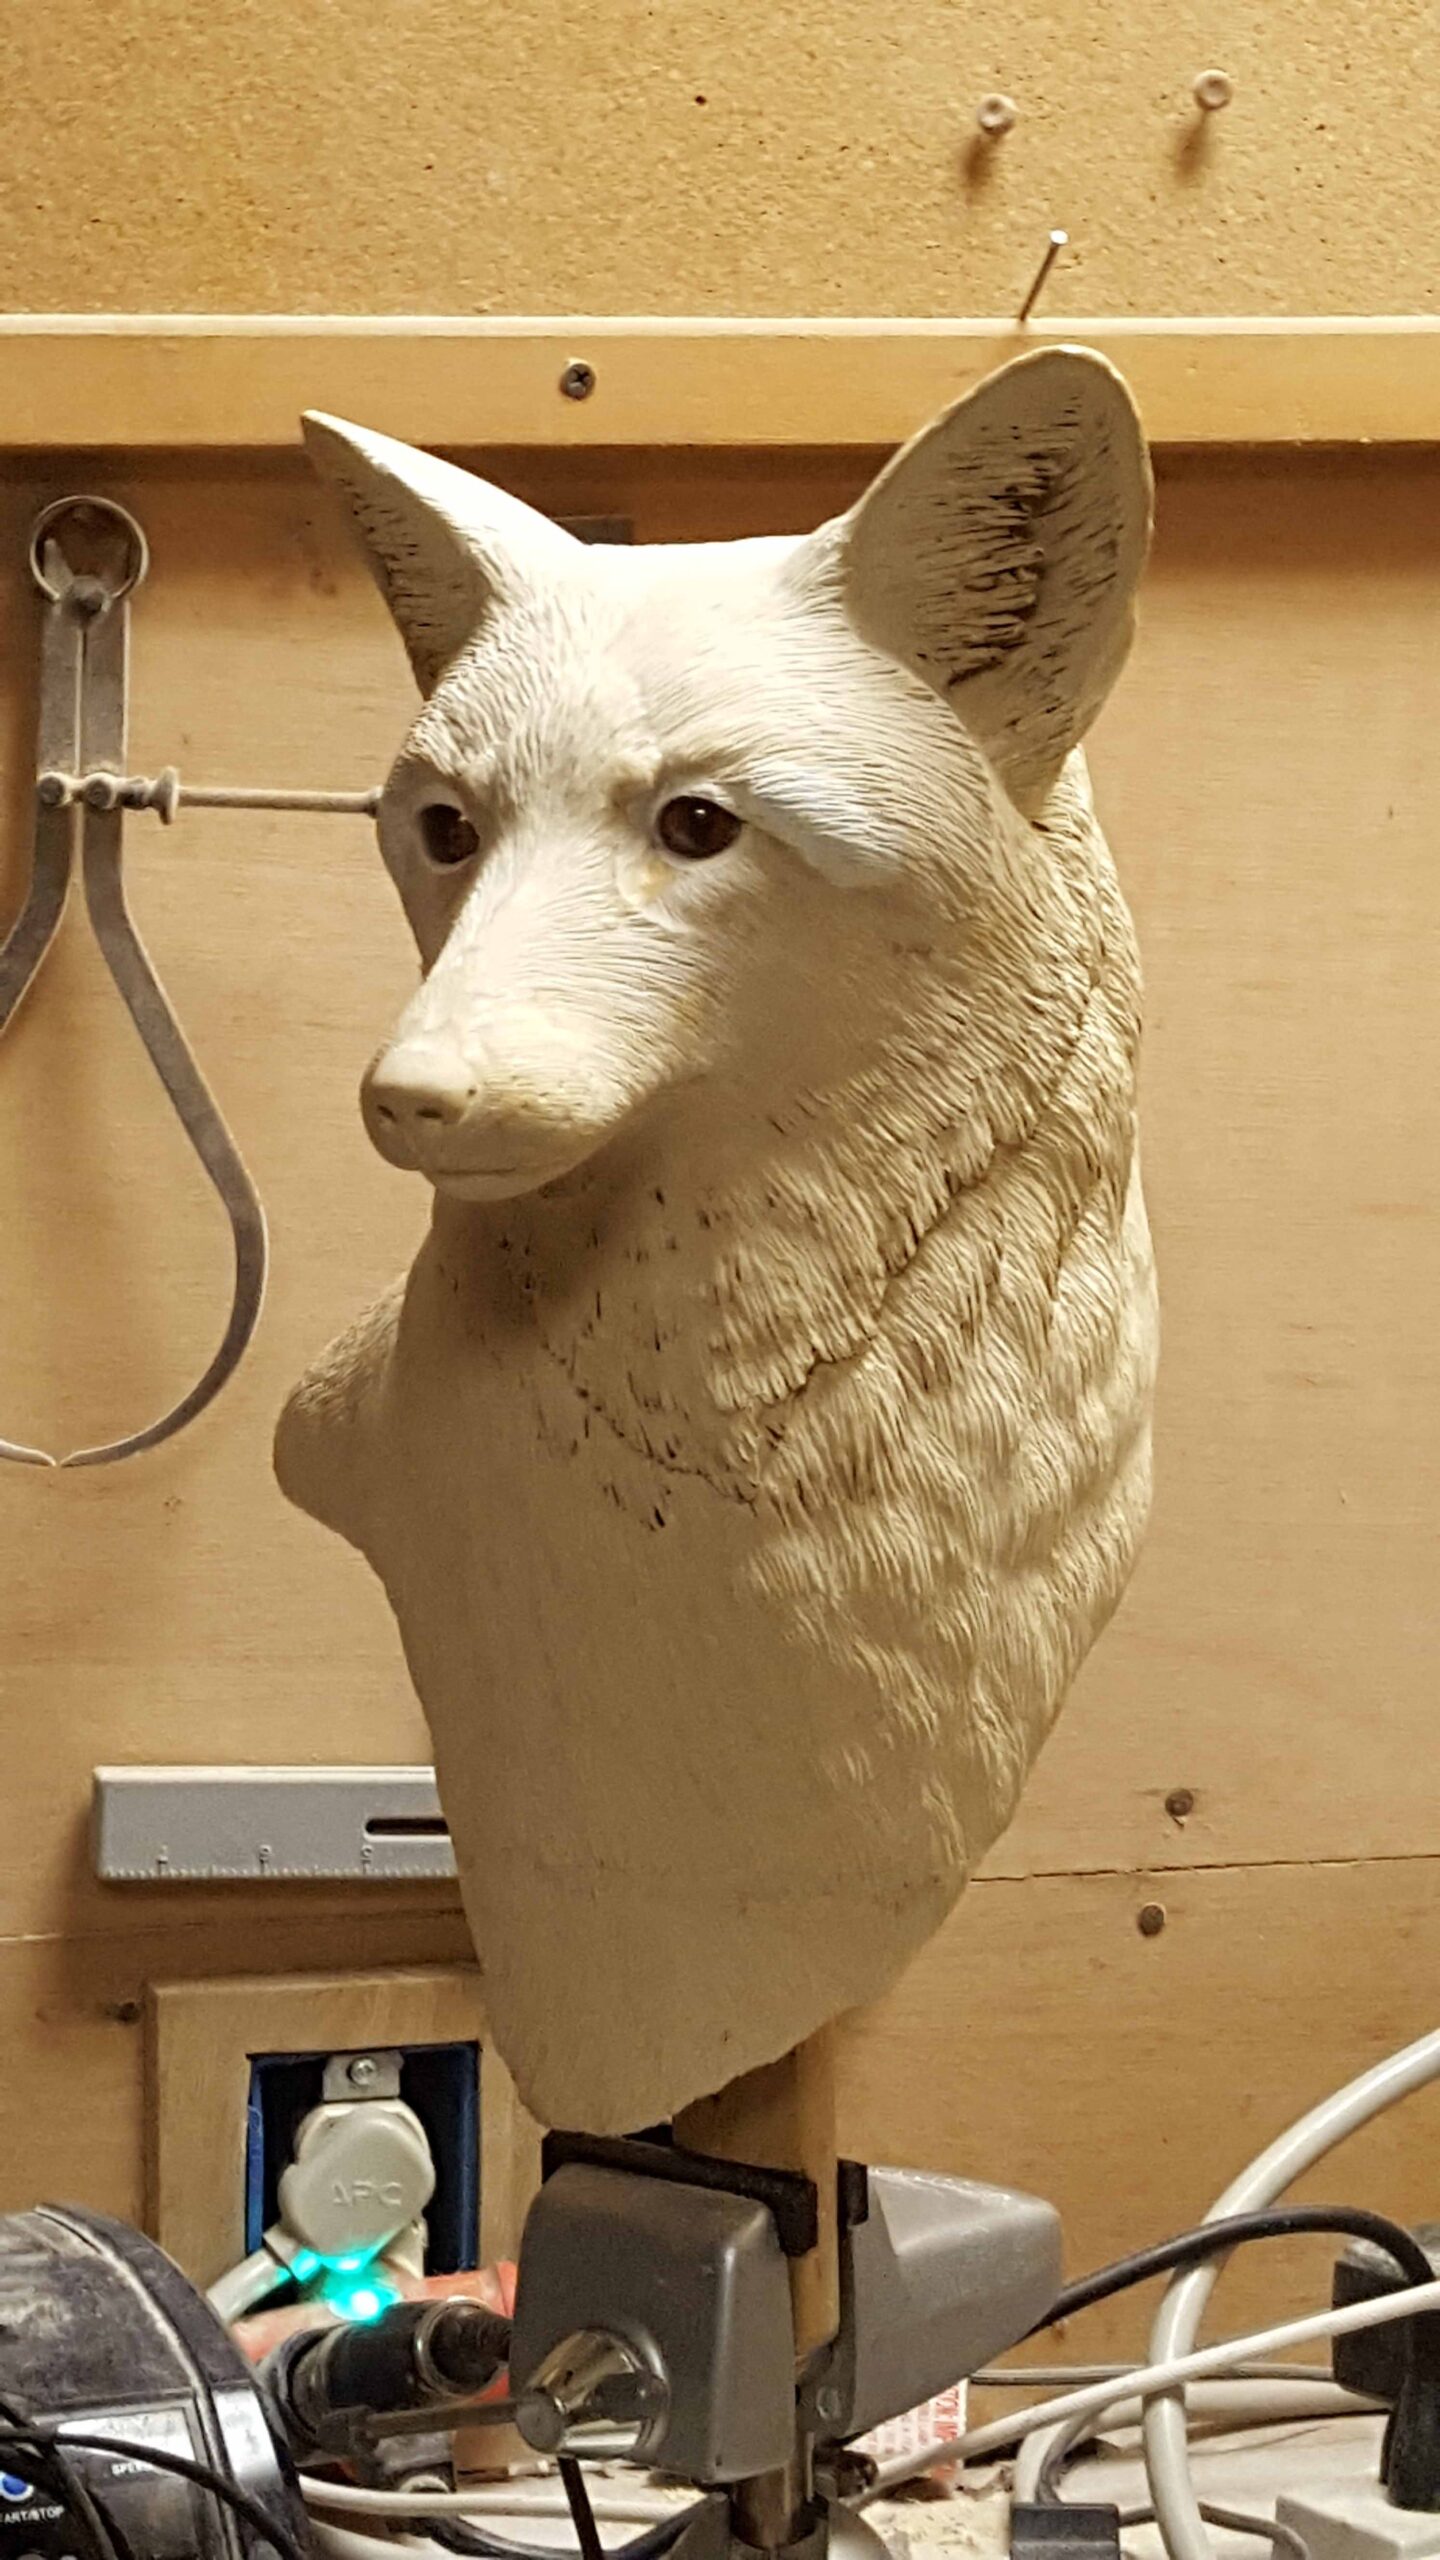
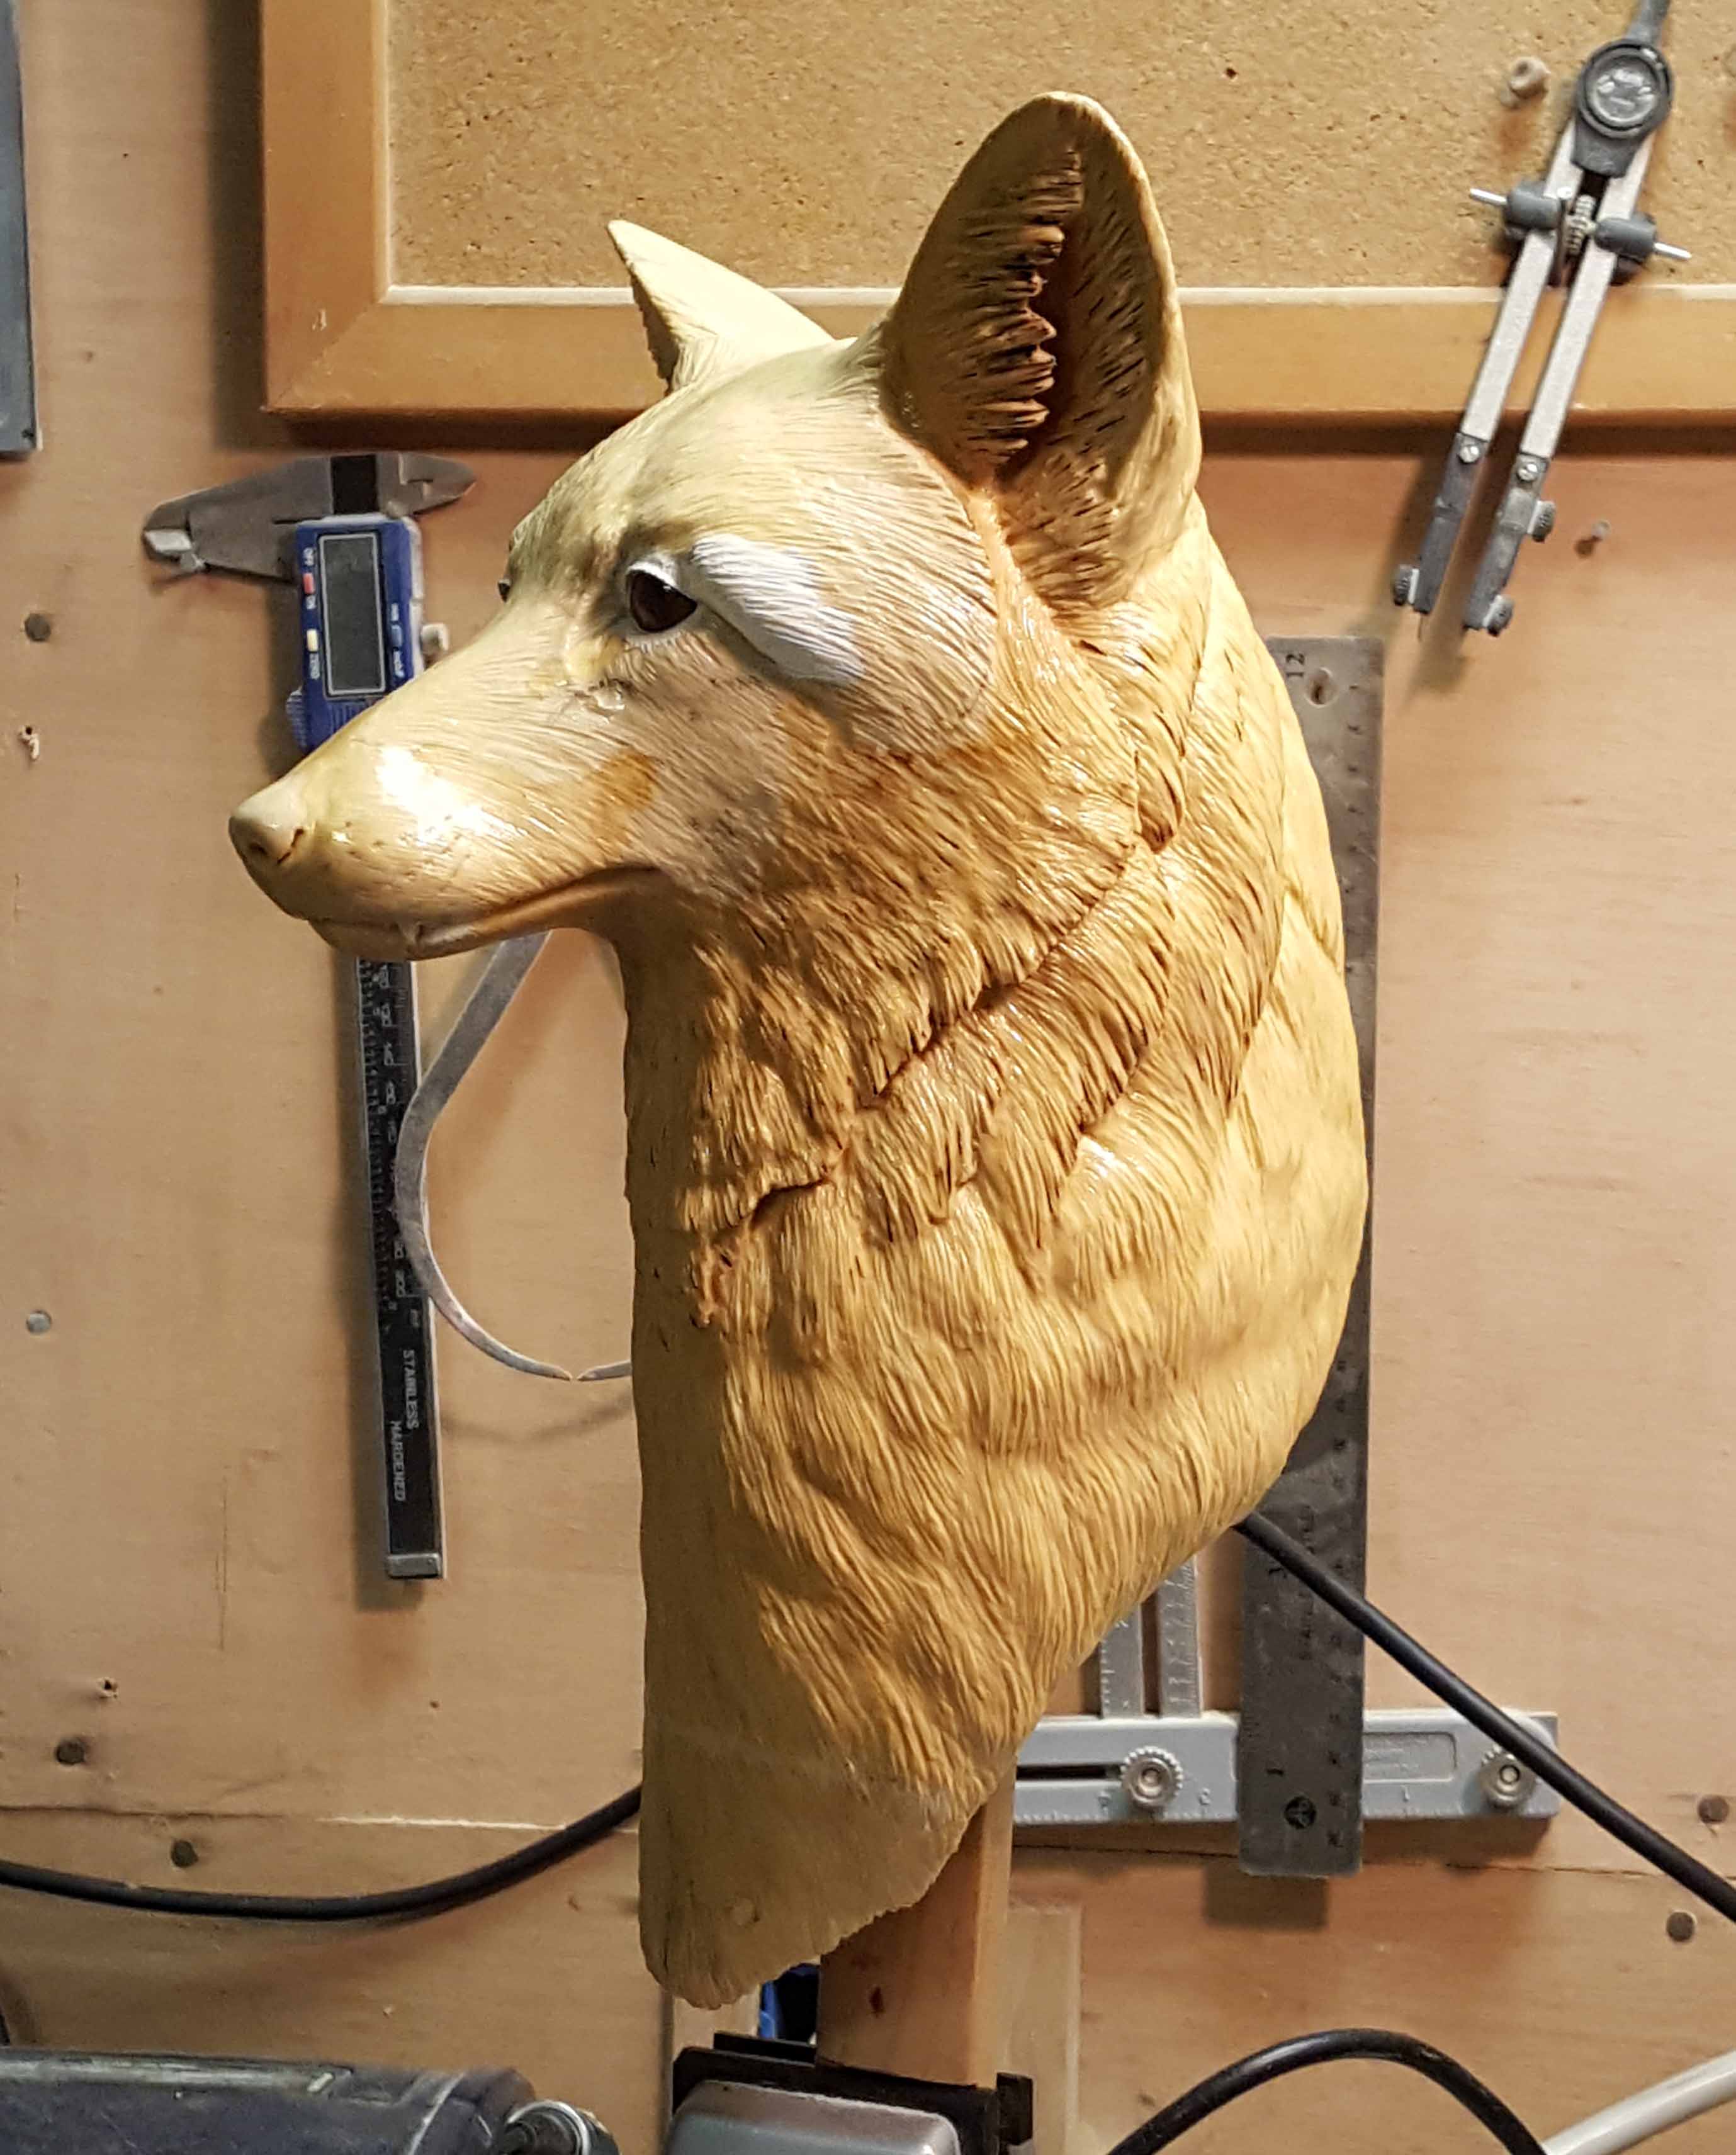
More detail added to the wood using a ceramic stone bit.
Sealing The Wood
There are options to sealing the wood prior to paining. Gesso is commonly used and it can be mixed with acrylic paint to establish the foundation colors. Sanding sealer, such as Deft Sanding Sealer Lacquer can be primed or painted on without any primer. For the fox I used the Deft Sanding sealer to seal the wood. I then used Ronan Sign Painting – Prime All on top of the sanding sealer. Ronan can also be mixed with acrylic paint for the foundation coat. It also provides a great base for painting with oils or acrylics. Sealing is important so that humidity or moisture doesn’t swell the wood that can cause cracks and loss of carved detail.
Second picture of the sculpture that has just been sealed.
Foundation colors
As a general rule, you start with dark backgrounds and us successively lighter colors until you finish with your highlight colors. Imaging the chest of the fox. Most people would say that the chest is white. The reality is that it is an off or dirty white. And if you look closely at a picture of a fox you well see shadow that appear in the “valleys” between clumps of fur. These shadows may appear purple or blue. To create depth in your painting, you need to start with the darker colors.
Dark foundation colors
Building Depth With Color Variance
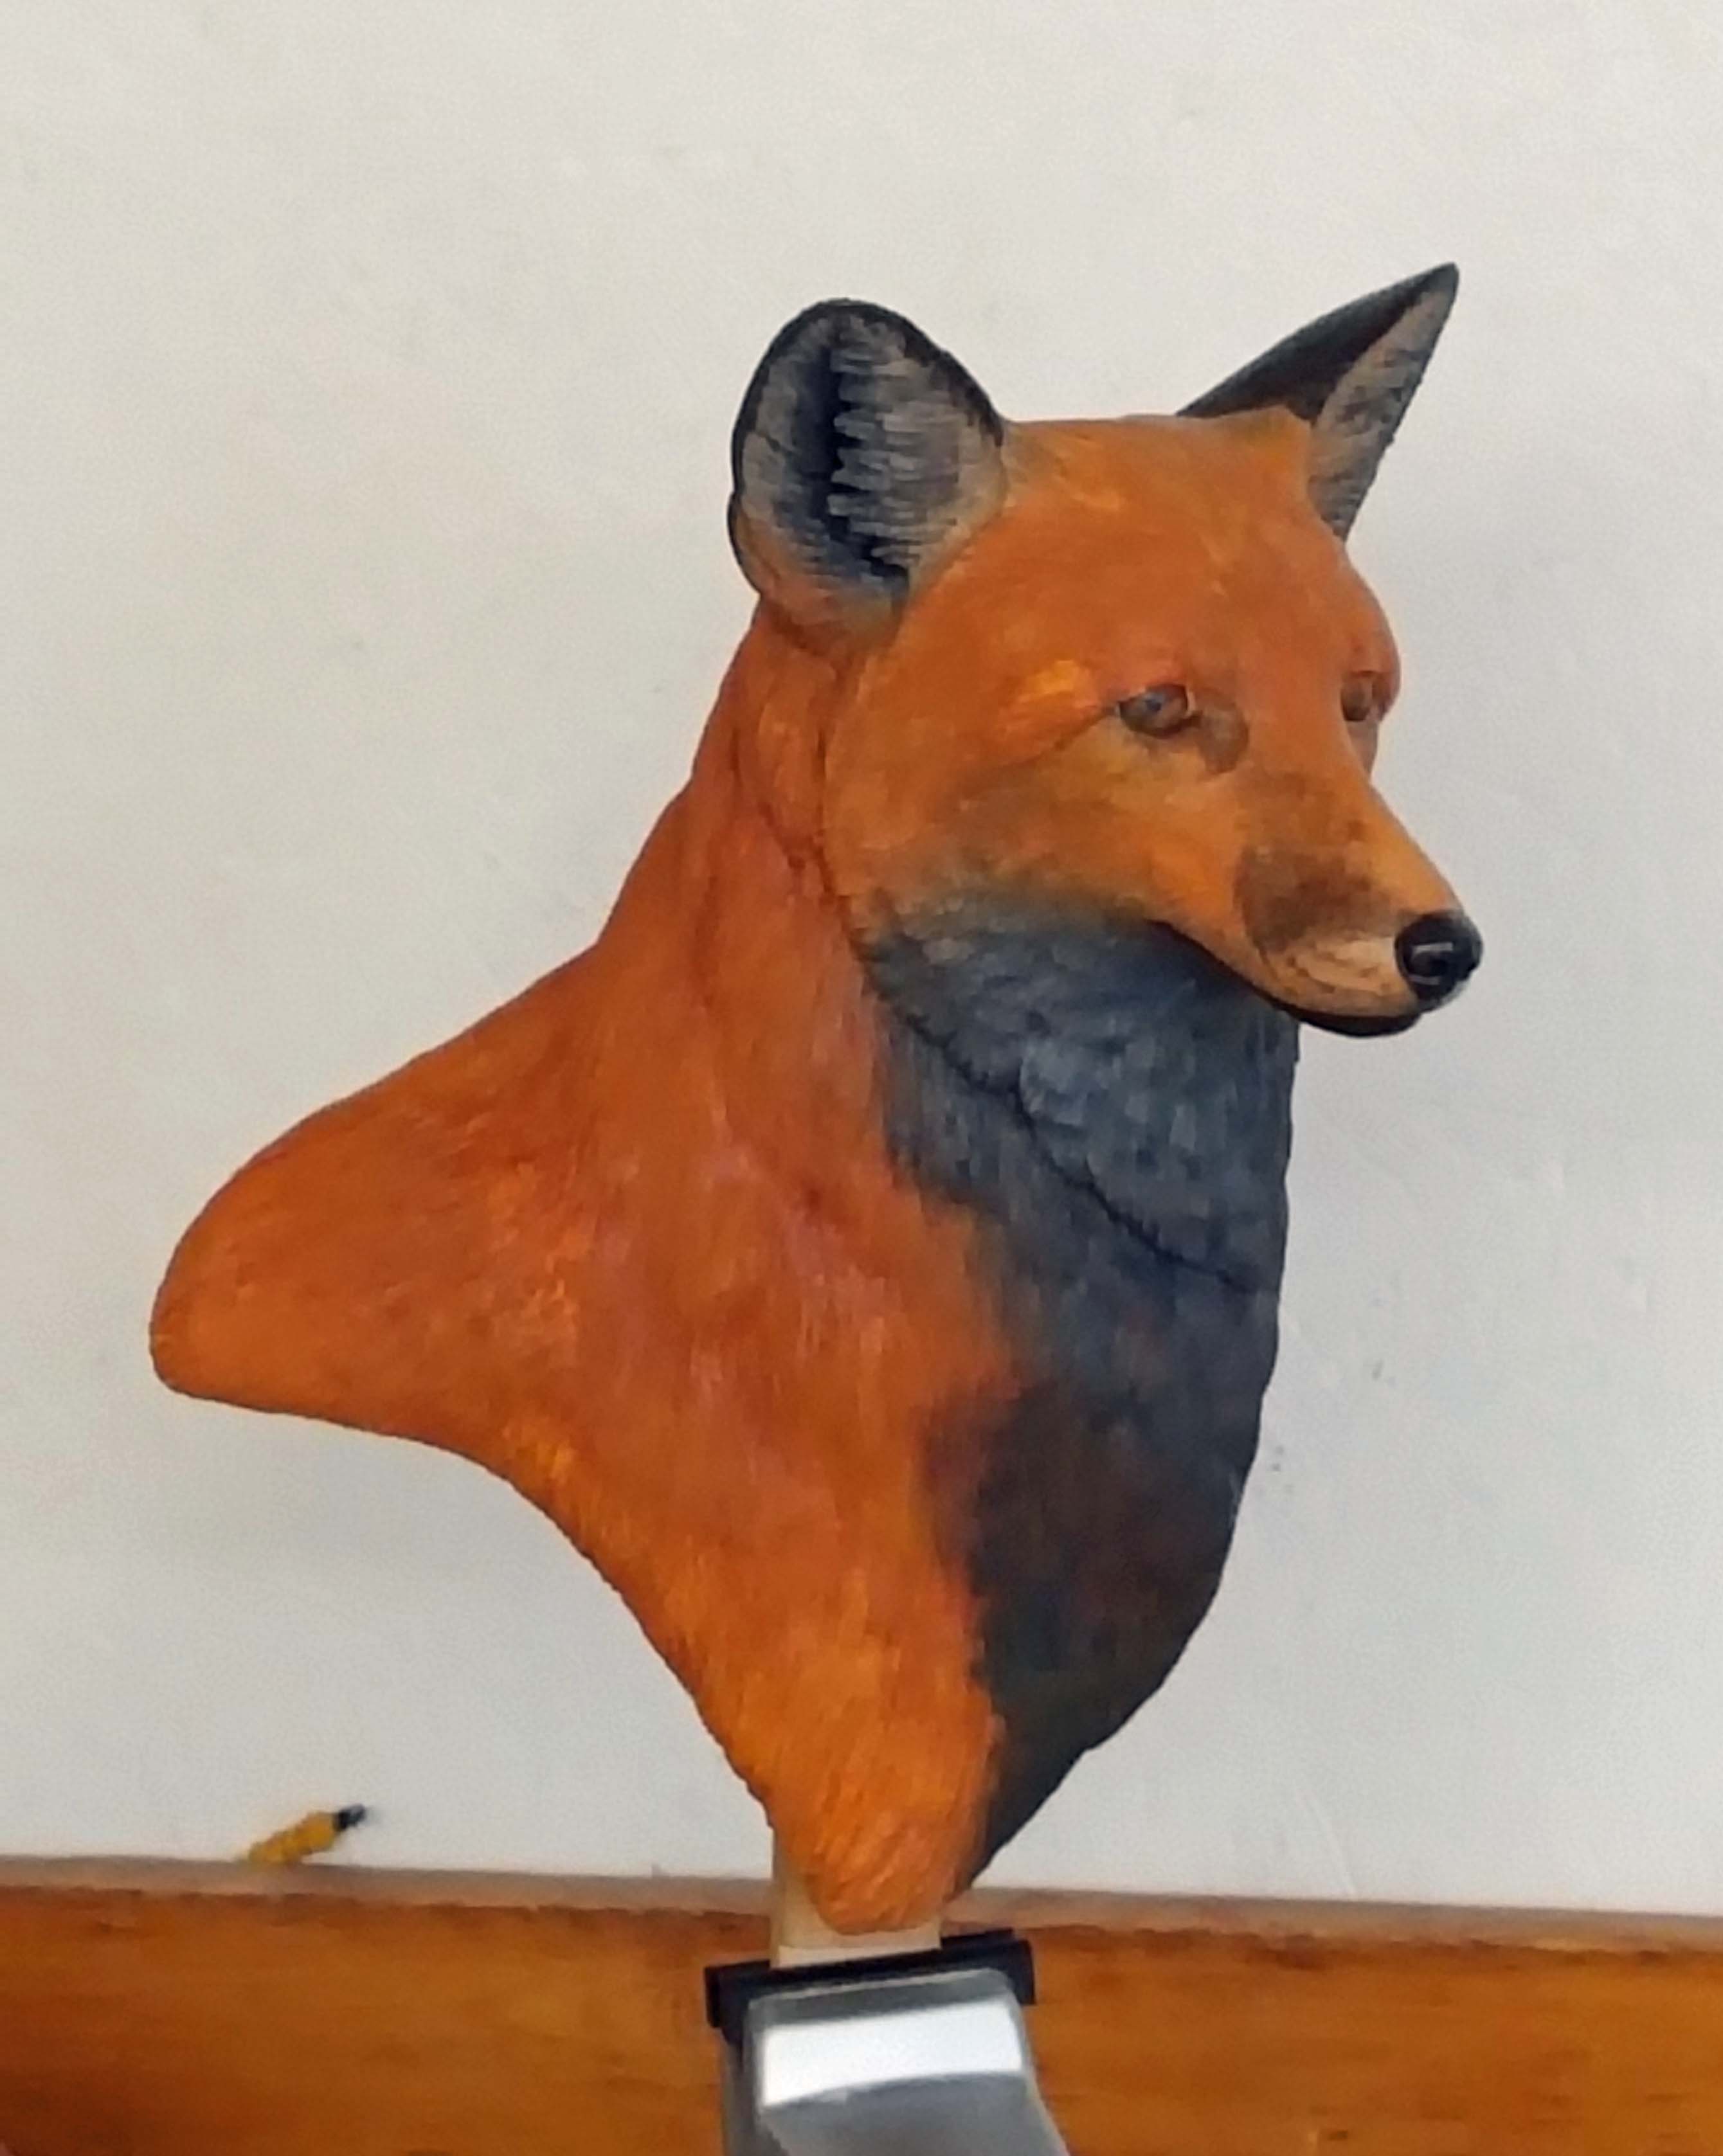
In the following picture you can see that several coats of paint (of varying shades) have been added. You can still see some of the foundation colors peaking through. The goal in creating depth is to always leave some of the deeper colors exposed. I still added three more color combinations after the following picture.
Building color on top of the foundation coats.
The next colors I used included some lighter blueish gray, dirty yellow and a slightly tan colored white at the highlight coat. At a distance of eight feet away, you would say that the fur is white. But is you got closer you can still see the other colors that provide subtle shading.
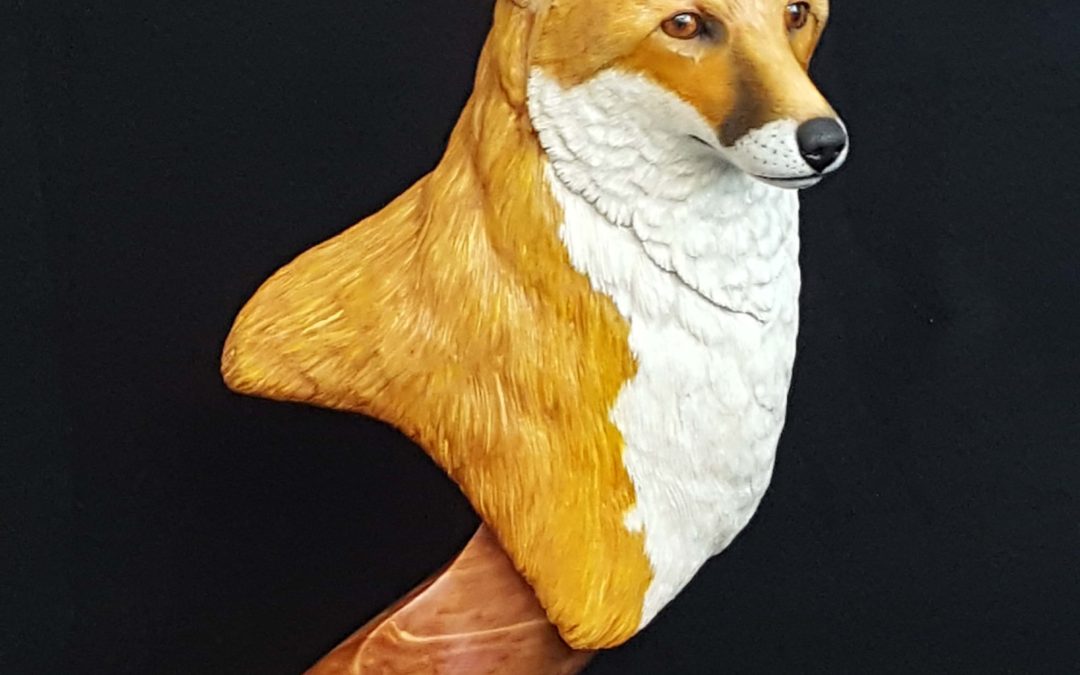
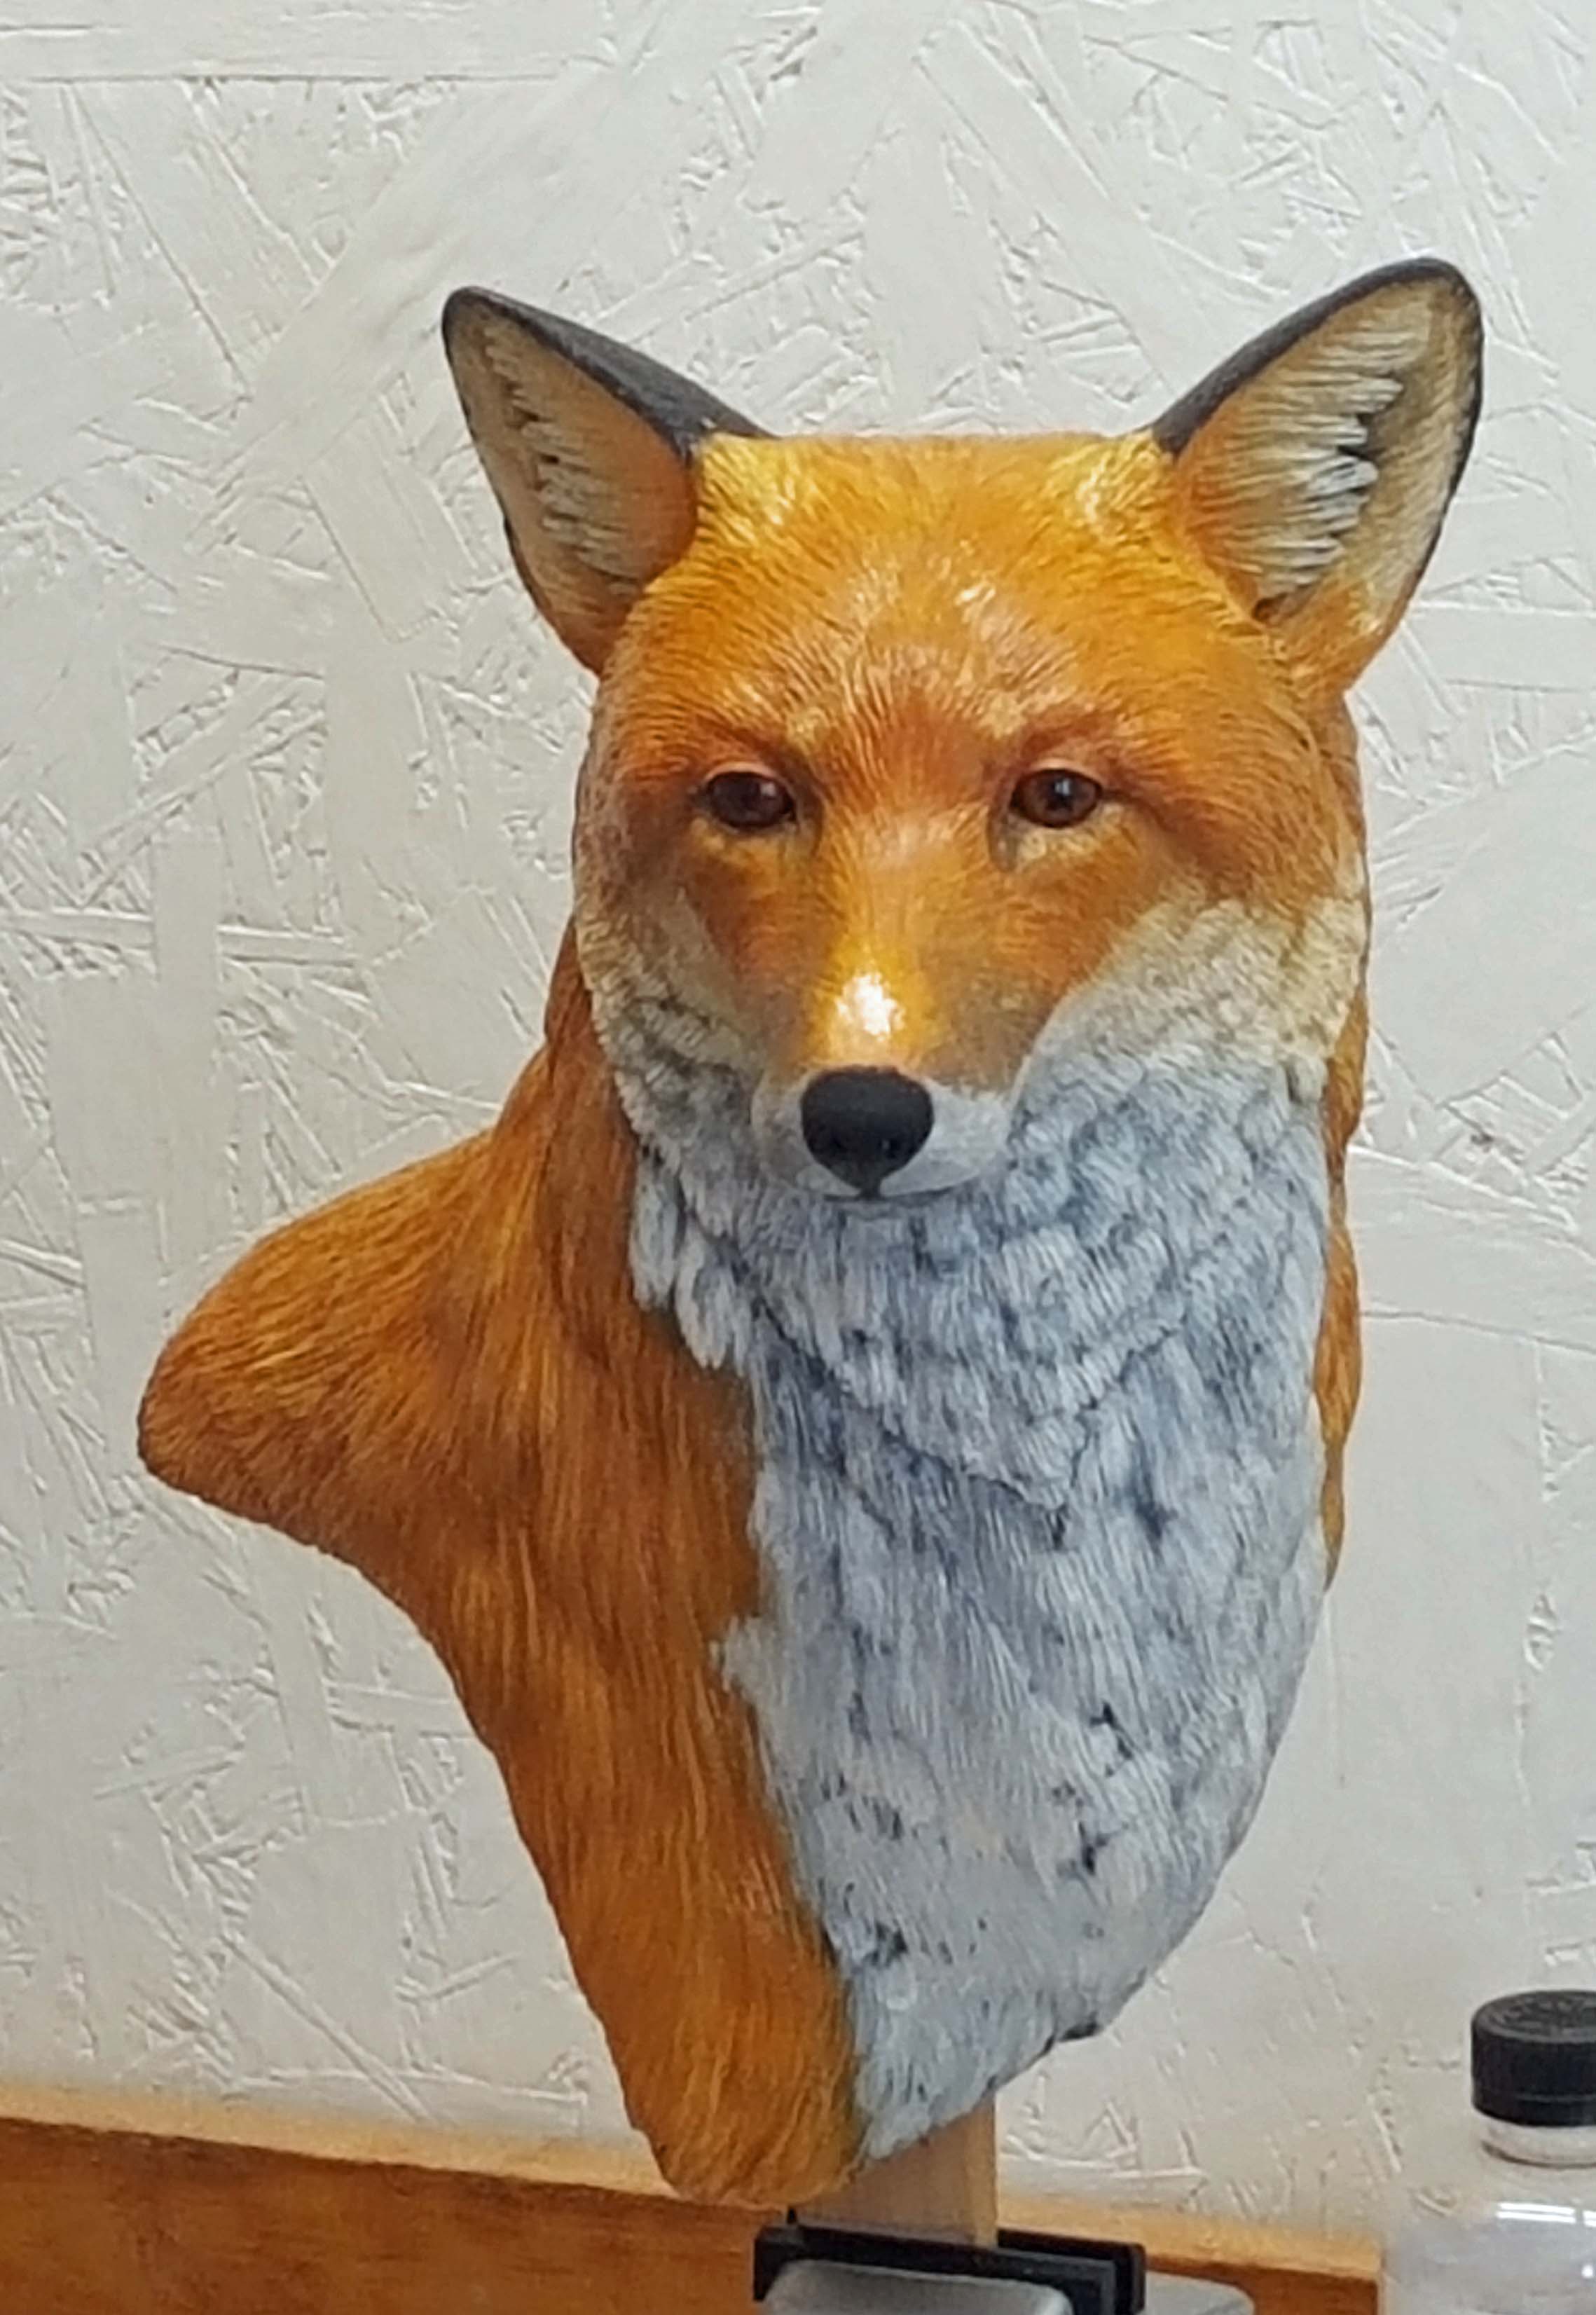
The finished Red Fox
With the painting finished, there are only a few details left to complete. Oil paints dry shinny do I used Krylon Matte, UV protective spray that you can buy at Michaels. You don’t need much. Just mist over the entire sculpture once the paint is totally dry. They use some lacquer thinner to clean the matte finish off the eyes. Signing the bottom of the sculpture and adding a varnish over the signature will add value to the piece. For the base of this sculpture I carved a piece of Aromatic Red Cedar. I finished the base with tongue oil.

Completed sculpture from the front.

Completed red fox sculpture

Closer view of the face.