Initial stage of carving the owl
The first step in carving an owl or anything other subjects is to create a reference model from clay. Clay is a lot more forgiving than wood and you can save yourself a lot of time and frustration.

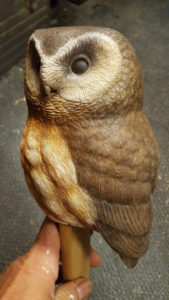
Ready to paint
Now that the owl was sealed with lacquer and primed with Gessoe, it’s ready for painting. Be sure to test your paints on white paper before painting the carving.

Adding Shadows
Using an airbrush darken the transitions of the feather groups. This technique will help add depth to paint job.
Building up color
In order to have soft color transitions, add color with very light (watery) washes until you obtain the desired color

Adding white
Both the spots and the facial disk will be colored and softened with light washes of burnt umber. Finally starting to see expression.

The finished Carving
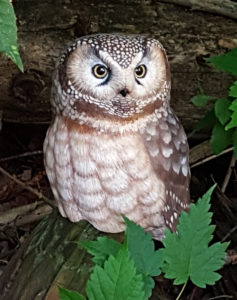
Finished owl sitting in a natural setting
With the painting complete
Such a beautiful bird
 I entered three sculptures in the 2016 Maine Wood Carvers Association competition. Since I had never competed before, I decided to enter in the intermediate level to get an idea of how I compared to other carvers. This owl took first place in birds of prey, second place in category and third best of level. Now I will be competing in the open or advanced competition levels.